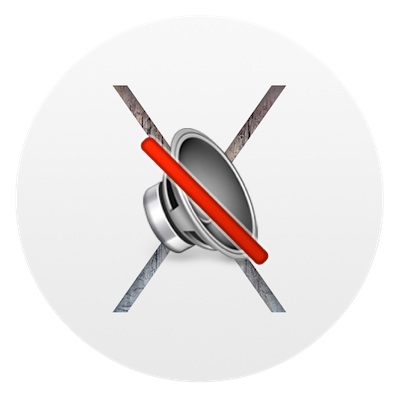
If you want to quickly change your sound input device on a Mac, by far the fastest and simplest way to do so is to Option-Click the Sound menu icon at the top of your screen.
Option-clicking the sound icon menu bar item enables an alternate pull-down menu including a list of clearly labeled and named available input devices. From this menu, select your new input source, whether that’s an external microphone, bluetooth device, or whatever, and it will immediately be set as the universal input to the Mac. Read more »
Backing up your iPhone text messages is made extremely easy thanks to a freeware utility called Syphone. Since the iPhone has a limited number of text messages it can store at any one time, Syphone allows you to backup all the text messages and read through the archived text messages yourself on your Mac in an easy to read iChat-like interface.
In a move that has surprised many, Apple has decided to open source their multiprocessor task management technology known as Grand Central Dispatch. This comes as a surprise because the technology has barely gotten into the hands of customers through 10.6 Snow Leopard, and it’s widely considered to be a competitive advantage. So why would Apple release such a thing into the open source community? AppleInsider offers this possible explanation:
“Significant new outside interest in Grand Central Dispatch could result in a wider support base for building parallelism compatible with Apple’s other open technologies, such as OpenCL. The availability of the dispatcher on Linux and other Unix operating systems would also help generate demand for other command line utilities that tap into its power. That would help Apple leverage its technologies in markets where it has a minority position, such as in the enterprise and supercomputing.”
Grand Central Dispatch is not the only Apple technology to be open sourced however. The core technology behind the Safari webbrowser, known as WebKit, is also an open source project, which has led to the development of Google’s Chrome browser and other webkit-based browsers (which all tend to be lightning fast).
iTunes 9.0 removed the ability to click the green ‘minimize/maximize’ button to get into iTunes Mini Player mode, you had to hold down Option to get the Mini Player. iTunes 9.0.1 Update fixed this problem (as if it was a bug, but I imagine it was changed back due to user confusion and complaints), but if you happened to like the way the iTunes 9.0 green widget button behaved, then you can get that quirky maximize behavior (and option-click for Mini Player) back with the following Terminal command:
AT&T iPhone users of 2009 can now officially join the cellular world of 2002, with the ability to finally send and receive MMS messages. You have to upgrade to iPhone 3.1 and download a new carrier file to enable MMS on your AT&T iPhone. After reading so many negative reviews about the iPhone 3.1 update, I am holding out on this ancient technological ‘upgrade’ from AT&T until Apple sorts out the 3.1 bugs, I waited 7 years I think I can wait a few more weeks/months. If you already have 3.1 installed, or you don’t mind installing 3.1 with the risks, then plug in your iPhone and open iTunes to get MMS capabilities. You can read more from Apple here:
Want to almost instantaneously put a Mac to sleep from your external keyboard? It’s much easier than you’d think, and you don’t need to pull down the Apple menu to accomplish this task. Instead, to quickly sleep your Mac just hold down Command + Option + Eject for about two seconds, and the computer will immediately enter sleep.
That’s one fancy Cupertino Coffee or Cappuccino! I came across this Apple themed coffee drink on Twitter, not sure where the original source or coffee house is but it sure looks nice. Has anyone ever seen one of these in person? Maybe it’s at the Cafe Macs restaurant on the Cupertino campus of Apple? Who knows?
It would take some serious effort to make such a perfect Apple logo that’s for sure. If you want to try yourself, here’s where to begin:
Then you just need a fresh cup of coffee and some steamed milk or cream. Best of luck with your Mac Mocha or Cupertino Cappuccino!
I had to develop an iPhone specific website recently and working with the iPhone resolution was a key aspect in this development process. The actual pixel density differs on the iPhone models as well, which will effect the appearance of interface elements and graphics for websites and iPhone applications. Of course knowing the resolution and PPI should not be limited to developers, it dramatically effects the graphic and picture quality of any user experience with the device. Here are each iPhone’s details and a picture comparing the two screens:
iPhone 4 screen resolution & pixel density
* iPhone 4 has a screen resolution of 960×640 pixels, which is twice that of the prior iPhone models
* The iPhone 4 also has a much higher pixel density than it’s predecessors, displaying 326ppi (pixels per inch).
Original iPhone, iPhone 3G, iPhone 3GS PPI & screen resolution
* iPhone 2G, 3G, and 3GS screen resolution is 480×320 pixels
* The iPhone 2G, iPhone 3G, and iPhone 3GS has a display of 163ppi (ppi is pixels per inch whereas dpi is dots per inch).
The below image compares the screen resolution of iPhone 3 on the left vs iPhone 4 on the right:
As you can see, the iPhone 4’s increased pixel density makes the resolution significantly better.
“This was a very typical time. I was single. All you needed was a cup of tea, a light, and your stereo, you know, and that’s what I had.” – Steve Jobs
This is rather iconic, isn’t it? Something about that picture captures the minimalist aesthetic that Apple successfully translated to the digital age, with our iPhones and Macs. Quite an amazing picture and quote, both of which come from Diana Walker, who photographed Steve Jobs on several occasions.
You may have seen this picture before made into black and white, which makes the rounds from time to time, again capturing the minimalism of Jobs and therefore Apple known under Jobs.
Someone recently sent me a Nero Image File and I had no idea what to do with it, but after some looking around I discovered you can easily convert a Nero image File to ISO format.
Apparently the only difference between a Nero Image File and a typical ISO is that Nero adds a 300k header to the normal ISO file. Using the command line tool dd we can trim this header and convert the the Nero image file to ISO format.
All of this will be done via the Mac OS X command line so launch Terminal and enter the command as seen below.
Ever wondered what shell you are using at the command line? It’s not unusual to want or need to know which shell is running, and though you may hear this question many times, the answer could be different for every user, thus the easiest thing to do is to issue a terminal command which determines the currently active shell.
I love the web, I hate Flash. I know this isn’t always a popular opinion, but for me it causes a lot of problems. It’s a slow bloated resource hog that makes browsing the web painful, loud, and obnoxious. Really the only time I actually want to use it is on video sharing sites like YouTube, when using Flash is MY choice and not some obnoxious web advertisers with a “Congratulations… blah blah blah” talking Flash ad blasting in the background, so annoying! Ok now that my rant is over… let’s get to the point and find a solution to this problem; what we really want to do is prevent Flash from loading without our permission, right?
Do you need to access and mount an SMB share from the command line on a Mac? You may be used to connecting to Windows PC from the Mac networking features to mount a Windows share on Mac, but you can also connect to Samba shares from the Terminal too.
This article will show several ways to mount and access SAMBA / SMB network shares from the command line of Mac, including with the latest MacOS versions and older Mac OS X releases too, as the process is different depending on the system you are using.
Want to hide all desktop icons on a Mac? Desktop icon clutter can really impact workflow by overwhelming you with files and just too much stuff to look at. Inevitably, it can be hard to avoid since a lot of apps download things to the Desktop by default, we save things there, screenshots go there, it quickly becomes the generic catch-all location for documents and stuff that we’re working with.
If you decide you have too many icons on the desktop and maintaining the desktop is just too much to deal with, you can actually toggle a secret setting in Mac OS X to turn off the Mac desktop icons completely, thereby preventing them from being displayed at all. This effectively hides all the icons from showing up on the Mac desktop only, but all of your files and stuff will still be accessible from elsewhere through the file system and Finder. You can think of this kind of like disabling the desktop, because you can still actually save files and folders to the desktop, it’s just that the icons will not show up. Instead, you’ll just see your desktop wallpaper.
While geeking around I discovered another way to check if your Mac is 64 bit compatible by using the command line. Launch terminal and type “sysctl hw |grep 64bit”
Here’s me using the command on my MacBook which does not have a 64 bit processor: $ sysctl hw |grep 64bit
hw.cpu64bit_capable: 0
on my friends newer MacBook Pro his results were: $ sysctl hw |grep 64bit
hw.cpu64bit_capable: 1
I have a million different genres in iTunes and not nearly enough album art, which is fine and dandy until you put iTunes 9 into genre ‘grid’ view and then suddenly you have a bunch of boring looking music note icons. Apparently how iTunes sets genre art is by looking for album art set in that genre, and if it can’t find any album art it will resort to the boring grey box. But not anymore! Thanks to a crafty Mac user, you can now change those dull music note icons into virtually any image you want, which dramatically spruces up your iTunes grid view appearance. Highly recommended iTunes tweaking! Check out the how-to guide here:
Want Gmail Push Notifications on your iPhone? In a crafty workaround, you can get Gmail to push notifications to your iPhone by setting up Gmail as a Microsoft Exchange account. The downside to this method is that you can only have one Microsoft Exchange account setup on your iPhone at a time, so if you already have an Exchange account configured you would have to replace it with the Gmail one. In any case, you can follow the instructions directly from Google on setting up the account so that you can get push notifications: Google Sync: Set Up Your iPhone or iPod Touch
The “uptime” of a computer is how long it has been since it was last rebooted or started up. Since Macs are very stable and generally OS X users rarely have to reboot their machines, the uptime of Macs can reach impressive numbers. You can check the uptime and reboot history of any Mac if you want to find this information yourself, we’ll show you how.
Here’s how to check the uptime in days (or hours) and the rebooting history both via the Command Line of OS X, and also how to find ‘time since boot’ through the System Information profiler on a Mac.