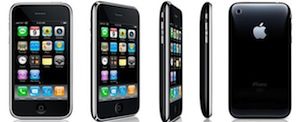
How I fixed my dropping wireless Airport connection problem in Snow Leopard
I don’t know why but when I upgraded to Snow Leopard my wireless internet got all wonky, connections were dropping left and right and I couldn’t maintain any worthwhile airport connection for longer than a few minutes. DHCP was behaving particularly strange and the automatic settings pulled from my router were dropping every few seconds. I’m reposting this here not only as some sort of catharsis but also in the event that it helps someone else troubleshoot their wireless problems in 10.6.
Here’s what I did to fix my Airport wireless connection from dropping in Snow Leopard. There was no silver bullet, but each setting allowed my airport connection to become more stable, and the combination of all of these changes has sustained a connection without dropping:
* Changed DHCP auto settings to manual – now I manually set my IP address on the network, I just set something high so it wouldn’t interfere with other DHCP machines. As long as you have the subnet mask, router, and DNS settings configured manually as well, this shouldn’t be a problem.
* Change Wireless Channels – I noticed that a neighbor recently changed their wireless channel to the same one I was on, it’s a weak signal but can still cause interference. I logged into my wireless router and changed the wireless channel to a more obscure and unique one.
* Disabled “Wireless G only” Mode – what seems to have finally sealed the deal was disabling ‘Wireless G Only’ mode that I had set on my router, yea things could theoretically be a little slower but I haven’t noticed, and I’ll wait an extra millisecond or two for a webpage to load if it means I can use my MacBook wirelessly at home as intended.
Interestingly enough, I tried doing each of these things entirely on it’s own and it did not resolve the problem, it was the combination of everything that seems to have ‘fixed’ my airport connection problems. I know my wireless connection issues with Snow Leopard are a fluke here, I imagine it’s something unique to my network and router that only a few other users will encounter. Anyway, if you’re having any wireless connection problems in Snow Leopard 10.6 too, try these things out and see if it works for you as well.
Update: Mac OS X 10.6.3 has been released and contains a few Airport bug fixes, it would be wise to install that software update in addition to trying these tips.
Some more Wireless connection troubleshooting tips:
* Update to the latest version of Mac OS X (10.6.3 includes numerous Airport fixes)
* Reset your router
* Reset your cable modem/DSL
* Disable WPA/WEP protection
* Change security protocol from WEP to WPA/WPA2
* Switch wireless channels – pick a channel no neighbor is using.
* Turn Airport on & off (via menu or Network preferences)
* Delete and then recreate/reestablish wireless network connection
* Create a new Network Location
* Make sure your router firmware and Airport card firmware is up to date
* Zap the PRAM on your Mac (hold Command+Option+P+R on restart)
* Flush the DNS cache using the Terminal command: dscacheutil -flushcache
* Delete the com.apple.internetconfigpriv.plist and com.apple.internetconfig.plist files from ~/Library/Preferences
* Trash your home directories SystemConfiguration folder and reboot – Remove all files within ~/Library/Preferences/SystemConfiguration/ and reboot your machine. Make sure you delete the proper folder, this is in your home directory.
If all else fails, try this, which has worked for some individuals:
* Reset your Mac’s System Management Controller (SMC) : Shutdown the MacBook/Pro, remove the battery, disconnect the power, hold the Power Key for 15 seconds. Replace the battery, reconnect power, and zap PRAM and wait for 2 chimes before letting the keys go. Check out more information on when and how to reset your SMC.
-David Mendez

I still don’t know why AT&T and Apple don’t enable Internet Tethering by default on the iPhone, but nonetheless they don’t… but you can enable it yourself with a little work! The simplest way I’ve found without Jailbreaking your iPhone requires a few settings changes from updating a system profile, which you can 

So now that
Successfully developing for the iPhone and iPod Touch is fun but it’s not easy, sure, you’ll want
I installed some Software Updates recently on an older Mac Mini and left my house to go on a run, I came back about an hour later to find that nothing was installed yet, my Mac Mini was stuck on “Configuring Installation” – hmm now what? Well, it’s a rare occurrence, but it can happen and thankfully it’s easily fixable. First, do not reboot the machine half installed! Follow
If you’ve ever wanted to know what’s being executed, which packages are being installed, and the installation directories and file locations of a Mac OS X system install, then you’ll enjoy this tip sent to us on 
This is somewhat controversial because it is against the Apple EULA, but apparently you can save $140 if you’re a Tiger 10.4 user and run the 10.6 Snow Leopard upgrade without a problem. To make things even more interesting, popular Mac writer 
The Hackintosh community is rather controversial but increasingly popular, and some of the most appealing Hackintosh machines are those based around Netbooks, tiny lightweight laptops that fill a niche Apple has yet to dabble in. The Dell Mini 9 has long been the cream of the Hackintosh Netbook crop, but it looks like the Dell Mini 10v is giving it a run for it’s money, the internals are largely the same but it has a 10″ screen. (Note that the Dell Mini 10 and 10v are completely different units with different hardware, the 10v is Hackintosh compatible, the 10 is not). It’s worth noting that installing Mac OS X on something other than Apple hardware is against the Apple OS X EULA, so the legitimacy of the entire Hackintosh movement is dubious at best, but morals aside…
The Mac world is really heating up with anticipation for the upcoming Snow Leopard release, due this Friday.
The best thing about a sour economy are the price wars that benefit consumers, and in this case
I have an external drive partitioned in various ways, one of the partitions is formatted to FAT32 and I don’t need access to all the time. So how do I keep that from showing up needlessly when I plug the drive in? Using the command line to create an /etc/fstab entry and a bash script, you can do precisely this, thanks to a tip I found on 
