How to Setup 2-Factor Authentication on Apple ID for Extra Security
This guide will walk through setting up two-factor authentication for an Apple ID. Two-factor authentication requires that whenever a user is logging in to an Apple ID from a new untrusted device, not only must the proper password be entered but a secondary security ID code must be entered as well, which is typically delivered to a trusted device or through text message to a trusted phone number. This offers an additional security layer and significantly enhances security for Apple ID and iCloud account use, because essentially it means that even if someone were to know the password for an Apple ID, unless they had access to a pre-determined trusted device, they would not be able to log in to that account.
Not all users will want to use two-factor authentication for Apple ID and iCloud access, but for the security conscious it can be a good idea as it offers added protection to the account and related data. Consider that an Apple ID typically contains data about a users address book and contacts, notes, iCloud mail, credit card information, iCloud keychain, iCloud backups, iCloud photos, purchase history, and much more, and you can quickly see why the Apple ID is something to protect well, which two-factor authentication does.
The ability to setup and use two-factor Apple ID authentication requires modern versions of system software to be running on devices that will use the service. For iPhone and iPad, this means iOS 9 or later. For Macs, this means Mac OS X EL Capitan 10.11 or newer versions. Older iOS and Mac OS system software does not support two-factor authentication.
How to Enable & Set Up Two-Factor Authentication for Apple ID
You can enable Two Factor Authentication from iCloud, iOS, or Mac OS X through the iCloud settings section. In this walkthrough we’re demonstrating setting up Two Factor Authentication from an iPhone with iOS iCloud settings:
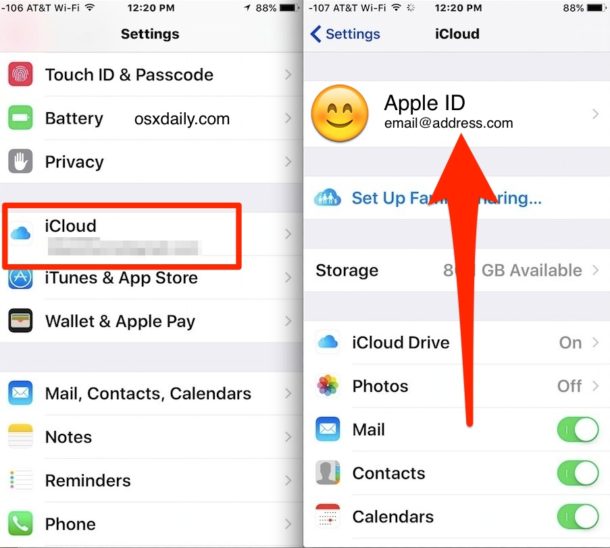
- Open the “Settings” app on the iPhone, or iPad, and tap on your name to access the “iCloud” section, and then tap on the Apple ID to access settings for the account
- Choose “Password & Security”, then scroll down to tap on “Set Up Two-Factor Authentication”, then tap on “Continue” to begin the setup process
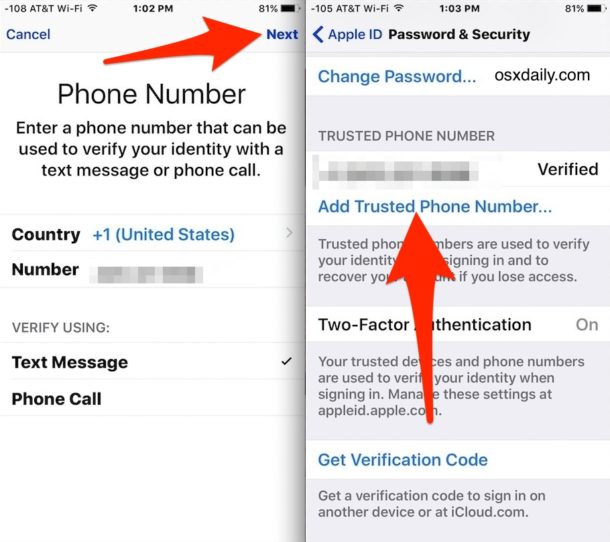
- Enter the phone number you want to add as a trusted number for two-factor verification, then tap “Next” and you will receive a text message (or phone call) with an ID number to verify setup
- OPTIONAL BUT HIGHLY RECOMMENDED: Choose “Add Trusted Phone Number” again and add at least one additional trusted phone number as a backup option. This can be an office line, home phone number, a partners, friends, cousins, brothers, uncles, kids, parents, anyone you trust with a phone number that is somewhat reliable – remember, this does NOT give that person access to your Apple ID because the Apple ID still requires a password, it simply allows those additional phone numbers to get a verification code in the event your primary phone number is unavailable
- When finished adding and verifying trusted phone numbers, exit out of Settings as usual, you now have enabled two-factor authentication for the Apple ID

To reiterate yet again; it is a very good idea to add additional trusted phone numbers to the Apple ID two-factor authentication service. If you only use your primary number, but lost your iPhone for example, then you may have a very hard time getting into the device. If you completely lost access to the only phone number on the account, you’d lose access to the Apple ID permanently. Prevent that potential situation by adding more trusted phone numbers, again they can’t access the account unless they have the password anyway.
If you primarily use your Apple ID on the same device, then you will rarely if ever see the two-factor authentication prompt or get a verification request, this is because you are on a trusted device. However, if you were to get a new Mac, new iPhone, new iPad, or another new device, and try to use the Apple ID on that new device, or try to use iCloud.com from the web, then you would be required to have access to one of the trusted phone numbers for the two-factor authentication process.
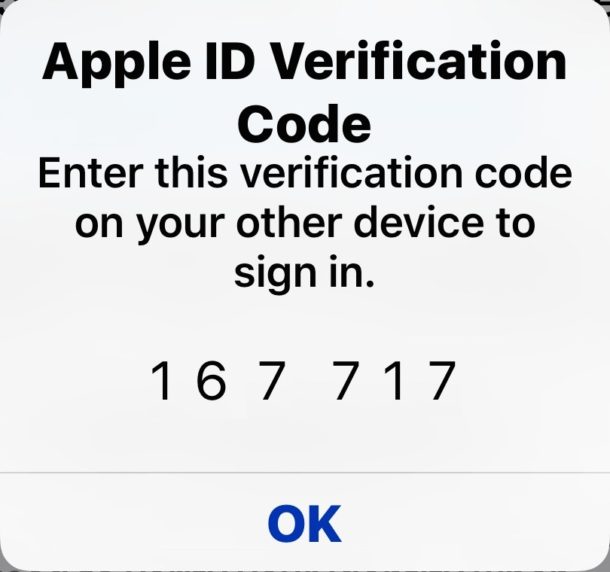
This is what a two-factor authentication ID code looks like, it will show up on trusted Apple devices (that is, any of your personal hardware that is using the same Apple ID) when you (or someone else) is attempting to log in to the Apple ID account from a new device or new location. Before you see the code, you’ll get a little approval message asking if the login attempt should be allowed with a map of the general location where a device has requested access (be forewarned however, in setting this up the Apple Maps pop-up showed me a location several hundred miles away which was clearly inaccurate – likely a bug but worth mentioning).
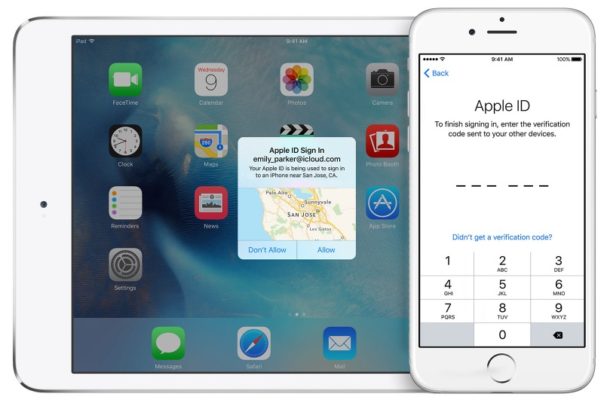
Once you approve the request from a device, you simply enter the randomly generated code sent to the trusted number after you enter the proper password and then you have access to the Apple ID as usual.
Two factor authentication is generally best reserved for security conscious individuals who are comfortable with the process of setting this up, and understand how two-factor logins work. If you’re the type of person who routinely forgets Apple ID passwords and changes phone numbers, two-factor authentication is probably not for you. It can be incredibly difficult if not impossible to recover an account where both the password has been lost and the trusted devices or phone numbers are not available, if you ever end up in that situation this page on Apple.com can be helpful to refer to.

You can always disable 2-factor authentication after the fact if you decide it’s too much of a nuisance, or for another reason. Just be sure you use a secure strong password if you disable two-factor auth on an Apple ID, which you should have anyway.
Interested users can learn more about two factor authentication here at Apple.com.

And how is one meant to set up 2fa on a non primary iCloud account? Looks like Apple never thought of that.
I live in Iran so I its not on the list
what can I do?
I can’t verfy my account this is my #09363875079 pls txt my verification # pls
Please give me
I’ll just leave this here:
https://twofactorauth.org
Greenland is not on the list of countries that can use 2-step verification (countrycode +299) :(
Interestingly Algeria is listed, with the countrycode +1 (which is the U.S.) – must be a Arabian Spring thing? :)
I went through this recently on the Mac, it is exactly the same to setup, done through iCloud System Preferences. You can also do it on the Apple ID management website on Apple.com.
For me, I ignored setting up two-factor verification on my Apple ID for a long time until I started getting repeatedly pounded with the endless mysterious ‘log in to your Apple ID’ pop-ups that every iOS and Mac user gets. I know these are ‘normal’ but they are so insecure feeling that I decided I had to have an additional layer of security involved. And yes, the fact you can log in to an Apple ID and make a purchase from apple.com/store and iTunes Store is yet another reason to protect the account well.
Personally I would recommend having at least two different trusted devices, and at least three different backup phone numbers. Losing access to an Apple ID would be a disaster. The same applies to Gmail two-factor verification for that matter, you want to protect your account but have ample ability to access it should the need arise.
Oh and for Google users, here is how you can enable two-step verification on Google and Gmail as well.
https://www.google.com/landing/2step/
Highly recommended if that is your primary email account, security is a good thing! Google even offers a ‘security key’ physical hardware feature as an additional backup option for logging in, that would be great for Apple ID to implement as well. https://support.google.com/accounts/answer/6103523?hl=en