How to Install Fonts & Remove Fonts in Mac OS X
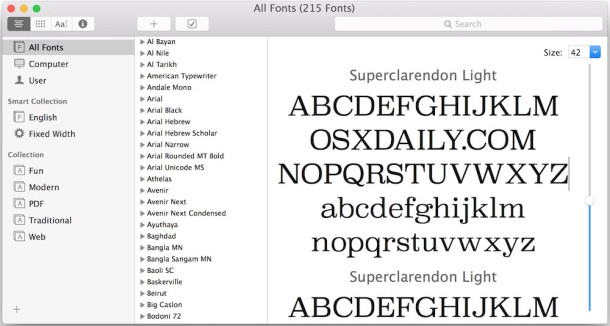
Want to install a new font in Mac OS? Maybe you want to remove a font you no longer use? Managing fonts on the Mac is incredibly easy regardless of what system software version you are using.
We’ll cover the process of installing new fonts, deleting unwanted fonts, and also restoring your default system fonts to MacOS and Mac OS X in case you mess something up in the process (though that is fairly unlikely).
How to Install New Fonts in Mac OS X
Installing new fonts on Mac is very easy. At it’s most simple, all you need to do is this:
- Locate the font file in the Mac file system
- Double-click on the font.ttf file
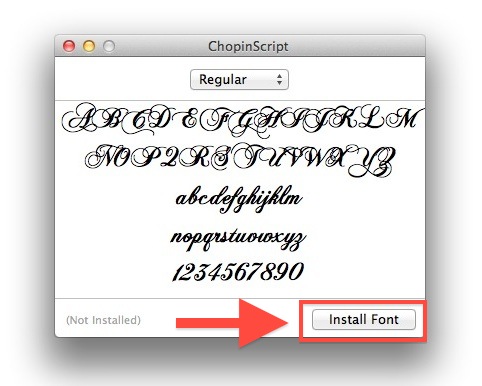
- Click on “Install Font”
When you double click on a font file, other than being able to install it, you’ll also see a font character preview showing the font face. This window will also let you preview any stylized versions (bold, italic, etc) of the font that are available and tell you if it’s installed or not. This is done through the Font Book app, which can also be launched separately to manage your typefaces.
You can also go through the process of both installing and removing fonts in Mac OS X entirely through the Font Book application. To add fonts through Font Book, you can either drag & drop the fonts into the application, or use the File menu options.
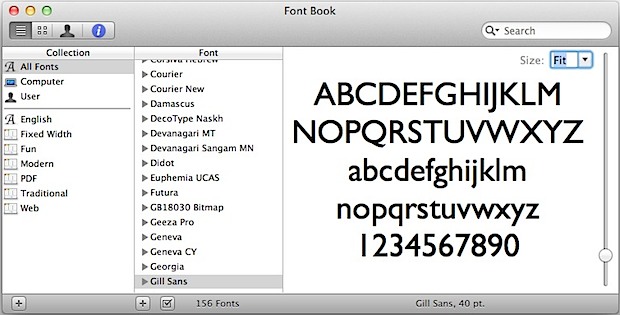
Regardless of how you install fonts onto the Mac, you can always browse through all fonts – both the default system bundled fonts and user added fonts – through the Font Book application. Font Book is basically the font manager for Mac OS, letting you do all sorts of font related tasks including installing and removing fonts on the Mac.
How to Remove Fonts from Mac OS X
Installed an ugly font and decide you don’t want it on the Mac anymore? Back in Font Book we can easily uninstall them:
- Launch Font Book (located in /Applications/) and use the Search function to find the font you want to delete
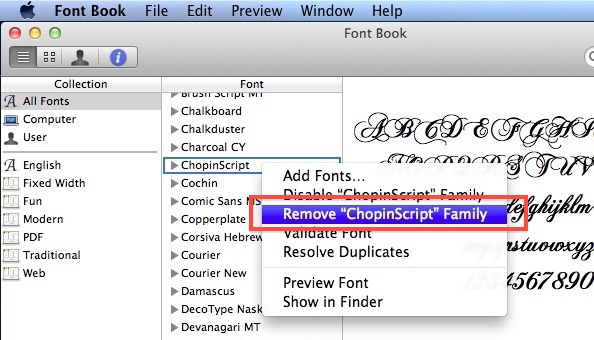
- Select the font to remove and either right-click on it and select “Remove ‘Fontname’ Family” or choose the same option from the File menu
- Confirm the removal of the font
How to Remove Third Party Fonts & Recover Default Mac Fonts
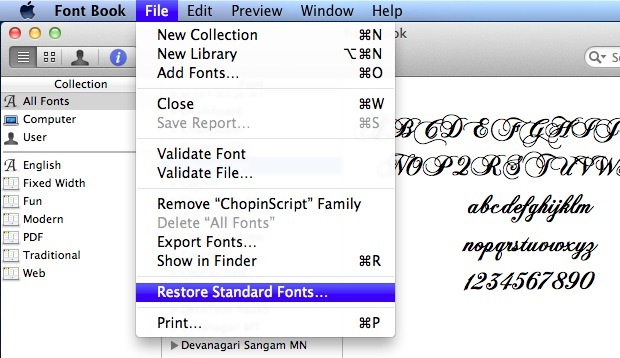
Finally, if you accidentally deleted an essential typeface or system font, or you added so many third party fonts that your font menus are a disaster, you can restore the standard font family to Mac OS X:
- From Font Book, pull down the “File” menu and select “Restore Standard Fonts…”
- Click “Proceed” – this will remove all third party additions and nonstandard fonts and return you to the base Mac OS X font pack
Note: You can recover third party fonts after the restoration by looking in your ~/Library/ directory for “Fonts (Removed)”. Here’s how to get access the ~/Library folder in OS X Lion.
This process of installing and removing fonts on the Mac is exactly the same in macOS High Sierra, Sierra, El Capitan, Mac OS X Yosemite, OS X Mavericks, Mountain Lion, Mac OS X 10.7 Lion, and 10.6 Snow Leopard.


fontbook is frozen everytime i open it! how do i uninstall fonts another way? and which font are safe to trash?
Hi,
Why can’t I remove a suite of foreign language fonts such as STFangsong, Xingkai, Yu* and others that crept in while I wasn’t paying attention? Now, every time I use Google it wants to download more crap.
Any ideas?
[…] writing app and don’t want to negotiate around the Finder. You can also see previews from the Font Book manager application, which is also where users can add and remove things from their OS X font collections if need […]
Thank you for the explanation, it worked!
Hi, im running 10.5.8 and dont have the option to restore standard fonts. Is there still a way i can do it?
Try going to Spotlight on the top right corner and type in Fonts. Look for Fonts with the Macintosh HD name beside it. Drag and drop the fonts you want to install. It worked for me.
MBA 13″ OSX Lion 10.7.2
that’s the one.- thanks!
use file>find> to search for fonts
pick the fonts folder with this route:
macintosh hd>library>fonts
and drop the font file straight in THAT fonts folder
restart any applications before trying to find your font, now working
My colleague is not able to install fonts in lion,
it does not popuop with a window of the entire font with the installe button :(
any tips?
[…] Installing and Removing Fonts in Mac OS X Installing and Removing Fonts in Mac OS X… Source: osxdaily.com […]
I’m running Mac OS X 10.6.8, and there is no “Restore Standard Fonts” menu item in the File menu or anywhere else.
is there good places that i can get loads of fonts from ?
dafont, urbanfonts.com, and 1001freefonts.com
Some aren’t that great though but they’re free.