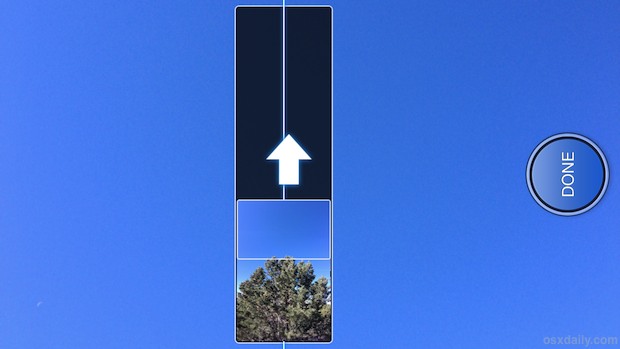
Shoot Vertical Panorama Photos on iPhone

The iPhone’s excellent panorama mode allows for easy vertical panoramic shots as well.
Shooting panorama mode in vertical orientation is perfect for taking pictures of tall trees, waterfalls, buildings, or anything else that is taller than the standard range provides.
This guide will show you how to switch Panorama mode into vertical mode, to snap images of tall objects or scenery.
How to Shoot a Vertical Panorama Picture with iPhone
To shoot a vertical panoramic picture, all you need to do is open Panorama mode of Camera app as usual, then rotate the iPhone sideways – yes it’s that easy:
- Open Camera, then swipe over on the options to access “PANO” mode (older iOS versions need to tap “Options” and select “Panorama”)
- Once in Panorama, simply rotate iPhone into horizontal orientation
- Shoot the panorama photo as usual, tapping “Done” when complete
Panorama is smart enough to save the resulting vertical shot into the proper vertical orientation, so you won’t need to rotate the image after the fact.

If you’re new to Panorama mode, don’t miss some tips for taking the best panoramic photos with the iPhone. You’ll need a modern version of iOS to have the feature on newer iPhone models, it’s really great and a lot of fun.


And if you touch the little arrow it will change the orientation from Down-to-Up to Up-to-Down, in this case (right to left in horizontal panoramas).