Delete Email Faster in iOS Mail App with a Swipe Gesture
![]()
Deleting mail from the iPhone, iPad, and iPod touch is a little more cumbersome than it should be, but it doesn’t have to be that way.
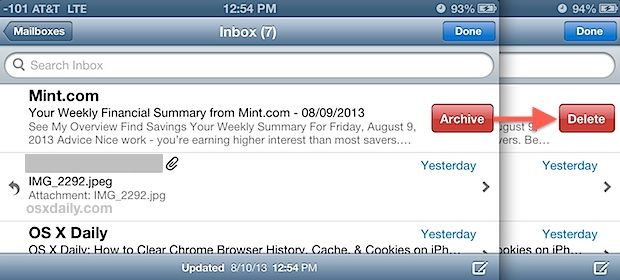
By making a quick settings change, we can turn the existing “Archive” function and swipe gesture into a “Delete” button and gesture instead.
This also carries over to the “Edit” options to more easily bulk delete email messages from the iOS Mail app.
Here’s how to make this change to Mail swipe left behavior in versions of iOS Mail app:
Change Swipe Left Mail Gesture to Delete or Archive Emails in iOS
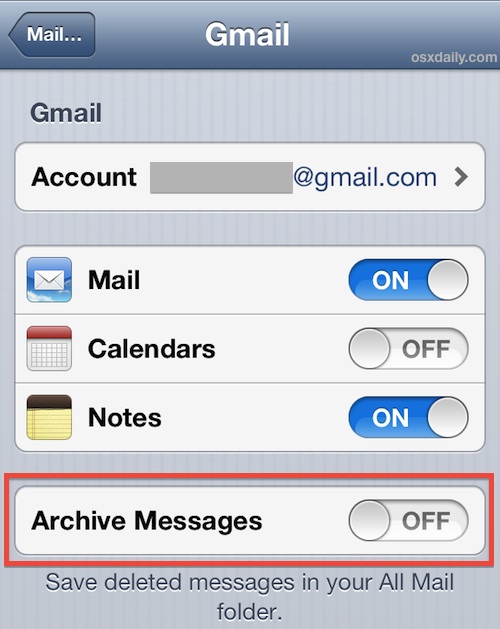
- Open “Settings” and go to “Mail, Contacts, Calendars”
- Tap on the email account you use (i.e.: Gmail)
- Look for “Archive Messages” and flip that to OFF or to ON, depending on whether you want to archive or delete the emails with the gesture
- Exit out of Settings and return to Mail

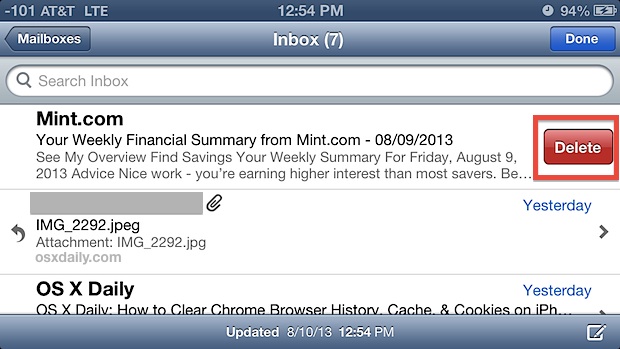
Now to access the quick Delete button, you just need to swipe from right to left on any Mail message within mailbox, where the “Archive” option has become “Delete”.

Additionally, you can bulk delete emails this way rather than using the move-to-trash trick for batch deleting, to do that you just need to tap “Edit” and select the group to trash.

This swipe-to-delete trick is used in many other places throughout iOS, including phone calls, music, podcasts, and elsewhere.
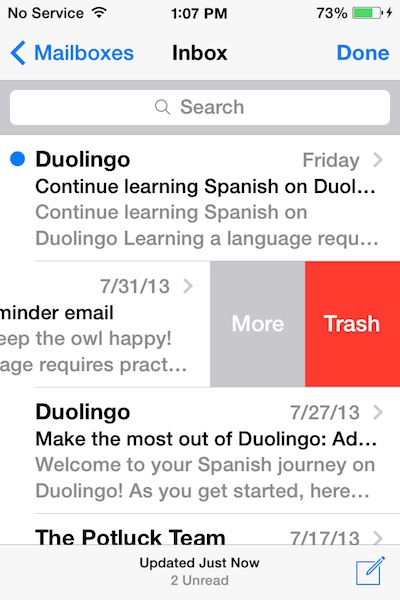
The feature is useful enough that it’s the new default option in iOS 7, making the settings change unnecessary for users some versions of iOS. Though some versions of iOS defaults to turning the “Archive” button into a “Trash” option instead when you swipe, or some will show Archive rather than Trash, like so:

Choosing the “More” option continues to reveal “Archive” and other options, however.
Check out some more great Mail app tips for iOS.


THANK YOU THANK YOU THANK YOU!!! It’s been driving me nuts that somewhere between my phone upgrade and software updates I lost the ability to easily delete my gmail messages in the mail app. It turned into a 2-3 step process = DRAG. So thank you for this easy and quick article. I now have that fixed and can love my iPhone again!