Get More Usable Screen Space on a Retina MacBook Pro by Adjusting Resolution
The MacBook Pro with Retina Display takes an ultra-high resolution display and scales onscreen elements down to effectively double the pixel count, providing for ultra crisp images and text on the screen. While the default resolution settings are undeniably gorgeous, you can also choose to manually adjust the screen resolution to either show more space on screen, effectively adding to your available screen real estate and desktop workspace, or choose a smaller resolution that will offer larger crisper text.
Each Retina MacBook Pro model offers these display settings, though the display panel size ultimately determines how many options you’ll get, with the larger 15″ screen having an additional selection available than the 13″ model.
Change Retina Mac Screen Resolution for More Space or Larger Text
- Open System Preferences from the Apple menu and choose “Displays”
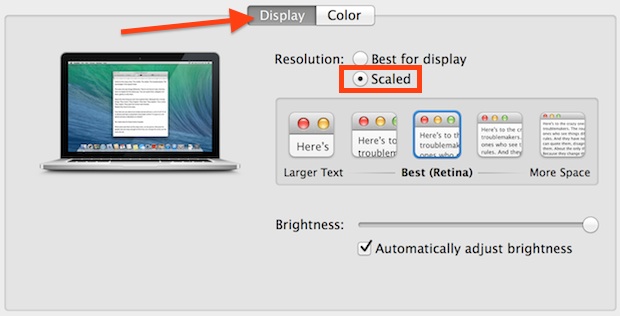
- Go to the “Display” tab and next to ‘Resolution:’ choose the “Scaled” radio button to reveal additional resolution options, including the following on a 15″:
- “More Space” is the equivalent to 1920×1200
- 4th over is 1680×1050 – a great alternative if you’re looking for more screen space without going too small
- “Best (Retina)”, the default setting is 1440×900
- 2nd over is 1280×800
- “Larger Text” is 1024×640
- Choose one of the other resolution options and close out of System Preferences
The options towards “More Space” are the most useful if you feel your screen is cramped, allowing for more windows, apps, and content to be visible on the display.
The above resolutions are for the Retina 15″ models, where supported scaled resolutions are 1920×1200, 1680×1050, 1440×900, 1280×800, and 1024×640. For Retina models with a 13″ display, the supported scaled resolutions are 1680×1050, 1440×900, 1280×800, and 1024×640.
You can hold the “Option” key when clicking “Scaled” to see all options available.
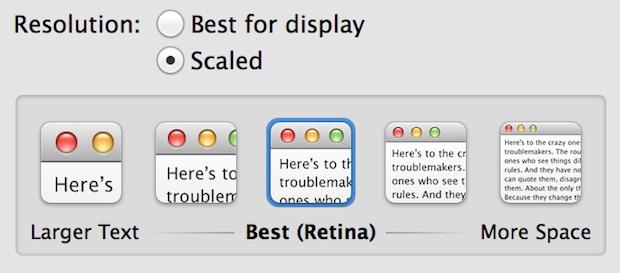
For most users, the default setting or one towards “More Space” is usually the best option. The further “More Space” settings do provide for tons of usable screen real estate but can make things look small and difficult to read, while the “Larger Text” options can reduce screen real estate to the point where things feel cramped despite the super-crisp text.
You’ll notice that once you change resolutions from “Best for Retina Display” to “Scaled” you’ll see a little message under the resolution options, stating the “Using a scaled resolution may affect performance” message. That is perhaps true for graphics intensive games and GPU straining activity, but is otherwise completely unnoticeable in most usage, particularly for what most users are doing on their Macs. That said, if you intend to do something incredibly GPU intensive, you won’t want to use a ‘scaled’ resolution during that task, or else you’ll needlessly suffer a performance hit.
Changing the built-in display resolution of a Mac will have no impact on external screens, which need to be set separately through the Displays preference panel that pops up on their own screen. Those should appear by default within the System Preference panel, though you may need to detect connected displays yourself through an option hidden toggle in the Display settings. External displays should automatically run at native resolution by default, unless another resolution has been specified.
Super Sizing with Native Retina Resolutions
While it’s not officially supported, Retina Mac users can access truly huge amounts of screen real estate with the help of free third party utilities available to unlock the full native display resolutions, which on the 15″ model is a freakishly large 2880×1800 pixels. Be forewarned though, that running at such a huge resolution turns the text and onscreen elements extremely small, making it fairly impractical for most users. Nonetheless, it’s still an interesting option to have.

Thanks for fantastic info I was looking for this information for my mission.
It is interesting that if you install Windows 10 in BootCamp Windows scales to basically the 1280 X 800 setting. Windows 10 I know does fractional scale pretty well and it looks great on my MacBook Air 2019. Although I noticed right away the difference from Mac OS at 1440 X 900. I used to enjoy the extra real estate with higher scale but these days I like text to be bigger and easier to read. I will gladly give up screen space.
I connected MacBook Pro Retina 2015 to SONY Bravia TV via a HDMI cable. The colors are totally distorted, lite green and purple. How do I get the correct resolution and color on the TV? My old MacBook Pro works fine
That is a great tip, nevertheless, more screen real estate = small fonts, need new glasses. Thank you.
Where do i find the wallpapers! the’re amazing
Apple marketing images, they’re not included in OS X unfortunately as I have looked all over for them myself!
Anyway, these retina settings are a big deal because unlike changing the resolution on a traditional LCD displays which looks horrible when not running at native resolution, the Retina display CAN run at other resolutions. That is a HUGE HUGE HUGE deal for those who don’t understand why this is worth mentioning. Great tip and even better to use!!! 1680×1050 should be the default in my opinion, it’s the best resolution by far, but the biggest one is wonderful if you’re working on images. Photoshop Pro must know tip!