How to Clear & Flush DNS Cache on iPhone & iPad
 If you ever need to set custom DNS or change the DNS settings on iOS devices for using an alternate domain name server or a faster one, you’ll probably want the DNS changes to take effect immediately, which requires the flushing of DNS caches on the iPhone or iPad. There are actually several ways to perform a DNS flush on an iOS device, we’ll cover the two fastest methods below, the first is preferential because it has the least amount of impact overall to other activity on the device as it does not require a reboot.
Keep in mind these methods work the same for all iPhone, iPad, and iPod touch devices, though the Airplane Mode approach works particularly well with iPhone and cellular equipped iPad devices.
Flush DNS Cache on iPhone / iPad with AirPlane Mode Toggle
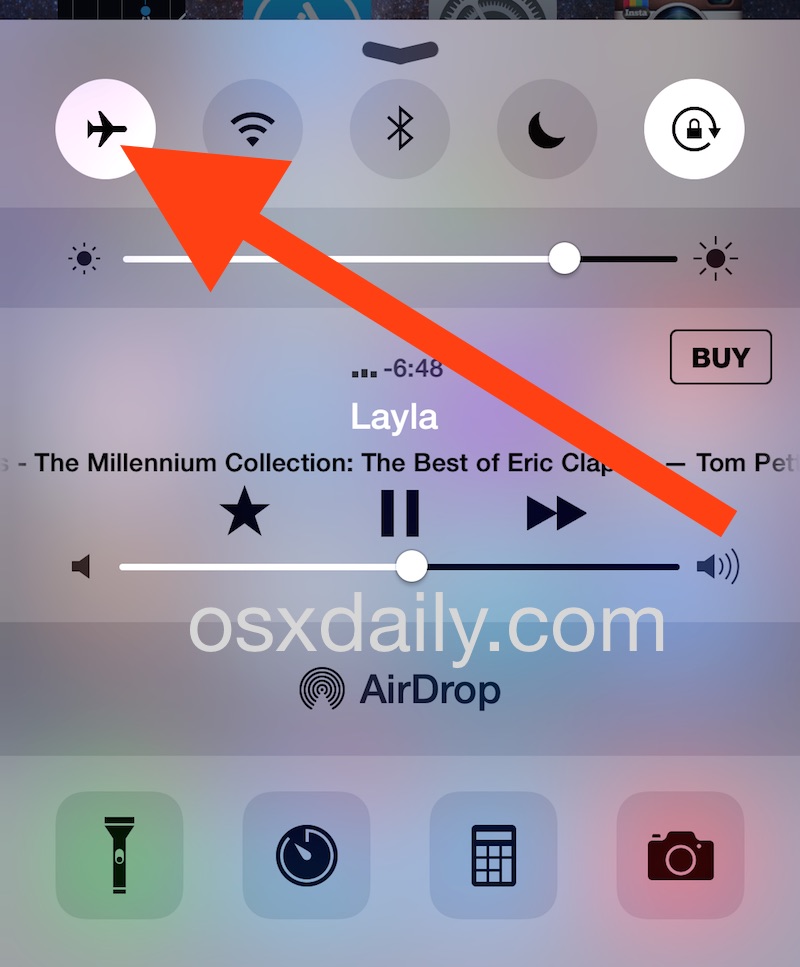
By far the simplest way to clear out the DNS caches on the iPhone is to simply toggle Airplane mode ON and back OFF again. This is easily done by using the simple airplane switch from within the Control Center of modern versions of iOS:
- Swipe from the top corner of the iPhone or iPad screen to reveal Control Center (or from the bottom of the screen if the device is older)
- Tap on the Airplane Icon to enable Airplane Mode – wait until the devices radio signals are off as indicated by the airplane logo in the status bar, then tap again on the Airplane Icon to disable Airplane Mode
- Swipe to leave Control Center, the DNS cache has been flushed successfully
Now that DNS has been cleared out, whatever adjustments were made in the devices Network Settings will take effect immediately without any further action.
You can also reset and clear DNS cache on iPhone and iPad by going to the Settings app to turn on AirPlane mode: Open “Settings” then flip the switch for “Airplane Mode” to the ON position.
* Remember that some devices with new iOS version access Control Center through a swipe down from the top right of the screen instead of a swipe from the bottom of the display.
Rarely, the Airplane Mode toggle does not work sufficiently to clear out some persistent DNS caches, though it always should, perhaps it’s a bug in the unusual scenarios where it does not work sufficiently. If that’s the case, you have another option to clear out the caches, which we’ll cover next.
Clearing Persistent DNS Cache from iOS with a Network Settings Dump
Resetting the iOS devices network settings is a surefire way to flush all old DNS settings if you made adjustments and for some reason or another they were not maintained. The downside to this is that you’ll lose connections to wi-fi routers and other specific network settings. Additionally, this reboots the device, which is actually another way to clear DNS cache anyway.
- Open the “Settings” app in iOS and head to “General” followed by “Reset”
- Choose “Reset Network Settings” and confirm that you wish to clear out all network settings (though no specified, this includes all DNS data)
- When the device reboots, the DNS cache will be cleared out but so will all other customizations, meaning you’d need to set a manual change made to DNS servers again

This latter approach is rarely necessary, and though it’s not as simple as the AirPlane switch or the Mac command line approach offered to flush DNS details in new versions of Mac OS X, it does work if all else fails.
That should be all that is necessary to clear out stale DNS cache from your iOS devices. Keep in mind that sometimes your local device DNS settings are not going to make a difference if what you’re waiting for is DNS propagation changes from elsewhere around the internet, which can take quite a while for DNS changes to carry over between servers around the world.
If you know of another way of modifying or clearing DNS cache in iOS, let us know in the comments.

Thx for the tip. I did it, and successfully flushed my DNS. Keep up the good work.
Good to know, never knew that but of course there had to be a way to flush DNS on iPhone, right?
If your iPhone joins a variety of variable quality wi-fi networks (and most of us do) I would definitely recommend manually setting Google DNS servers or Open DNS servers as your DNS, then flushing out the DHCP assignments. It offers a nice boost to internet speeds on iPhone when joined to wireless networks. Try it, if it doesn’t work for you, well, just revert back to normal I guess.
Hi, can you explain this in layman’s terms please. Thank youl
The reset of network settings can be annoying.
It clears ALL network settings; preferred wireless networks and cellular data from your cell-phone provider.
If you are not on your own providers cellular network, your phone will not get these information again, and will not function after this reset until it does.
I would call my cellular provider for locating my phone on the cellular network, before resetting these data.