How to Resize a VirtualBox VDI or VHD File on Mac OS X
 If you use VirtualBox to run guest operating systems within a virtual machine on the Mac, like Windows 10 or Ubuntu Linux, you may find yourself needing to resize the virtual disk size where the OS resides. This is often the case when you inadequately estimate how much space is required for properly installing in a virtual machine with dynamically allocated storage.
To resize a VDI or VHD file in Mac OS X (this may work the same in linux, let us know), you’ll use the VBoxManage tool from the Mac command line. Even if you chose to install the VirtualBox command line tools, it won’t be in your path, so you’ll be heading into the VirtualBox.app contents to use the utility instead.
Since this is modifying the virtual machine, it’s a good idea to back up the VDI or VHD file beforehand, if you’re not comfortable with the terminal at all you should probably back up the entire Mac first. Keep in mind the resize utility uses megabytes for measurement, so if you’re changing a vm file to be 30GB that would be 30000MB, 50GB as 50000, and so forth.
How to Resize a VirtualBox Virtual Disk in Mac OS
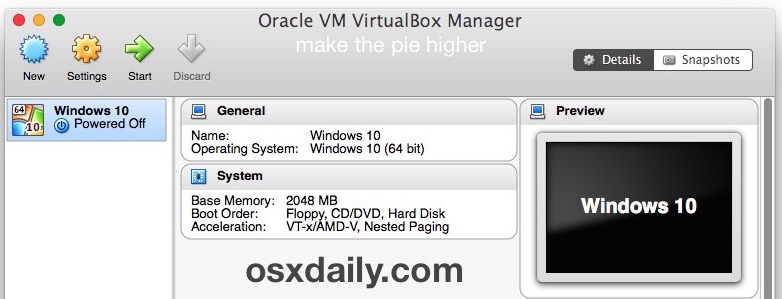
- Shutdown the VM and quit VirtualBox
- Open the Terminal app and use the following command to navigate to the VirtualBox app directory:
- Now in the proper directory, you’re ready to run the resize command with the following syntax:
- If desired, verify the change has taken place with the showhdinfo command:
- Relaunch VirtualBox and boot your newly resized guest OS
cd /Applications/VirtualBox.app/Contents/Resources/VirtualBoxVM.app/Contents/MacOS/
VBoxManage modifyhd --resize [new size in MB] [/path/to/vdi]
For example, let’s say there’s a Windows 10 VM VDI file located at /Users/Paul/Documents/VM/Windows10.vdi and we want it to grow from 15GB to 30GB, the syntax would be:
VBoxManage modifyhd --resize 30000 ~/Documents/VM/Windows10.vdi
VBoxManage showhdinfo ~/path/to/vmdrive.vdi
If the path to the VM file is in a deeply rooted or complex location, use quotes or using the drag drop to print path trick which works great in Terminal app to properly point to a complex directory hierarchy.
Resizing the drive with VBoxManage is basically instantaneous from the command line, but keep in mind that once you’re back in the virtual OS (Windows, OS X, Linux, or whatever else you have running in VirtualBox) you will probably want to reallocate the partition to use the new space.
I ran this to grow a dynamical allocation minimum size, if the VDI file is a fixed size and you want to shrink it, the VBoxManage tool will still do the job but the –compact flag is what you’re looking for.
VBoxManage is a helpful tool with a lot of great uses, you can also use it to quickly clone a virtual disk and modify nearly anything within VirtualBox from the command line. If you plan on using VBoxManage often, you may want to add it to your path or create an alias for easier access.
Know of another way to resize a VirtualBox VDI? Let us know in the comments.

I have the same problem as Lauriano Jay:
Hampuss-MacBook-Pro-3:MacOS KrampusKnall$ VboxManage modifyhd ~/VirtualBox\ VMs/Windows\ 10/Windows\ 10.vdi –resize 35000
0%…
Progress state: VBOX_E_NOT_SUPPORTED
VBoxManage: error: Resize medium operation for this format is not implemented yet!
Pleeaaassee help me! i dont have time reinstalling windows 10 …
Doesn’t work:
0%…
Progress state: VBOX_E_NOT_SUPPORTED
VBoxManage: error: Resize medium operation for this format is not implemented yet!
Works for everyone else to resize the VDI or VHD file in Virtualbox, so it sounds like you are doing something wrong, using the wrong syntax, or the wrong format type.
If the format you are choosing is wrong, that is the problem as the error message it gives you says.
Had same problem but did the resizing this way today:
VM must be off. Beside Virtual Box on upper portion of window Select file tab then select Virtual Media Manager. Then select the vdi file to resize. You’ll then use the sliding bar to select the new size and then select the apply button.
This worked fine for me.
Thank you!
Some months ago I could do this without issues. Now I need to shrink it back from 50GB to 40GB but I get this error
//
0%…
Progress state: VBOX_E_NOT_SUPPORTED
VBoxManage: error: Resize medium operation for this format is not implemented yet!
//
Any helps?
At least with the latest VirtualBox, the resize parameter requires TWO dashes – so “–resize xxx”, not “-resize xxx” as shown. (If you already have two dashes, the font isn’t making that clear.)
what about for redhat on vm?.. if i use this it says
0%…
Progress state: VBOX_E_NOT_SUPPORTED
VBoxManage: error: Resize medium operation for this format is not implemented yet!
Good share. Thanks
VBoxManage modifyhd –resize 50000 ~/Users/Macbookpro/VirtualBox VMs/W/W.vhd
got error
Syntax error: Invalid parameter ‘VMs/W/W.vhd’
Please help me in this regard
The content on osxdaily.com is always useful and superior. So, I’m disabling ad-block on your side, even though you guys don’t ask.
Nothing was working for me until I looked around in the folders for VirtualBox a bit. My VBoxManage program was in a different folder. I had to drag and drop the paths for it to work. Here is what worked for me:
/Applications/VirtualBox.app/Contents/MacOS/VBoxManage modifyhd –resize 35000 ‘/Users/MYUSERNAME/VirtualBox VMs/Windows/Windows764bit.vdi’
Hi, Thanks! It really help me to resize my vdi file. Btw, I got a question of the command “VBoxManage clone”.
I’ve taken a snapshot of the vdi file I wanna resize. I wonder that the cloned vdi file has the state when I took the snapshot.
My host is MacOS Sierra 10.12.3 and I’m using VirtualBox 5.1.14 and this was the Terminal command that worded for me:
VBoxManage modifymedium /Users/dianeroberts/VirtualBox\ VMs/ten/ten.vdi –resizebyte 53687091200
I have a Mac and I had the same problem using the command resize, so I use resizebyte command. Here you have to add 6 zeros to make GB count (as Mike D. said)
After that I opened virtual box and my windows HD was the same size, so open Manage and look for Disk Management, there expand the hard disk size and follow the wizard, BOOM now I have the space I needed.
I got errors when using –resize 25000 to resize a 20Gb .vdi to a 25Gb .vdi file.
I had to use –resizebytes 25000000000 which did work.
I’m using Version 5.1.14 r112924 (Qt5.6.2) on OSX host.
Thank you, worked like a charm and it took less than five minutes to do it all, including resizing the disk within Windows 10.
Thank you heaps. The sudo command format worked beautifully. The standard command format just didn’t work. I’m on macOS 10.12.3.
Worked like a charm
Hi , my terminal in mac is not responding to first command line as posted
I’m on VirtualBox 5.x on OSX and the commands format seem to have changed:
sudo VBoxManage modifymedium "/Path/To/VDI/File/VirtualBoxVMs/ubuntu64/ubuntu64-2.vdi" --resize 30000.After increasing the vdi size I found another resource to actually increase the extended volume in the ubuntu vm and finally to increase the size of the lvm within the extended volume.
http://www.geoffstratton.com/expand-hard-disk-ubuntu-lvm
The doc was for ubuntu 10.x server, I was on ubuntu 14.04 and it worked for me. Good luck!
Make backups as relevant to you, I didn’t want to risk losing my original vdi so I just made a copy of that.
Hi,
At step 3 I got a problem. It seems that a space can’t be accepted in a folder name (i.e. “VirtualBox WMs”). So, via cd command I go to the folder where windows.vdi is located.
I then use the command “VBoxManage showhdinfo” without mentioning the path. It worked well.
Next I applied the instruction given by Tejas. Again OK. Only thing is that you have to restart Windows to effectively get the new space.
I’m no confident in Mac OS, but I was able to extend the size without too much sweat.
Thanks for the help. Was really helpful.
Domi
The man, the king, the chosen one
I did what was stated above, but the following error appears:
0%…
Progress state: VBOX_E_NOT_SUPPORTED
VBoxManage: error: Resize medium operation for this format is not implemented yet!
Here is the terminal output
Christians-MBP:MacOS ChrisERo$ VBoxManage modifyhd –resize 6900 /Users/ChrisERo/VirtualBox\ VMs/Walee05/Walee05.vhd
0%…
Progress state: VBOX_E_NOT_SUPPORTED
VBoxManage: error: Resize medium operation for this format is not implemented yet!
Rich,
One more thing – I noticed your drive says:
Format variant: fixed default.
(anybody?) Am I wrong that extending the size has to be a dynamic VDI file? Mine was… and worked. I didn’t get the “Progress state: VBOX_E_NOT_SUPPORTED
VBoxManage: error: Resize medium operation for this format is not implemented yet!” error that you saw…
Hmmm…
Rich,
I had the same problem.. it all came down to the default VM folder created by Vbox.. the path is odd. I never typed a backslash into the path.. but it appeared when I dragged and dropped! ODD!!
What worked for me was simply clicking my VDI file and dragging it into the Terminal where the path needed to be.. then I set my –resize 30000 and it worked perfectly! Looked like this:
VBoxManage modifyhd /Users/louise/VirtualBox\ VMs/Windows7/Windows7.vdi –resize 30000
Saw this:
0%…10%…20%…30%…40%…50%…60%…70%…80%…90%…100%
Reloaded my VM – Windows opened.. but had the same space (hadn’t reallocated the blank space) – opened Device Manager/Drive manager.. right click and extended the drive to the new space.. worked great!
Good luck!
Hi..
Man ..
THANK YOU .. the terminal drove me nut .. I did exactly what they stated above but it didn’t work. Your comment relieved the stress off me.
Thanks again.
Just made some progress but not there yet… here is what i have cut and pasted to here from terminal: XXXX is my name
richards-iMac:MacOS rhudes$ VBoxManage showhdinfo /Users/rhudes/VirtualBox\ VMs/Windows/Windows.vdi
UUID: fba22145-d963-4154-9dca-cf17de4b4c36
Format variant: fixed default
Capacity: 31239 MBytes
Size on disk: 31242 MBytes
Encryption: disabled
In use by VMs: Windows (UUID: 3d06ed98-c17b-4f7b-96d7-a7db9ff846fe)
The resize attempt
richards-iMac:MacOS XXXX$ VBoxManage modifyhd –resize 50000 /Users/rhudes/VirtualBox\ VMs/Windows/Windows.vdi
0%…
Progress state: VBOX_E_NOT_SUPPORTED
VBoxManage: error: Resize medium operation for this format is not implemented yet!
Hope this helps with trouble shooting
rich
Ok I got through the first step but when I get to step two
i got this message: Syntax error: Invalid parameter
I assume this indicates my path is not correct. to get to the file path…. I used the right click and copy path to get the path to the windows.vdi file. it looks like this (XXX) is my name
VBoxManage modifyhd –resize 50000 ~/Users/XXX/VirtualBox VMs/Windows/Windows.vdi
Any help would be awesome!
You have a space in your path so you need to add ” or “” like ‘~/Users/XXX/VirtualBox VMs/Windows/Windows.vdi’ or escape space like ~/Users/XXX/VirtualBox\ VMs/Windows/Windows.vdi
Eugene, you the man! That stupid space drove me nuts.
Thank you for your assistance. This tutorial was most helpful. Special thanks to Tejas! That partition extension was the key!
Thanks so much,
It’s very useful. It’s worked! :)
I have actually done all the steps above but yet I can’t see the unallocated HDD? I’m using a Snapshot, may be this is the reason?
Same here, I’ve got a couple snapshots and I’m not seeing any unallocated space in Gparted or Windows Disk Management… :/
Computer> Right Click >Manage> Storage> Disk Management>Notice the added Volume > Select the current Volume > right click> Extend volume. Now the Current Volume is extended.
I tried the above recommendations and didn’t help. The extend option is frozen and can only Shrink what’s on the disk. I have 25 Gs on the desk. Please advise if you know other options. thank for your help
make sure you resized your drive as explained here using VBoxManage modifyhd –resize [new size in MB] [/path/to/vdi]
then check if it’s ok VBoxManage showhdinfo ~/path/to/vmdrive.vdi
Good luck!
Thanks Tejas! Your added info about exactly how to get the virtual machine to actually see the extra allocated space made this a very useful article. Now I have a usable virtual Windows box again.
This worked for me after I had pulled all of my hair out. This is the right answer.
Thanks Tejas :-) – Your post really helped, it should be added to the article!
Thanks so much about the tip about extending the disk Tejas. I have done this once successfully now. Before installing windows 10 on the virtual disc. All went fine, resized fine, extended fine, windows 10 installed no problem. However since then I discovered I needed to increase the disc size again.
I have gone through the resize procedures a second time, all went fine. I booted up windows to extend the drive again, but this time, between the C drive that needs to be extended and the new unallocated partition there is a new 450MB Healthy (recovery partition). I guess thats been installed by Windows 10. With the recovery partition in between, the option to extend the C drive cannot be selected. Any ideas how I get out of this on then?
Hey Tejas, I worked it out. Downloaded the free EaseUS Partition Master and got it to move the recovery partition to a space after the unallocated partition. With the Unallocated partition now adjacent to the C drive it allowed me to extend. Job done :-)
Worked like a charm after resizing with vboxmanage. Thanks a lot!
I can’t find this
Tejas,
Thanks for the tip. It saved a virtual installation that I re-sized.
Kenny
Thank you Tejas, your added info worked perfectly.
Legit! This should be added to the author’s instructions which will only get you half way there. Thanks.
Thank you Tejas! I used another method with GParted, a partition manager for linux. However this method is so much easier. Works like a charm.
The need for extending the volume depends on the usecase, you can also create a volume on the unallocated storage and windows will use it as swap space when upgrading and so on without the need the (re)move the Healthy (recovery partition) mentioned by Colin.
Windows drive
clic right on drive
extended drive
Resizing the VHD is one thing, but it won’t resize the partitions inside it, only increase the empty space, so you’ll have to do it manually once logged onto your newly-resized VHD, either via GUI or using a partitioning tool.
For example, you can download a Gparted ISO, set your VirtualBox VM to boot from the (virtual, in this case) CD drive, and use Gparted to resize your partitions, the way you would on a regular PC.