Enable Additional Photos Adjustments in Mac Photos App
The Mac Photos app serves as a photo manager and image editor, and while the default toolset for picture adjustments is sufficient for many users, you can enable six additional photos adjustments to gain even more control over your pictures.
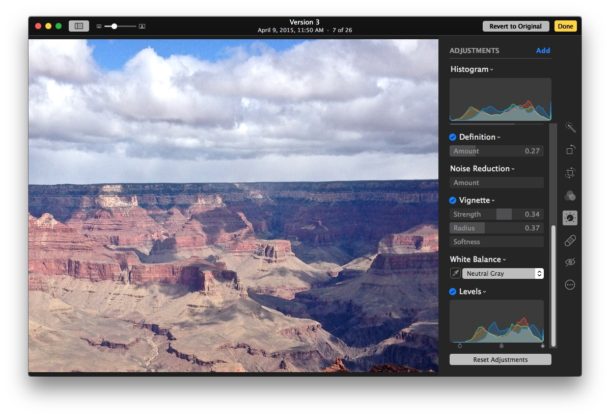
We’ll show you how to enable image adjustment tools for Sharpen, Definition, Noise Reduction, Vignette, White Balance, and Levels, each of which is generally considered a more advanced image editing feature, but the Photos app on Mac does a good job of making these adjustments easy to use and understand.
You’ll obviously need some pictures in the Photos app for Mac to get use of the image adjustment abilities. You can import pictures from files, use iCloud, or copy them into Photos directly from iPhone or a camera.
Enabling Advanced Image Adjustments in Photos for Mac
This works in all versions of Photos app for macOS and Mac OS X, and yes the default set of Histogram, Light, Color, and Black & White image editing tools will remain intact:
- Open the Photos app on Mac if you have not done so already
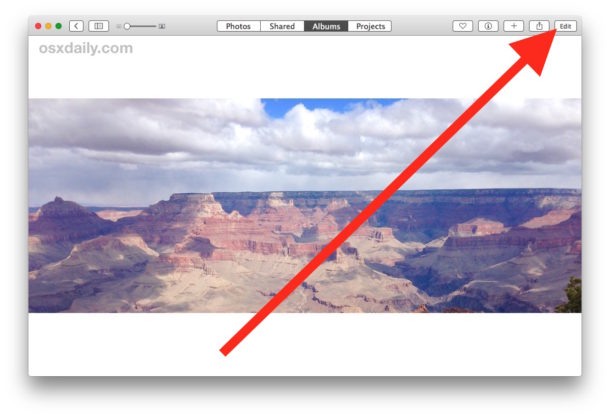
- Double-click on any picture to open the closer view, then click on the “Edit” button in the corner
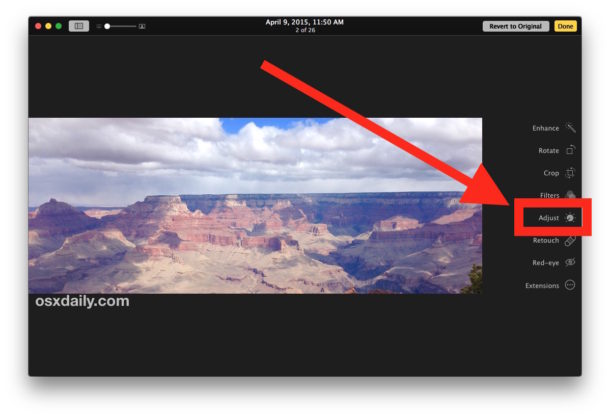
- Click on “Adjust” from the Edit options
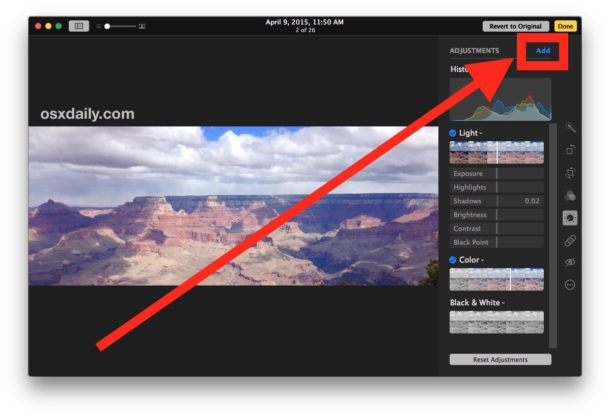
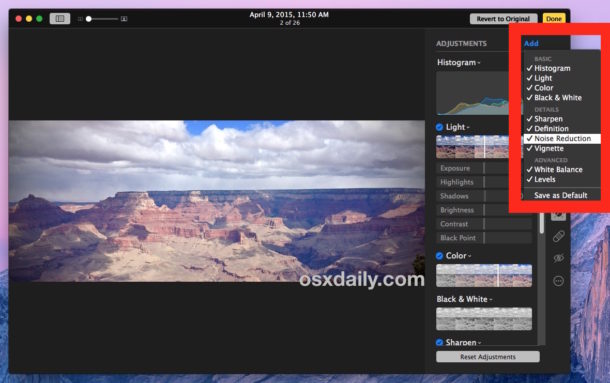
- Near the top of Adjustments, click on “Add”
- Select every additional adjustment item that you want to enable from the menu that is not currently checked, including:
- Sharpen
- Definition
- Noise Reduction
- Vignette
- White Balance
- Levels
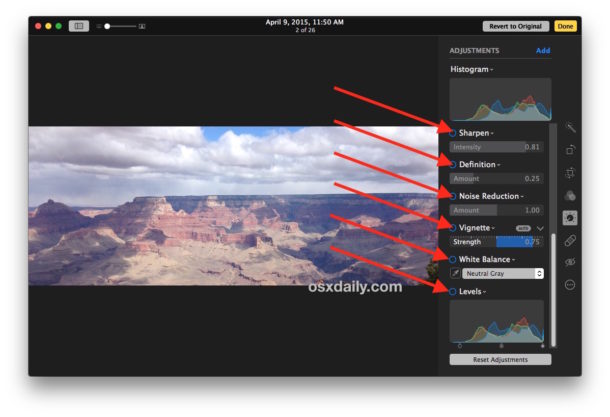
- Note some of these adjustments will now be ‘enabled’ on the active picture, which is not always desired, what you’re really looking to do is enable the adjustment feature without actually putting any adjustments on the picture until you specify, so scroll through the Adjustments list and uncheck each item (unless you want to actively use them right away on the current picture)
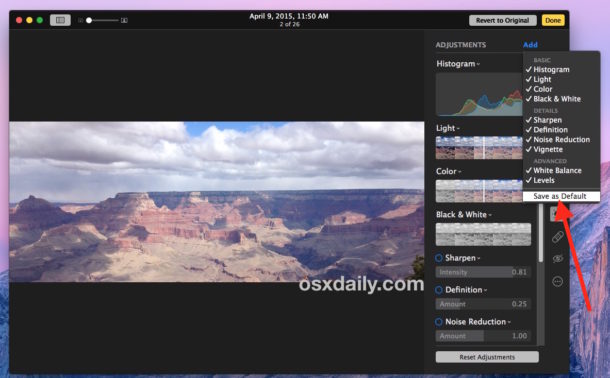
- If you want to keep all of the adjustment options available by default in Photos app, pull down the “Add” menu again and choose “Save as Default”
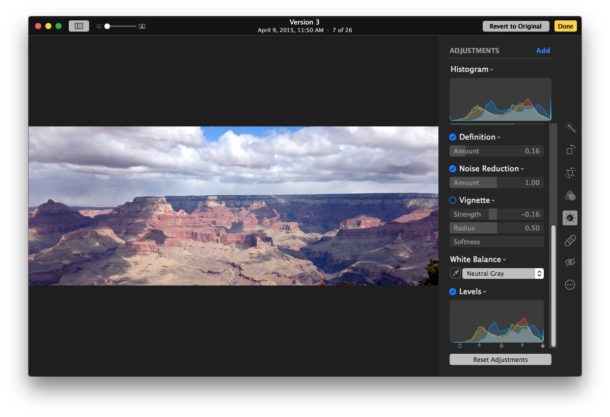
Exactly what each image adjustment option does is better seen than described, so it’s a good idea to check each option out yourself on a sample image to get a better idea of what type of image adjustment they make.
To offer a general idea of each additional option enabled here:
- Sharpen – sharpens the picture, making it appear more crisp, particularly beneficial if a picture is slightly out of focus
- Definition – enhances the definition of a photo, making elements appear more obvious
- Noise Reduction – reduces the noise on the image, but at the expense of slightly blurring the picture detail
- Vignette – adds a darker shadow around the edges of an image to focus attention on the center – learn more about adding vignette to pictures on Mac here
- White Balance – changes the starting white balance of picture, thereby shifting the color tone
- Levels – adjusts the levels of whites, blacks, and Red Green Blue
As mentioned before, you really should try each adjustment out yourself and individually to get an idea of what they do and the dramatic effects they can have on a picture.
While they are all useful tools, you can certainly overdo using them and end up with an ugly over processed image, proving that with image editing adjustments there is such a thing as “too much of a good thing”. Use the tools sparingly and how they are intended, and you’ll be able to make some really nice quality adjustments to pictures.

Thanks for the tip. It’d be nice to have these features handy, but when I pick edit, all the options are dimmed out except for extensions. Therefore, I can’t choose adjust.
Hey folks, what great tipps you continuously provide which often can’t be figured out somewhere else or just by using the product! Thanx!
Nice one Paul. Just the kind of tip a new boy to iMac needs.
Keep em coming!
Please Apple, bring back Aperture…
nice. Thanks