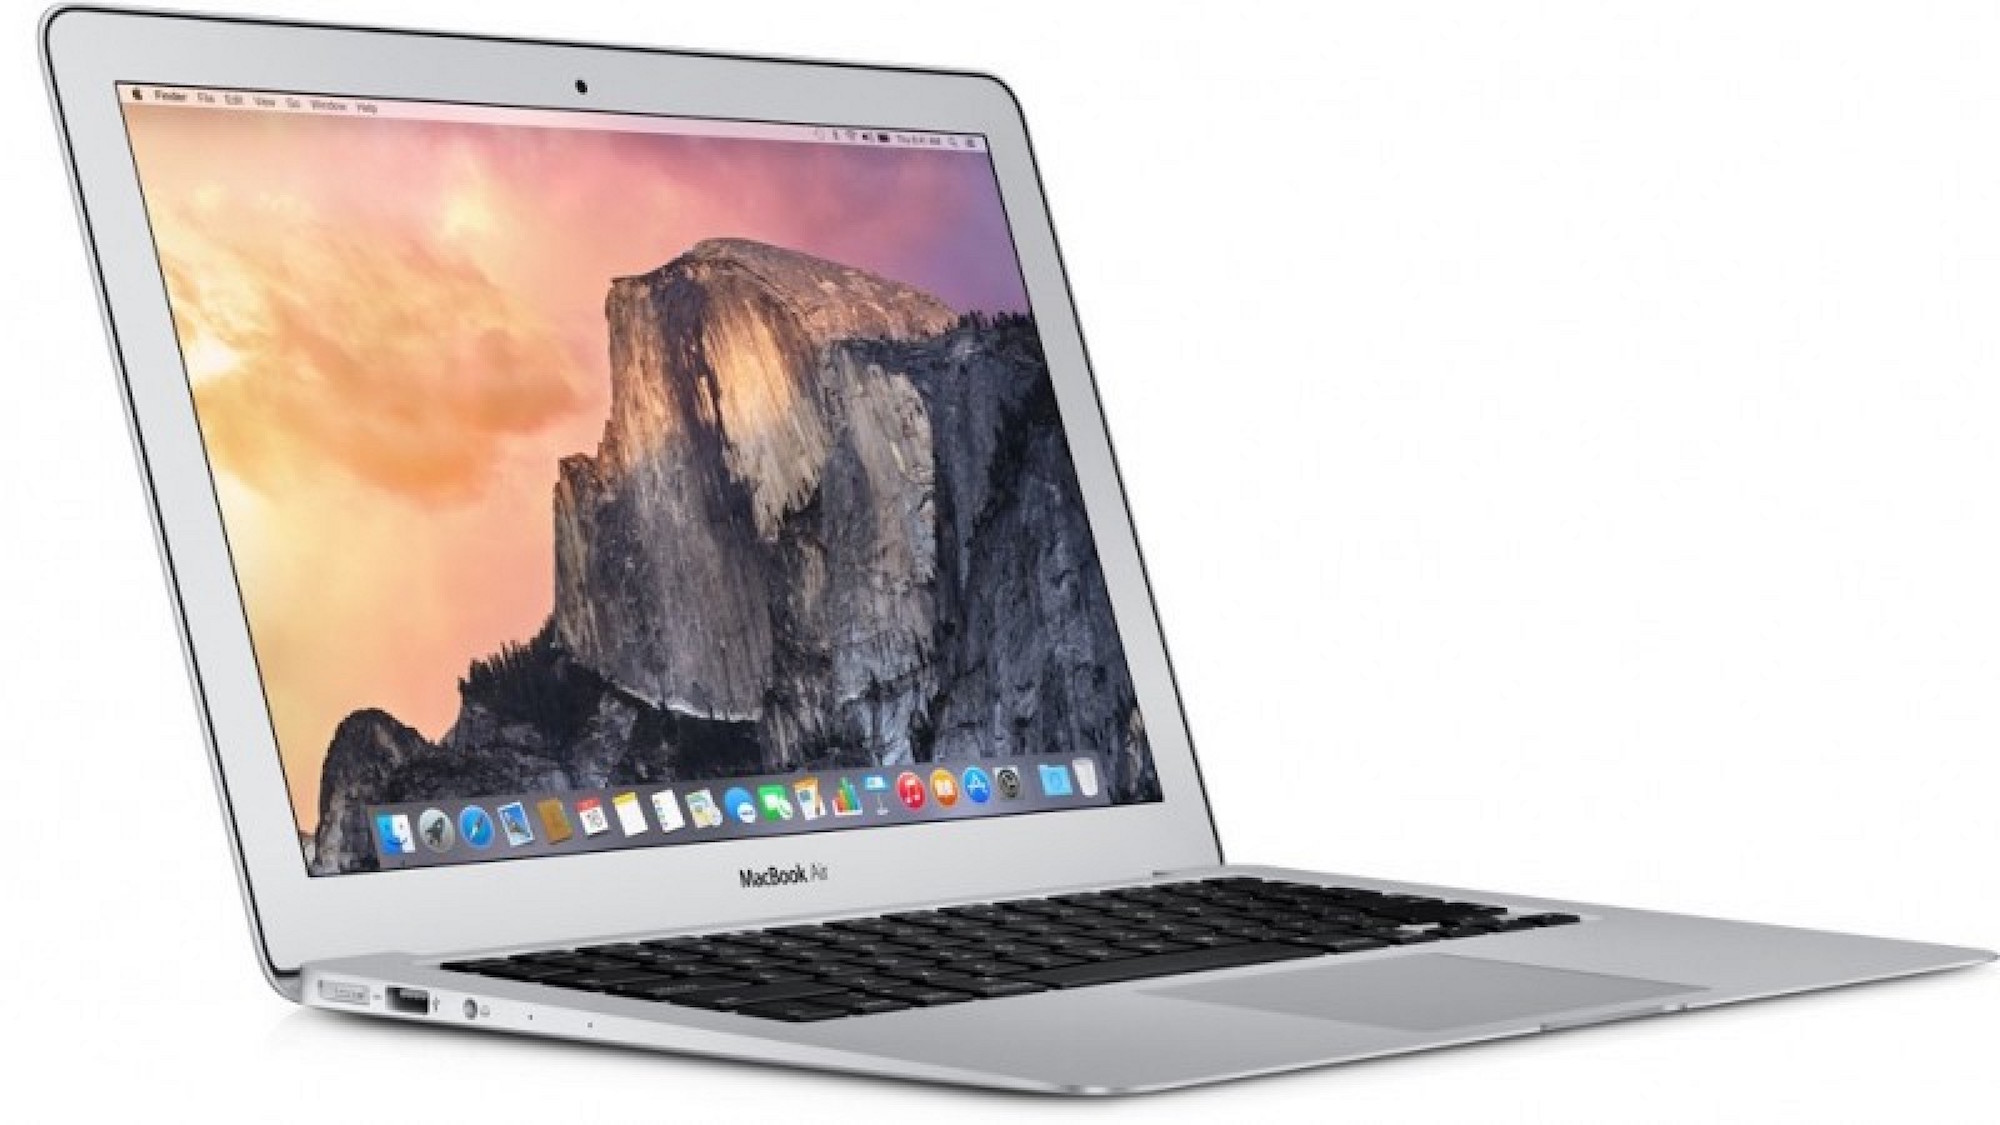
How to Upgrade & Replace an SSD in MacBook Air
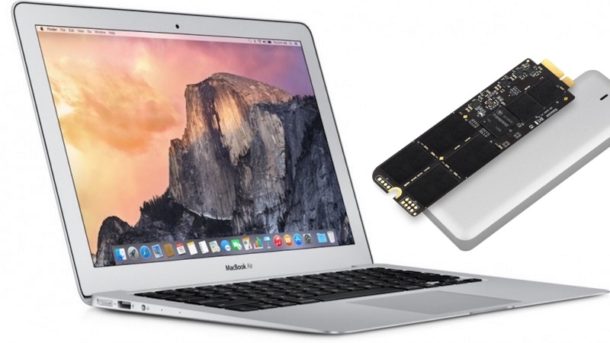
The MacBook Air is not really thought of as being expandable or upgradeable, but it turns out that with a little effort and patience, you can replace the SSD on the MacBook Air yourself. Changing the SSD on a MacBook Air can allow you to dramatically increase the storage size of the Mac and can often increase performance too, and while those are elective reasons to upgrade the devices SSD hard drive, another common reason to require swapping the SSD drive is due to an all out drive failure. That latter scenario is what led me to replace the SSD on this particular MacBook Air model for a friend, but regardless of the reason for upgrading or changing the SSD, it’s really not that difficult to do and the process is the same.
If you’re going to replace the SSD on a MacBook Air for any reason, you’ll need a few things; the new replacement SSD drive that is compatible with the Mac, a series of specific screwdrivers, at least two or three separate little bins for temporary screw storage, and some patience. Beyond that it’s really not particularly complicated, even if it involves taking apart the Mac and putting it back together again. There are many great detailed tutorials that walk through the entire process from sites like iFixIt, and we’ll link to a few below.
Keep in mind this is really only applicable to Macs that are outside of warranty service, and for those who are comfortable tooling around in their hardware. Swapping hardware may void a warranty on a newer Mac, so if the Mac is under warranty just take it to an Apple Support provider or Apple Store and they can handle all of this instead.
Step 1: Checking Replacement SSD Compatibility with MacBook Air
The first step is to insure the replacement SSD is compatible with the MacBook Air model. This typically depends on the model year of the MacBook Air itself, so it is critical that you know which model year the computer is. You can get the model and model year of any Mac by going to the Apple menu and choosing “About This Mac”, where in the overview screen you will see something like “MacBook Air (13-inch, Early 2012)” or similar.
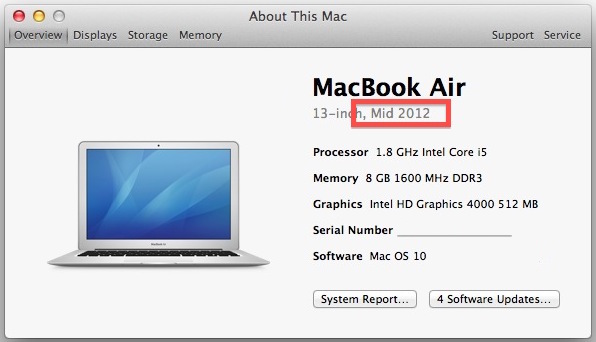
Once you know the exact model and model year of the computer, you can find a compatible SSD drive on a reseller site like Amazon.
For the sake of this article, let’s say the MacBook Air is a 2012 model year.
Step 2: Picking the Replacement SSD Upgrade / Kit
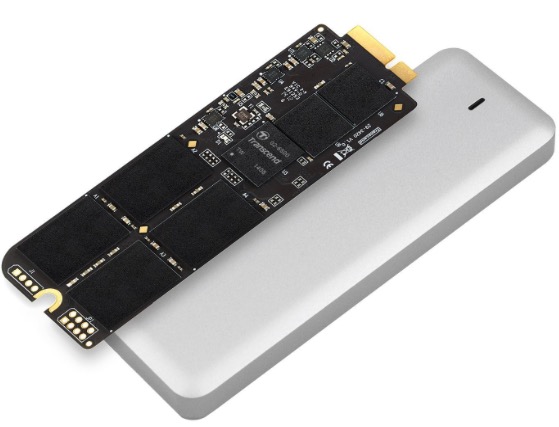
There are many brands and types of replacement SSD drives to choose from, you can research this if you want to, or if you have a preferred brand then go with that. My particular choice for this project was this Transcend 240GB SSD Upgrade Kit. I like the Transcend option for several reasons; it’s well priced, it’s very fast, it’s highly rated, it offers a good warranty, and it comes with a complete upgrade kit which includes an enclosure for the old SSD as well as the necessary screw drivers to complete the job. The Transcend SSD upgrade kit is basically an all-in-one solution, meaning you won’t need to shop for the screw drivers independently (and yes, other brands offer some similar package solutions, Transcend just happened to be the best overall deal when I was shopping for this MacBook replacement drive)
- Transcend JetDrive 480GB for MacBook Air (late 2010 – mid 2011 models) Upgrade Kit
- Transcend JetDrive 480GB for MacBook Air (mid 2012 model) Upgrade Kit
- Transcend JetDrive 480GB for MacBook Pro Retina 13″ (late 2012 – early 2013 models) Upgrade Kit
- See other Transcend SSD mac Upgrade kits here on Amazon
And yes you can absolutely buy a different compatible SSD that does not come in a kit as well, just be sure you get the appropriate pentalobe screwdrivers and insure compatibility with the drive and the Mac. It’s entirely up to you.
Step 3: Back Up the Mac
You need to backup the Mac before you change or attempt to replace the SSD drive. I recommend setting up Time Machine backups on the Mac at a minimum, and some more advanced users like to do this in addition to using SuperDuper or Carbon Copy Cloner tools to clone the drive directly over.
The only exception to this is if the drive is completely dead or missing, and then obviously there is nothing to back up.
![]()
Do not skip a backup, if you don’t backup you won’t have anything to restore the Mac to, and the replacement drive will not have your data on it. That’s not what you want. Using Time Machine also offers the advantage to being able to perform a clean install (of El Capitan or whatever else) on the replacement SSD and then restoring the Mac from the Time Machine backup after installation.
Do not skip backing up the Mac. Seriously.
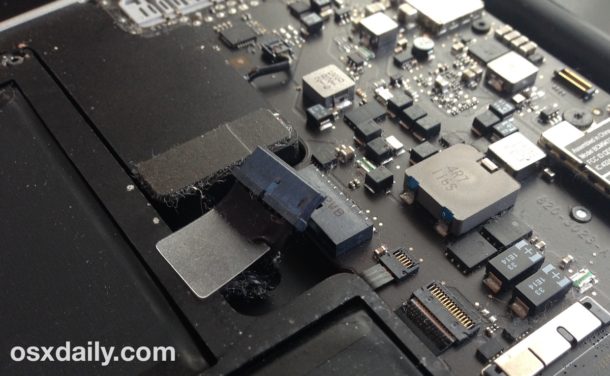
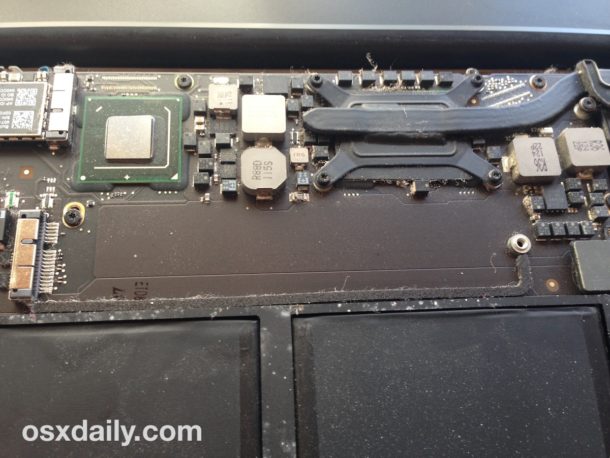
Step 4: Upgrading and Replacing the MacBook Air SSD
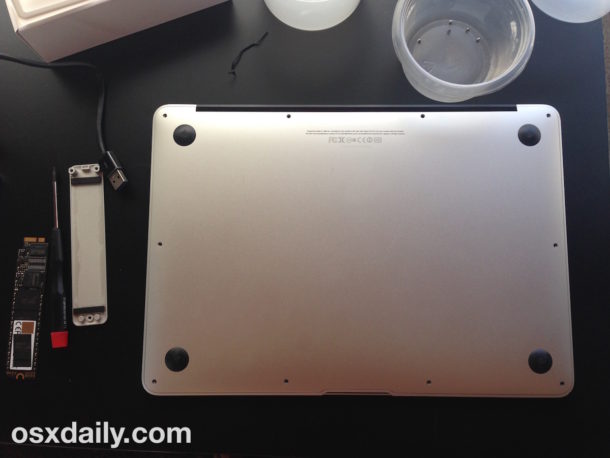
Now comes the fun part; opening the Mac and swapping out the old SSD with the new replacement SSD. Get some sort of containers or a cupcake tray so that you have somewhere to keep the screws in, keeping mind that there are multiple screw sizes, lengths, and types that you’ll encounter. I like to arrange mine by size and general location of where they come out of the Mac.
This part of the process is the most technical. Users who have a strong background in tinkering with electronics will likely be comfortable on their own, but almost everyone else is going to want to review some sort of guide that details the process well. Rather than reinvent the wheel, we recommend following the detailed iFixIt guides as they are well explained, detailed, and thorough.
- iFixIt.com: MacBook Air Repair Guides – find the appropriate model and year, and choose the appropriate “Solid State Drive Replacement” guide for the Mac
- MacBook Air 13″ (mid 2012) SSD replacement walkthrough guide
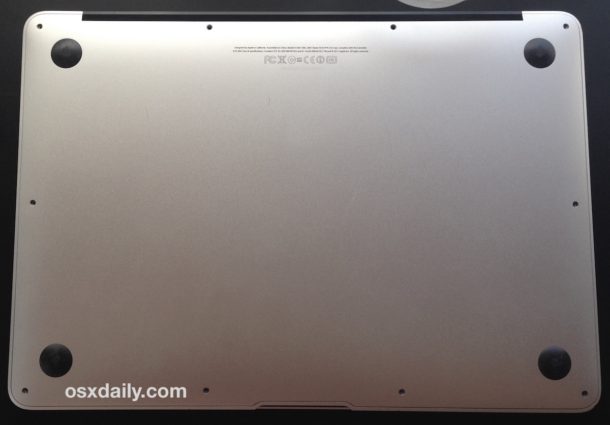
Basically what you’re doing is disconnecting the Mac from a power source, unscrewing the bottom panel and lifting it off, disconnecting the internal battery, then replacing the SSD. If you follow the iFixIt guide they rate the difficulty of a MacBook Air SSD replacement as “moderate” but I am confident that anyone with patience and the ability to follow instructions can get the job done rather easily, even if they’re a relative novice.
I highly recommend following the thoroughly detailed aforementioned iFixIt guide, but here are the basic steps if you’re curious as to what you’re getting yourself into:
1 – Removed the screws from the bottom of the MacBook Air (the screws are temporarily stored in the little bins above the Mac)
2 – Disconnect the internal battery – don’t forget this (and don’t forget to reconnect when finished)
3 – Remove the stock SSD drive (it is held in by another screw)
4 – Replace with the new SSD drive, screw it in, then reconnect the internal battery
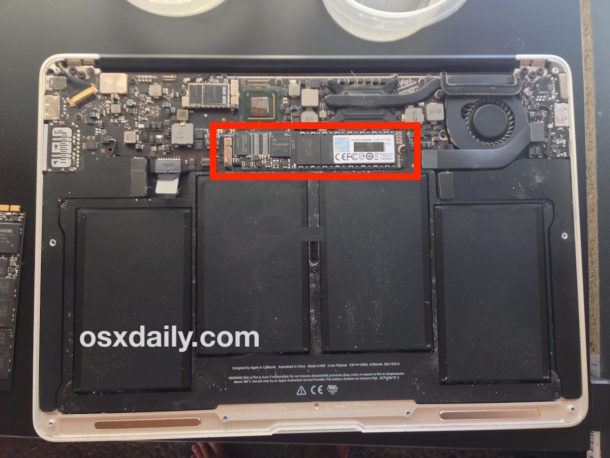
5 – Put the bottom lid back on and screw it back in, done!
Once everything is sealed back up again, you’re ready to go. Now it’s on to the software part.
Step 5: Reinstalling Mac OS X and Restoring Data
Admittedly I do things in this tutorial a bit different than some other technical people do; mainly that I put a blank SSD drive into the Mac, which then required an OS install and restore, rather than cloning over the drives first. Cloning the drive ahead of time is often the best approach, but in this particular instance it wasn’t possible however because the internal stock SSD had completely failed (question mark on boot, confirmed with Apple Hardware Test), meaning there was nothing to clone. Fortunately there was a recent Time Machine backup however, which is why I went with the install and restore approach.
If you want to go the cloning route, Carbon Copy Cloner and SuperDuper are both excellent and get the job done.
Anyway, what I did in this scenario was two steps; perform a clean Mac OS X software install using a bootable USB flash key, then restore from Time Machine during setup. It worked perfectly. We’ve covered these topics before, so if you want to go this particular route (typically necessary if the original SSD failed) then refer to the following detailed walkthroughs:
- Clean install OS X Mavericks (you can clean install OS X El Capitan, macOS Sierra, or any other Mac OS X release too
- Restoring a Mac from a Time Machine backup
Keep in mind that if you’re restoring a Mac from a Time Machine backup, you can start that process immediately after clean installing Mac OS X during the setup process.

(Quick side note: you can also attempt to restore the Mac SSD from Time Machine directly, but doing so means you typically have to re-create the Recovery partition manually and you may encounter EFI partition errors, both of which are avoidable if you just perform a direct clean install of Mac OS X system software ahead of time).
Once Mac OS X and the data has been restored to the drive, the Mac is ready to go and use as normal with a nice new shiny SSD! Enjoy!
Have any experience replacing or upgrading a Mac SSD? Share your experiences or ideas in the comments below.

Replaced the SSD in my Mac Air 2017. I used QNINE (QNINE M.2 NVME SSD Adapter Card voor Upgrade MacBook Pro (Retina Late 2013 – Mid 2015) en MacBook Air (Mid 2013-2017) on Amazon) adapter and Kingston A2000 1TB drive.
I’ve got a Mid-2012 Macbook Air that I changed out the SSD to 256 using the OWC Aura product. No problems at all – but it still only has 4gb of ram and sucks it up pretty quickly now I have installed Sierra!
8gb was a preconfigured option on these models and from what I can tell the RAM is soldered in.
Has anyone upgraded one of these, and can you tell me how and using what RAM?
Thanks!
Phil
I had replaced the Hard drive with a Samsung SSD on my Macbook pro 2009 model as well as upgraded the RAM to 8GB. Recently after upgrading to OS x El cap the laptop freezes on restart or start after shut down. Fortunately I am able to restore from my time machine back up but it is irritating to frequently restore which itself takes about 2 to 3 hours. Apple considers this laptop as vintage. If I wish to use the SSD and my RAM on a new laptop what do you suggest ?
I was just thinking about doing this MBP (mid 2009). Now I am thinking to go ahead but not upgrade from Mavericks (10.9.5). Can you tell me if you resolved this issue?
Apple has a replacement program:
https://www.apple.com/support/macbookair-flashdrive/
I had an SSD fail on a 2011 MacBook Air, I feel like it should have been covered but alas it was not. Had to replace it myself with a Transcend kit.
The point of this techblog is for enthusiasts. Please save your links for the apple forums.
Whether replacing MB Air flash storage or 2.5″ SSDs in MB pros, I use a different approach. I take the new SSD, plug into *my MacBook Pro using an enclosure or SATA-to-USB cable from Apricorn, install a fresh OS X El Cap & create an admin called “temp”. Install the new SSD into the client’s macbook pro or air, zap the PRAM & boot into “temp”, then plug the old SSD or HD as an external & migrate user data & apps, boot into old user. Remove “temp”, check for updates & done.
can you please also show how to replace the mbt 11″ battery?
thanks
I believe the OWC offering is less expensive and a better value.
Trim support is is extremely important and can be achieved on Macs running 10.10.3 or higher by typing in “sudo trim force enable” in terminal. Cindori Trim can be run for older OS’s.
The command is: sudo trimforce enable
how to optimize your Solid State Drive for Linux Mint 18, Ubuntu 16.04 and Debian (Trim and Swappiness)
https://sites.google.com/site/easylinuxtipsproject/ssd
Don’t forget to enable TRIM if you use a third party SSD as the replacement upgrade.
I have replaced the hard drive on many Macs before, glad to see it’s still easy to replace the SSD on MacBook Air. It looks like it is easy to replace SSD on MacBook Pro too.
Unfortunately I think the latest MacBook have soldered in SSD, like iPad. Limits what we can do with our hardware substantially. Major problem if there is a hardware failure too.