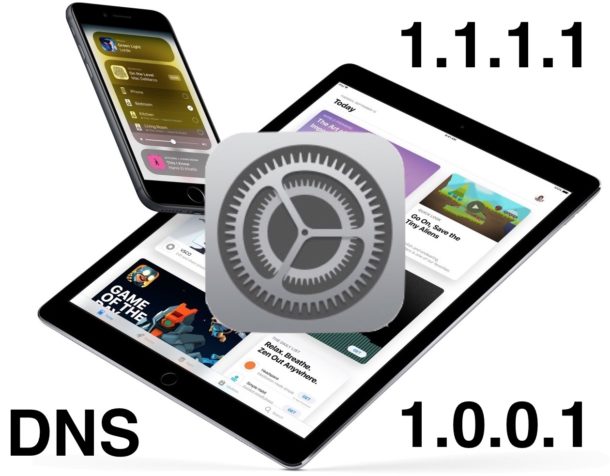
How to Use the Fast & Private CloudFlare DNS on iPhone or iPad
If you’re interested in using the Cloudflare DNS service on an iPhone or iPad, you’ll find it’s a fairly easy configuration process to setup your iOS device to use the ultra-fast and privacy-focused DNS service. This tutorial will detail that setup process.
If this sounds like Greek, then here’s a super quick background: DNS is what associates an IP address (like 1.1.1.1) to a domain name (like Cloudfare.com), you can think of it a bit like a directory service. That lookup and association process takes a small amount of time to complete. Thus, using a faster DNS provider can make DNS lookups a bit faster, and may offer a subtle performance boost to internet usage. Additionally, with CloudFlare DNS, that process is apparently not logged with your IP and the data is not sold or used to target ads, which makes it a bit more private than some other DNS providers and some ISP default DNS. If you’re interested in learning more, you can find more info on the Cloudfare blog.
If some of this sounds familiar to you it’s probably because we covered how to use Cloudflare DNS on Mac OS, but by request we’re now covering how to setup the same DNS service on an iOS device like an iPhone or iPad. You can custom configure DNS on virtually every iOS device ever made, so it does not matter what version your particular iPhone or iPad is running.
How to Setup Cloudflare DNS in iOS
If you have ever changed DNS settings on an iPhone or iPad before then this process will be familiar to you, except of course you’ll be using the Cloudflare DNS IP addresses. If you’re unfamiliar with the steps, here they are:
Note: if you have any pre-existing custom DNS configuration, be sure to make note of those settings before making any adjustments.
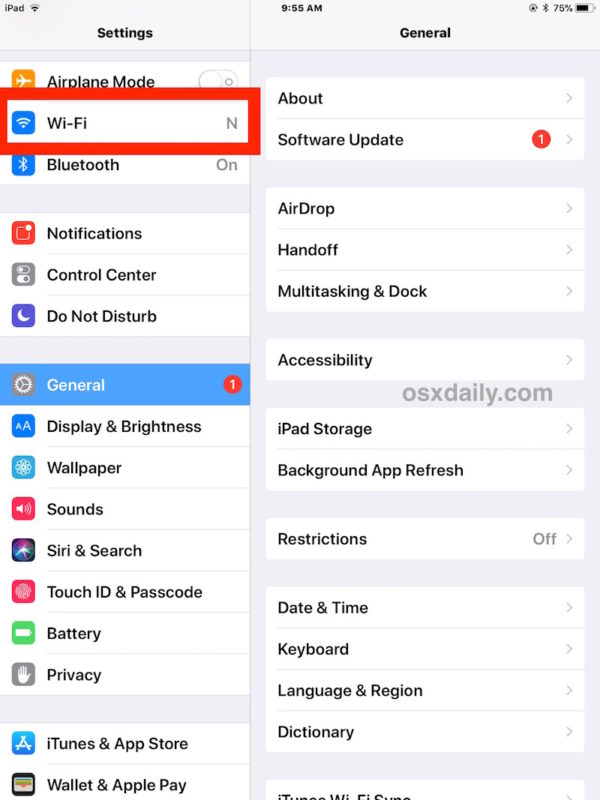
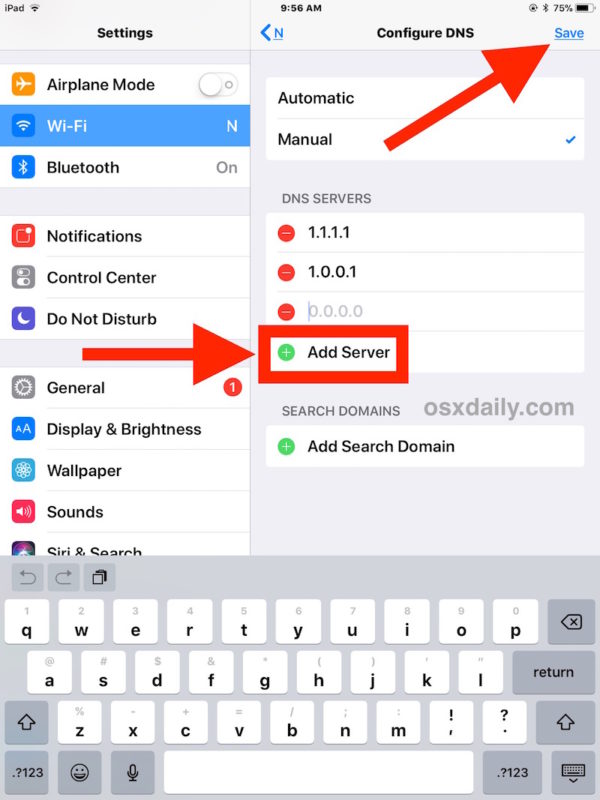
- Open the “Settings” app in iOS
- Tap on the “Wi-Fi” option in settings
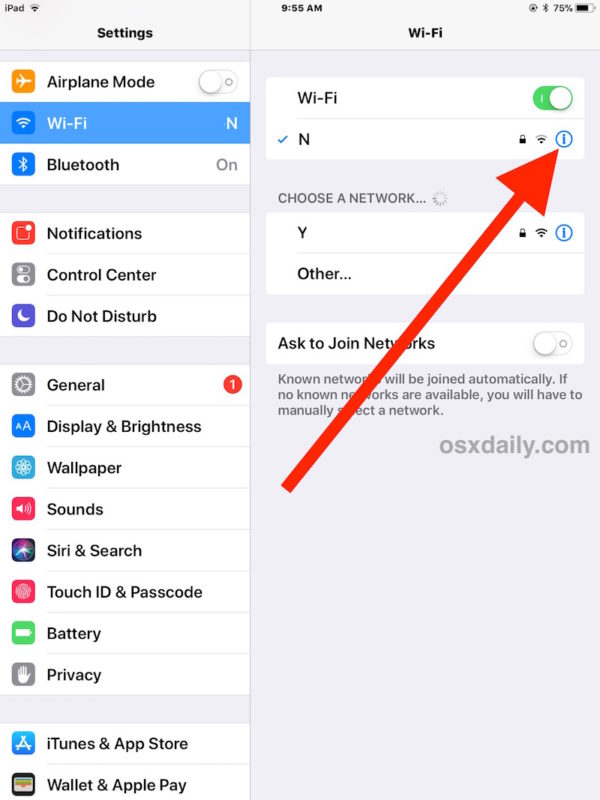
- Tap on the “(i)” button next to the currently connected Wi-Fi router name
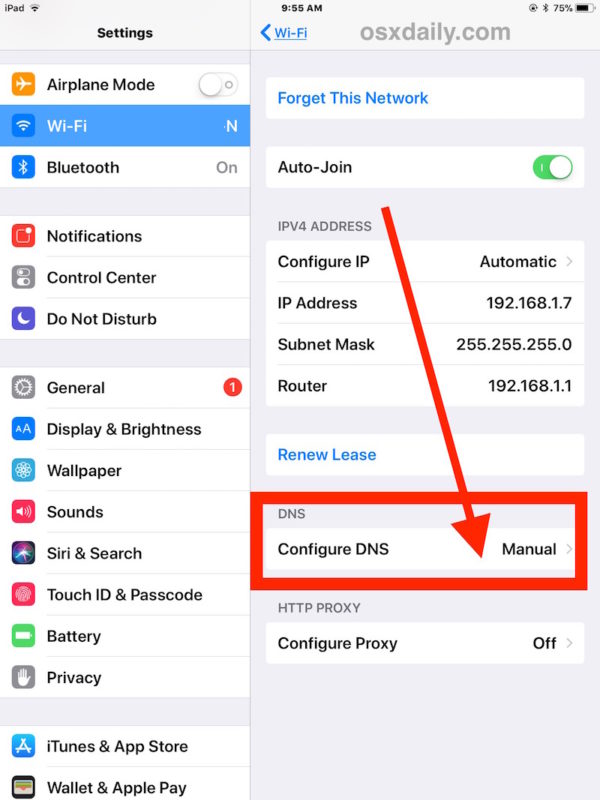
- Under the DNS section, tap on “Configure DNS”
- Tap “Manual” under the Configure DNS section
- Under “DNS Servers” tap on “Add Server” and enter the following IP address:
- Tap on “Add Server” again and enter the following IP address:
- Tap on “Save” to keep the Cloudflare DNS settings
- Exit out of Settings and use the internet on your iPhone or iPad as usual
![]()
1.1.1.1
1.0.0.1
The DNS settings change should take effect immediately and not require any additional action, nor rebooting, but if you’re having connectivity issues after making any adjustments then a restart of the device or clearing DNS caches on iPhone or iPad may be helpful. If you still don’t get a connection, make sure the syntax is entered correctly, and if that still fails then delete the entries and go back to your default DNS settings.
If you’re not sure if you want to use Cloudflare DNS, or you aren’t sure that Cloudflare DNS will be any faster than your current DNS, you can access a site like DNS Performance to see how the performance is for your general region of the world. It’s not going to be faster for everyone, but for some users it may be. Setting custom DNS settings can often lead to speedier wi-fi use on iOS devices and computers, so it’s worth investigating for many users.
As for the privacy aspect of Cloudflare DNS, the company says they will not log IP addresses, sell your data, or use any of that data to target ads. Whether or not that is appealing to you likely depends on your views of internet privacy in general, but it may be of interest to some users. It’s not a VPN nor will it anonymize internet usage in anyway, but it may offer some additional privacy during DNS lookups and DNS resolving behavior when using the internet from an iOS device configured to use the service.
Of course this walkthrough is geared towards iPad and iPhone users, but if you’re on a Mac and the topic interests you, then you can follow instructions to use Cloudflare DNS on Mac OS too.

I wanna stop this how? Pla
Go to the config page of your router, DHCP, DHCP settings, then change the DNS numbers to whatever you want. Click save, depending on the router it may require a reboot. Personally I would not switch to this until more is known. OpenDNS is doing quite well at the moment for me
As I said, some of these routers have unchangeable DNS addresses; they point to the ISP servers (Xfinity in this case).
Some of us have routers supplied by an ISP; and some of these routers have DNS numbers baked in.
This is the case with my current Xfinity router (yea, I’ve checked; cannot change the DNS numbers).
So, the question is: if I set up these Cloudflare numbers on my Mac, how do I know that the router isn’t using its own DNS addresses, and not the Cloudflare ones I specify on my mac?
Yes my question as well, on my MacBook Pro it seems to retain the manual settings when I change routers, but not on my iPhone.
Also what happens on mobile networks?
Thanks.
I am having the same problem. The changes work on my iMac but not on my iPhone.
Use a VPN. Select the same DNS server.
Then everytime you use the VPN, the DNS server is set for you.
Is there a way to apply DNS settings system wide and not only for a specific network?
No.
The only thing you could do is apply this DNS settings to the modem/router in order to force every connected device to use the CloudFlare service, so you don’t have to set up every single device as well.