How to Use Hello Screen Saver from iMac on Other Macs
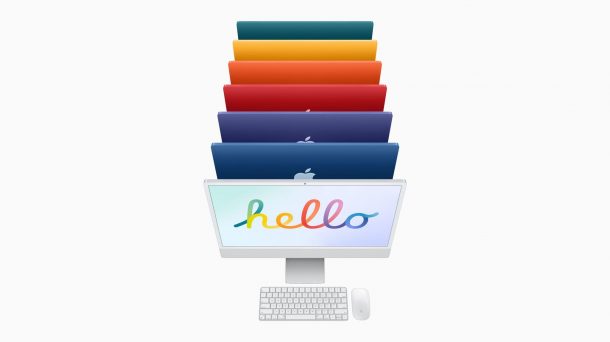
Did the new Hello screen saver on the M1 iMacs grab your attention? It’s kind of a modernized version of the retro “Hello” text on the first Macintosh. If you thought it looked snazzy, you may be excited to find out that you can get this screen saver on your Mac too, even if it isn’t powered by the M1 chip.
Apple introduced the new redesigned M1-based iMacs just recently, and to compliment their new colorful product, they’ve added an all-new screen saver along with the macOS Big Sur 11.3 software update. Although you’ll need the new iMac to access it from your list of screen savers, there’s a workaround that you can use to enable it on older Macs. Yes, this includes Intel-based Macs too.
Interested in learning what you need to do? We got you covered. Here, we’ll be guiding you through the various steps on how to use iMac’s Hello screen saver on other Macs within a matter of seconds.
How to Use iMac Hello Screen Saver on Other Macs
First and foremost, you need to make sure that your Mac is running macOS Big Sur 11.3 or later. You can check this by clicking on the Apple menu -> About This Mac. Once you’re done, here’s what you need to do.
- Pull down the “Go” menu in the Finder, choose “Go To Folder” and enter the following path:
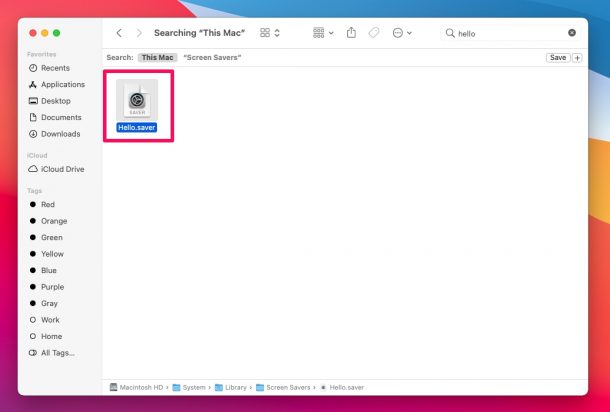
- This will open the Library Screen Saver folder where you’ll be able to find the “Hello.saver” file along with other screen savers. You can use the search bar at the top to filter and find this screen saver if you have too many. Now, drag and drop this file on to your desktop.

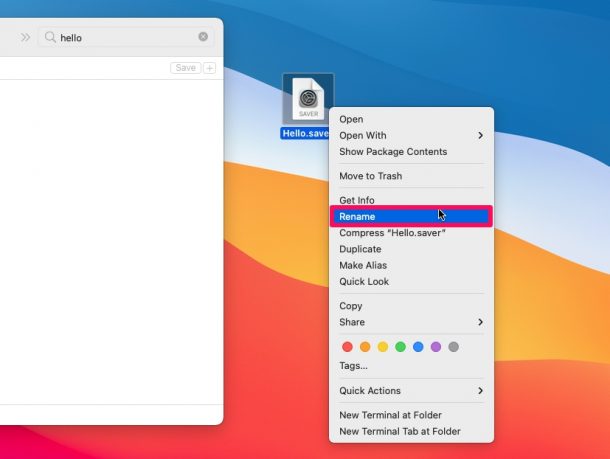
- Next, you need to rename this file to something else. Right-click or control-click on the file that you moved to the desktop and choose “Rename” from the dropdown menu. Rename the file to Hello.saver file to “Hello1.saver” or something similar.
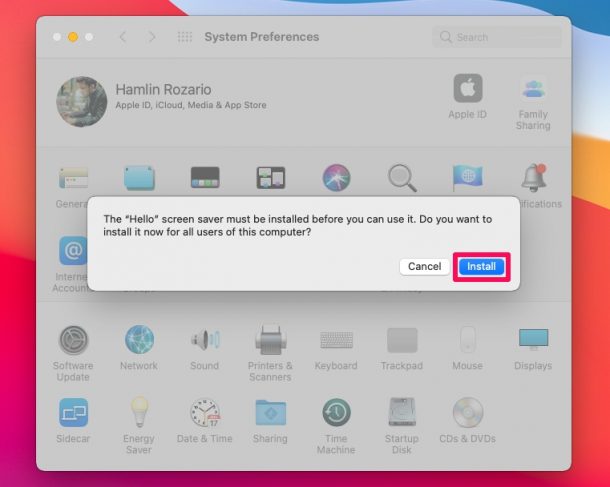
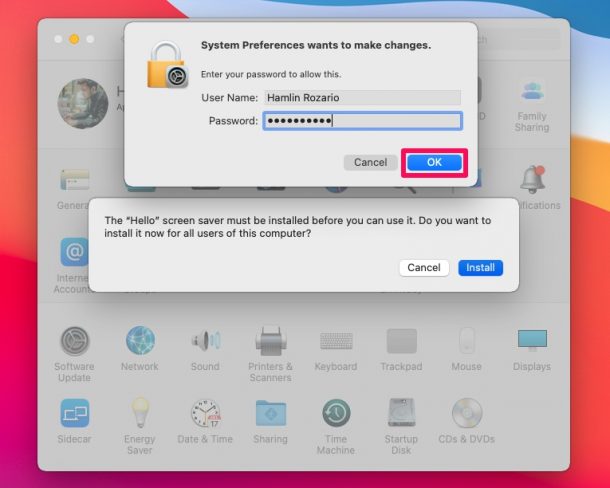
- Now, when you double-click on the file, you’ll get the following pop-up message on your screen. Click on “Install” to proceed.
- You may be prompted to enter your Mac’s user password to authorize and continue. Type in the details and click on “OK”.
- Once installed, you’ll automatically be taken to the Desktop & Screen Saver section of System Preferences. Here, if you scroll down, you’ll find the new Hello screen saver at the bottom.
/System/Library/Screen Savers/
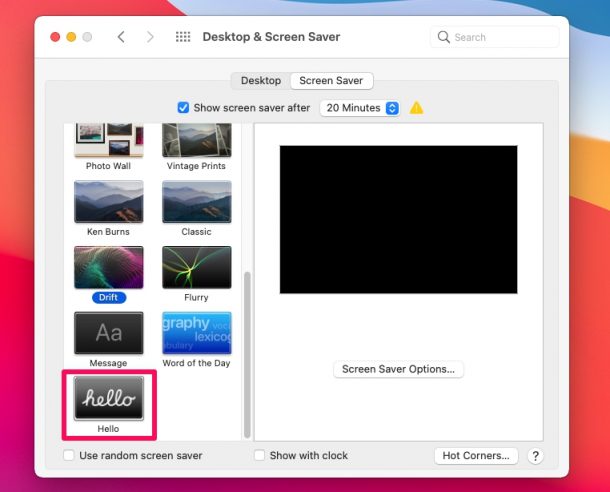
Now if you click to choose the Hello screen saver, it will set as the default.
Don’t forget to rename the Hello.saver file that you move to the desktop. If you click on the file without renaming it, you will get the message that the Hello screen saver is already installed on your system, even though it doesn’t show up along with your other screen savers.
You have additional ways to customize this screen saver by clicking on Screen Saver Options in the same menu. You can choose from three different themes namely Soft Tones, Spectrum, and Minimal. By default, the screen saver displays the Hello message in all supported languages, but you can disable this and set it to your main language.

The screen saver also matches your system appearance, meaning it adjusts automatically depending on whether your Mac is using Light mode or Dark mode. This can be disabled from the Screen Saver options too, if needed.
Did you get nostalgic feelings from the Hello screen saver? What do you think of this screen saver, or do you prefer another? Let us know your thoughts in the comments.

Linda
After installing, clean up the desk top by moving the Hello1.saver file to trash.
I am running Big Sur and I just copied and pasted the link, worked with no problem.
Command-shift-g also brings you the ‘Go To Folder’
I have no Library option under Go…
For reference, you must hold the Option key down to see the user Library option in the Go menu
However, the System Library with the Screen Savers directory is located elsewhere:
/System/Library/Screen Savers/The article has been updated to make this less confusing
Hello.saver is not in my Library/Screen Savers folder. I am running Big Sur 11.3.1.
Try looking in:
/System/Library/Screen Savers/
It was not in my User library folder, it was located within System Library. Instructions have been updated to reflect this.
Thanks! That works.