How to Add HomeKit Accessory Without QR Code
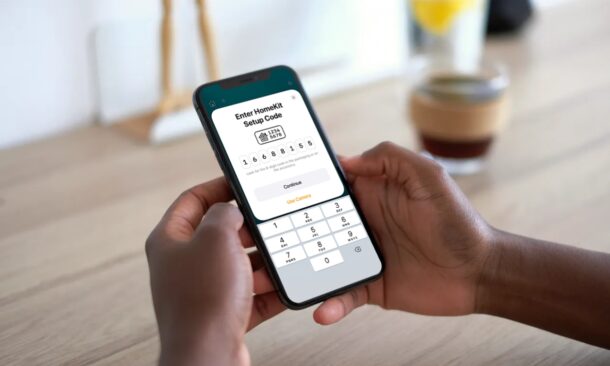
Are you facing issues setting up a new HomeKit accessory using the Home app? Perhaps, you’re unable to scan the QR code successfully, or the product’s QR sticker is damaged? Thankfully, you have other options to configure your accessory, as it’s possible to manually add accessories without having to use a QR code. We’ll cover this process using the Home app on an iPhone, but it’s the same for the Home app for iPad and Mac too.
Most HomeKit accessories come with a QR code sticker or NFC label either on the packaging box or on the device itself. If you’ve had any experience with scanning QR codes before, you know that they’re not always perfect when it comes to scanning and detecting, particularly if the QR code is damaged, or even missing. The good news is that Apple gives users an alternative option to set up and it’s shown right next to the QR code. You may have noticed some numbers next to the QR code and this is exactly what you’ll have to use if you ever run into problems.
Trying to figure out what you need to do with the code? Wonder no more, we’ll walk through the steps so you can add a HomeKit accessory directly, without needing to use a QR code scanning process.
How to Add Accessory to Home app Manually on iPhone, iPad, Mac, Without Using a QR Code
Typically, you can scan the QR code using your iPhone’s camera app and you’d get the link to add it to your Home. Manually adding the accessory requires a slightly different approach. Here’s what you need to do:
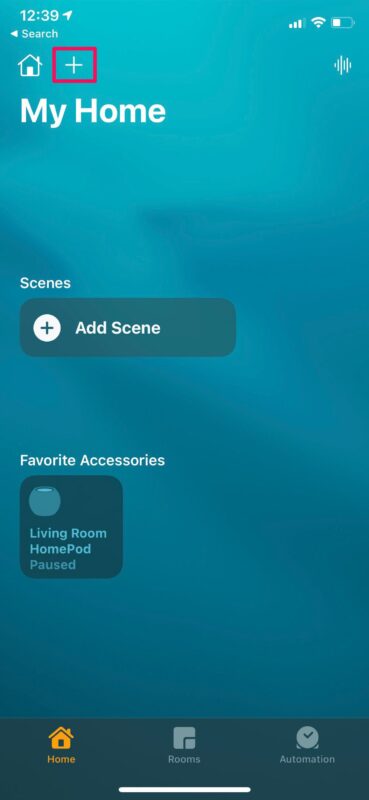
- First, launch the Home app on your iPhone or iPad.

- You can add a new accessory from the Rooms section or Home section of the app by tapping on the “+” icon at the top.

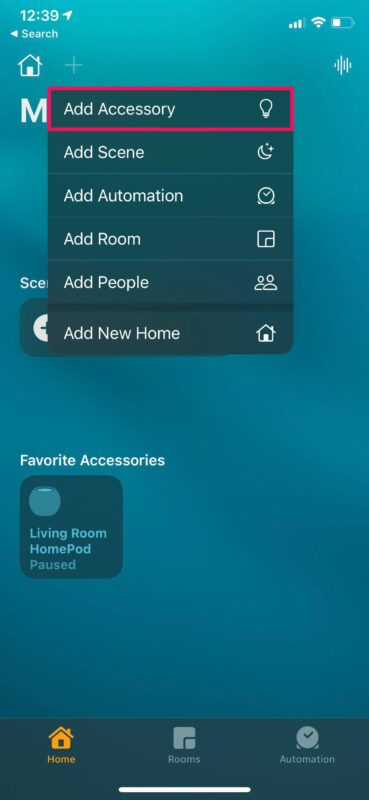
- Next, choose “Add Accessory” from the context menu that shows up.

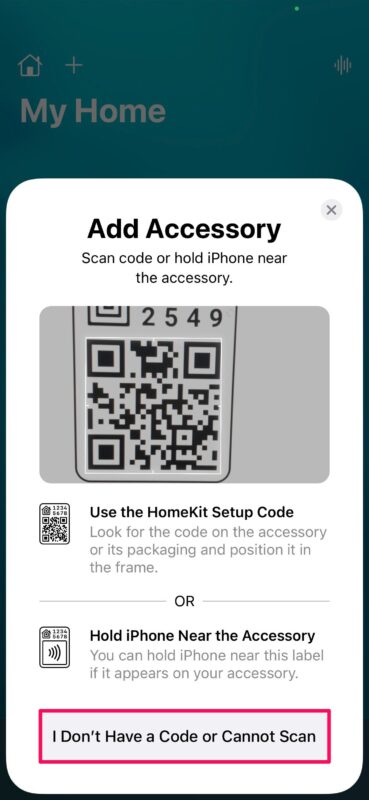
- Now, tap on “I Don’t Have a Code or Cannot Scan” since your scanner is simply not working for some reason.

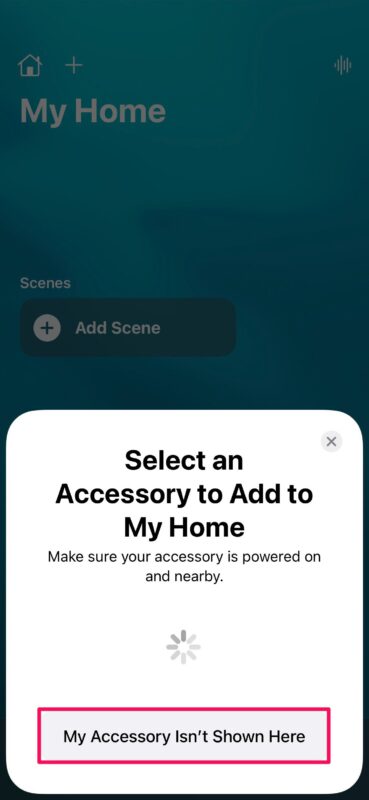
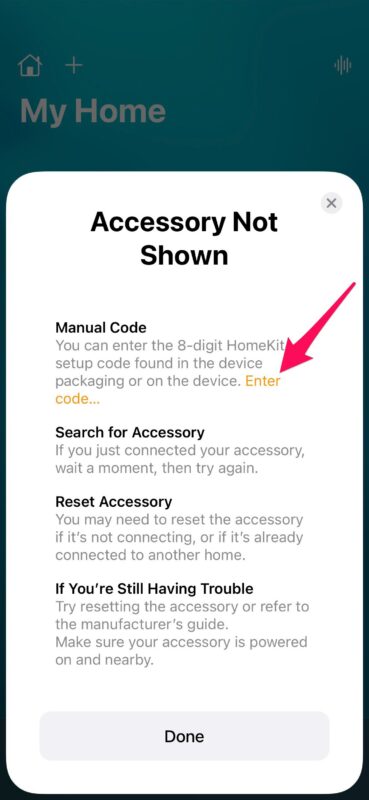
- The Home app will now try to find the device if it’s powered on and nearby. However, if it fails, you can tap on “My Accessory Isn’t Shown Here”.

- The Home app will now show what other options you have. The first one that’s listed here is the Manual Code method. Simply tap on the highlighted yellow text that says “Enter code” to get started.

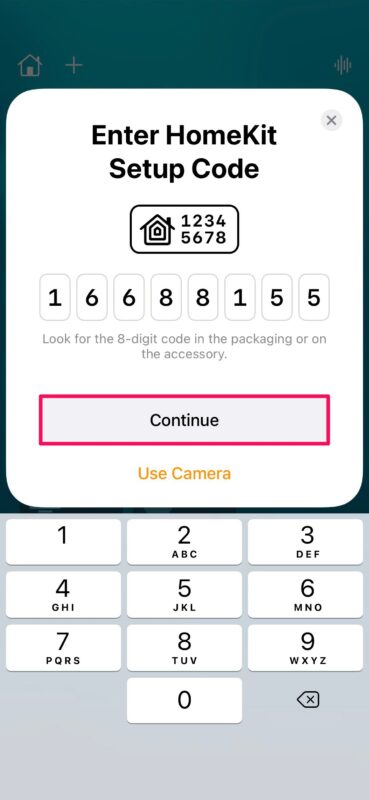
- Now, get the code from the accessory or its packaging and type it in. Tap on “Continue”.

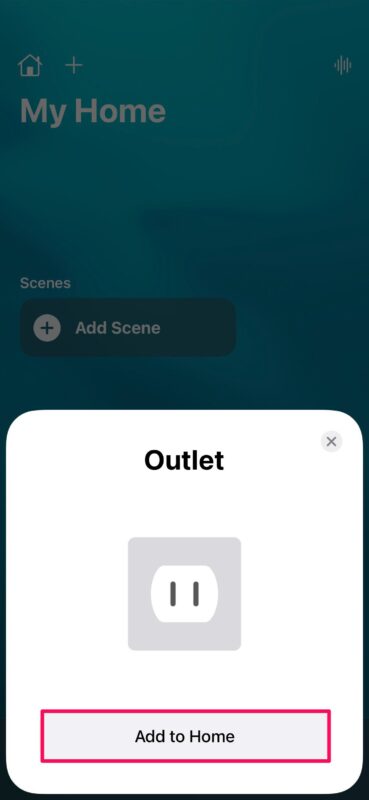
- The Home app will now identify and show what accessory it is. Tap on “Add to Home” to complete the set-up.

That’s how you pair your new HomeKit accessory with Home app, without the QR code or NFC label.
From now on, whenever you run into issues while setting up a new HomeKit device or accessory, you can make use of the manual method to add it to the Home app. Don’t forget that your accessory must be powered on and nearby. As for the accessories that require a bridge, make sure the bridge is powered on.
If you’re still having trouble pairing your HomeKit accessory you may find these tips to be helpful, and you may need to reset it first before you can pair it, especially if it was previously connected to another Home network. This would sometimes be necessary if you purchased a used or pre-owned accessory. Having said that, as long as you have the 8-digit code and the accessory is powered on, you should have no trouble getting it connected.
Were you able to configure your new accessory and add it to your Home network without any problems? Was the QR code on the packaging box damaged? Or is your camera fogged up to properly scan the code? What do you think of HomeKit? Do share your personal experiences and make sure to leave your valuable feedback in the comments section down below.

