How to Set Up HomePod Multiple User Voice Recognition
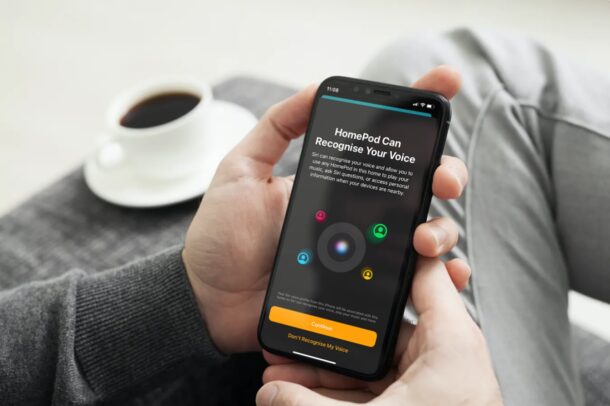
Did you know that Siri on your HomePod is capable of distinguishing between different voices? Although this is a feature that’s not activated by default, it’s something that you can set up within a matter of minutes for HomePod using your iPhone or iPad.
Apple’s HomePod and HomePod Mini smart speakers are designed for the home, and hence, it’s expected to be accessed and used by more than one person. This could be your family members, relatives, or even friends who visit your home frequently. By being able to recognize voices, Siri can complete personal requests for multiple users, like making phone calls using their iPhones, adding calendar events, reminders, etc.
How to Set Up HomePod Multiple User Voice Recognition
To use multiuser on your HomePod, your iPhone or iPad must be running a modern iOS version. Also, make sure your HomePod is updated as well. Two-factor authentication must be enabled on your Apple account too. Once you’re done with all this, just follow the steps below:
- First, launch the Home app on your iPhone or iPad.

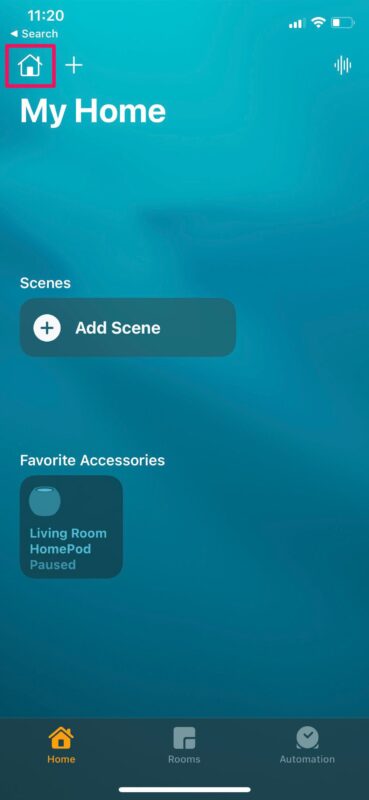
- Now, you as the primary user of the HomePod need to add the people who you want to utilize multiuser features. This is done by adding people to your Home group. To do this, simply tap on the home icon at the top-left corner of the Home app.

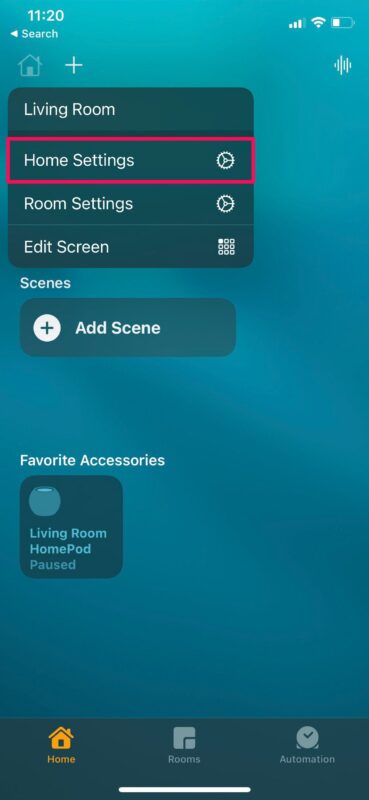
- From the pop-up menu, select “Home Settings” to continue.

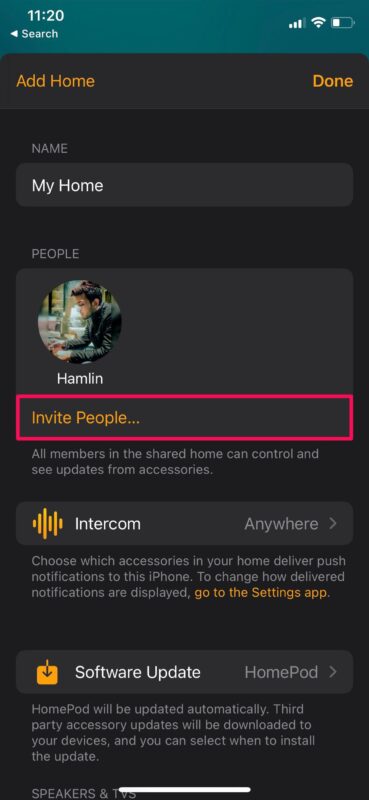
- In this menu, tap on “Invite People” and type in the Apple ID email address of the users that you want to add. People in your family group will show up automatically. Tap on the Apple ID name to send the invite.

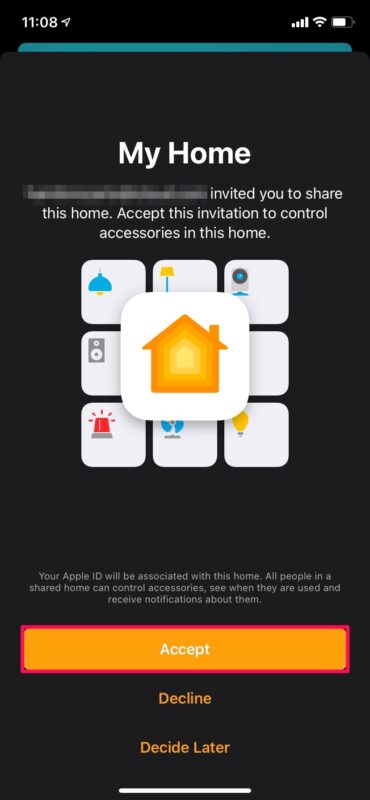
- The recipient will get a Home invitation as a notification on their iPhone or iPad. Tapping on the notification will launch the Home app and display the screen shown below. Simply tap on “Accept” to join the Home group.

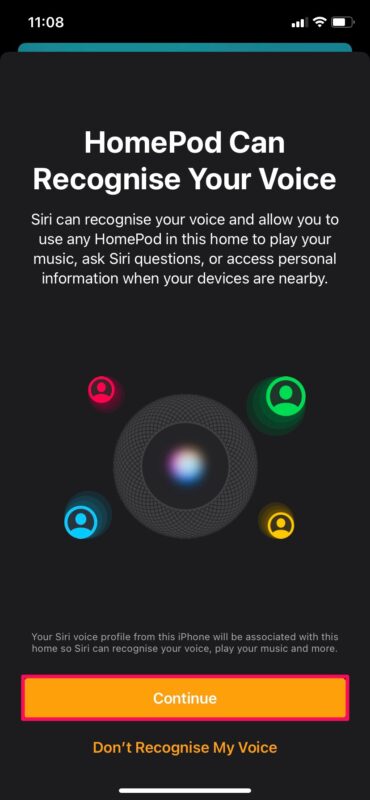
- Now, the user will be informed that HomePod can recognize their voice. They can tap on “Continue” to confirm and start using this feature.

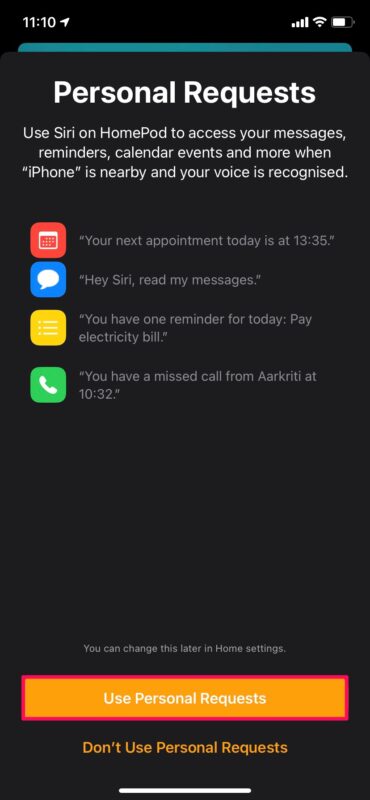
- In this step, the Personal Requests feature will be detailed to the user. Simply tap on “Use Personal Requests” to enable it on the HomePod.

There you go. You’ve successfully set up multiple users on your HomePod.
If the recipient doesn’t get the Home invitation as a notification on their device, they’ll need to simply open the Home app to get the option to accept it. You can repeat the above steps to add all your family members to your Home group and make sure Siri on your HomePod can recognize all their voices.
From now on, whenever a personal request is made using the HomePod, whether it’s making a phone call or sending a text message, Siri will be able to recognize the voice and then access the particular user’s iPhone to complete the tasks. However, the voice recognition feature may sometimes have trouble identifying the voice properly. As a result, Siri may ask you who you are every now and then. You simply need to respond with your name that matches your Apple ID name and you’re good to go.
We hope you were able to set up the multiuser feature on your HomePod without any issues. How often do you make personal requests on your HomePod? Do your family members utilize this feature regularly too? Feel free to share your personal experiences and make sure to drop your valuable feedback in the comments section down below.


Invite sent, person tries to accept but times out and inviter loses ability to invite or add devices!