How to Use Hide My Email for Signups from iPhone & iPad
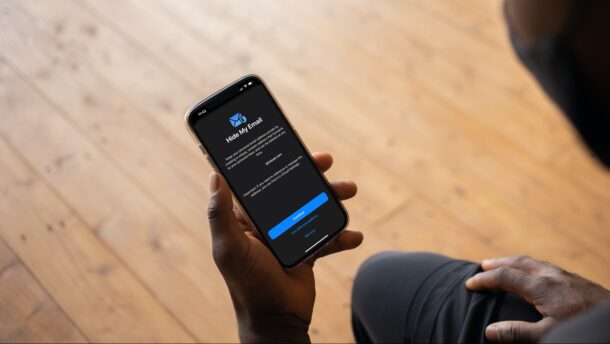
Apple has introduced a neat new privacy feature called Hide My Email, which, as the name implies, hides your email during service signups. This feature was introduced alongside iOS 15 and iPadOS 15 software updates as part of the company’s new iCloud+ service that focuses on user privacy, and is included in all existing paid iCloud plans.
Today, many users want to keep their personal email addresses private, which is difficult since websites and services constantly ask for your email to create an account. Well, Hide My Email is Apple’s workaround for this matter. With this feature, you can generate a unique and random email address that forwards all the emails it receives to your personal inbox. This way, you don’t have to give away your actual email address when you sign up on websites, as the randomly generated email address is used instead. You can then later remove that generated email address if you’d like to as well, all without ever revealing your real email address to the service. This could help to prevent spam and unwanted emails. This is kind of like the ‘Sign in With Apple’ feature, except that it works everywhere, and you can generate email addresses on the fly.
Hide My Email requires an initial setup to generate the random email address, so let’s walk through the steps to use the Hide My Email feature from your iPhone and iPad.
How to Set Up Hide My Email on iPhone & iPad
We’d like to quickly point out that you must be subscribed to a paid iCloud plan to use Hide My Email on your device, and the device must be running iOS 15/iPadOS 15 or later to find this feature in the settings. As long as you meet the requirements, you can follow the steps below:
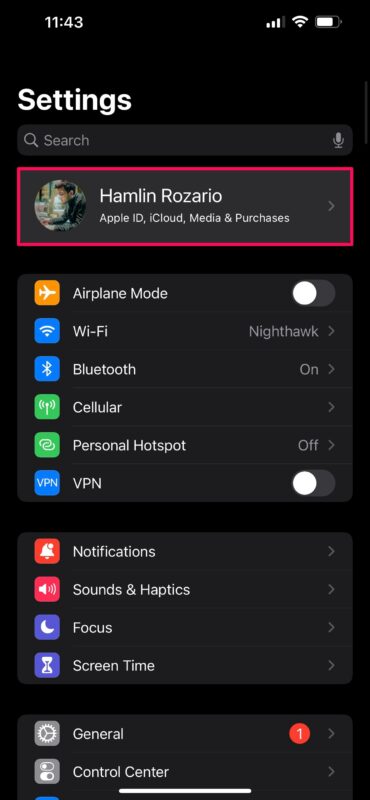
- Head over to “Settings” on your iPhone or iPad. Here, tap on your “Apple ID name” located right at the top.

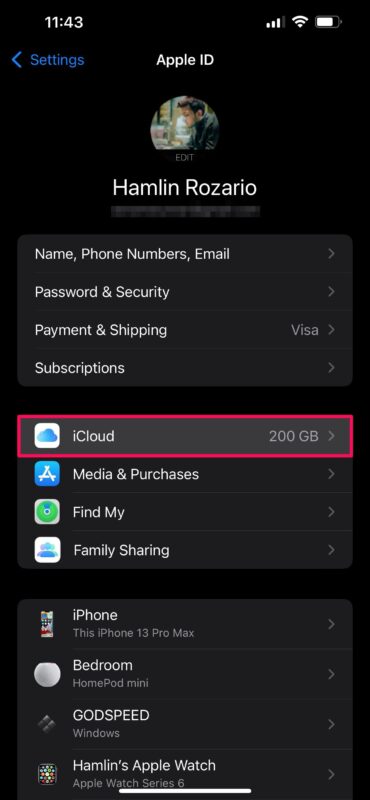
- Next, select iCloud from the Apple account settings menu.
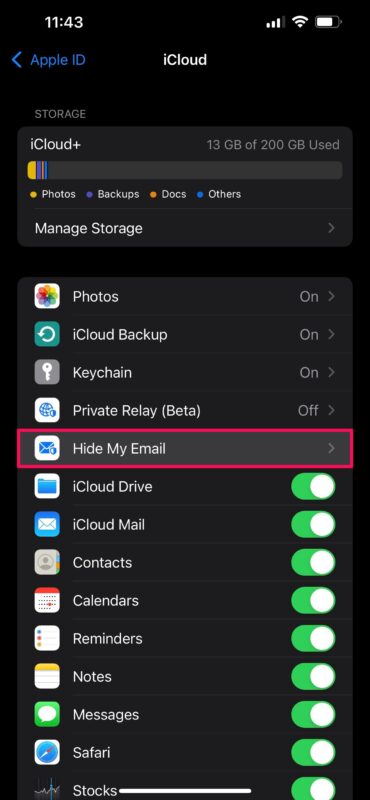
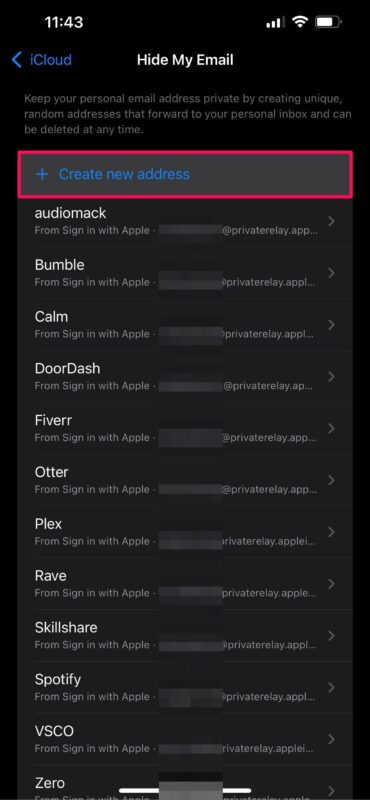
- Below your iCloud storage details, you’ll find the “Hide My Email” feature along with the other apps and services. Tap on it.
- If this is your first time using Hide My Email, you’ll see a setup screen. If you’ve used Sign in with Apple to hide your email before, you’ll see all those websites here. Tap on “Create new address” to get started.
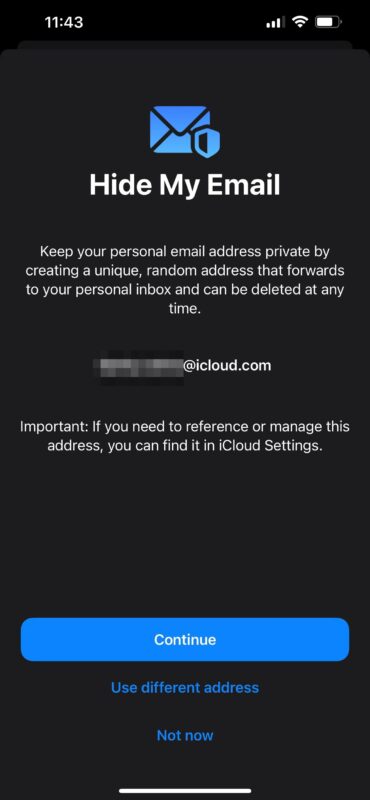
- You’ll now see a random iCloud email address on your screen. If you don’t like the address, you can tap on “use different address” to generate another one. Or, you can tap on “Continue” to proceed to the next step.
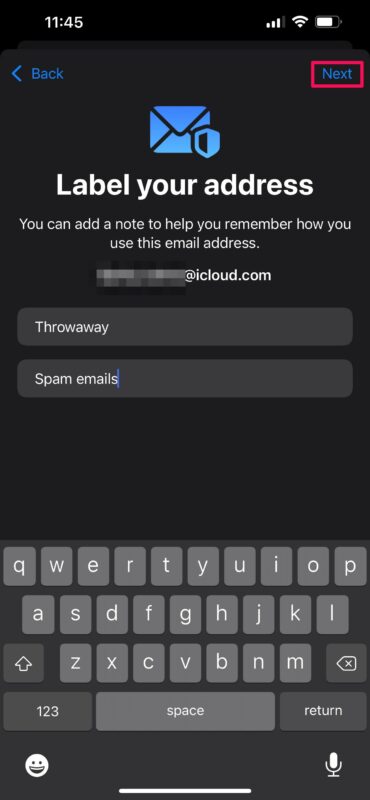
- Now, all you need to do is label your new email address, give it a note so that you know what you’re using this random email address for, and then tap on “Next” to finish the setup.
That’s it. You’ve successfully created a random email address with Hide My Email. You can now use this email address when you need to sign up for an online account anywhere on the web.
You’ll also find the Hide My Email suggestion appear in many sign-ups and email address forms on apps and websites, where you can quickly generate an email address to use the feature with.
How to Deactivate or Delete Hide My Email Address on iPhone & iPad
Sometimes, you may want to switch to a different email address for Hide My Email, or stop receiving emails to/from randomly generated addresses. In these cases, you’ll need to deactivate or delete your active random address using the following steps:
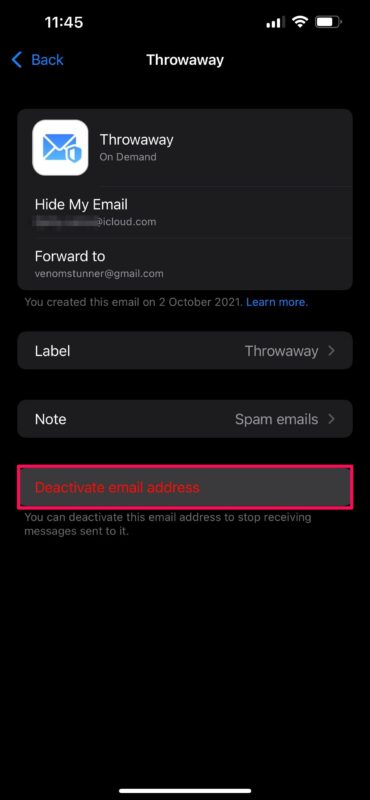
- Go to the Hide My Email settings from the iCloud section just like we did above. Here, scroll down and find your labeled random email address. Tap on it to change its settings.
- Now, simply tap on “Deactivate email address” to stop receiving emails that are sent to this address in your personal inbox. Choose “Deactivate” when you get the confirmation pop-up.
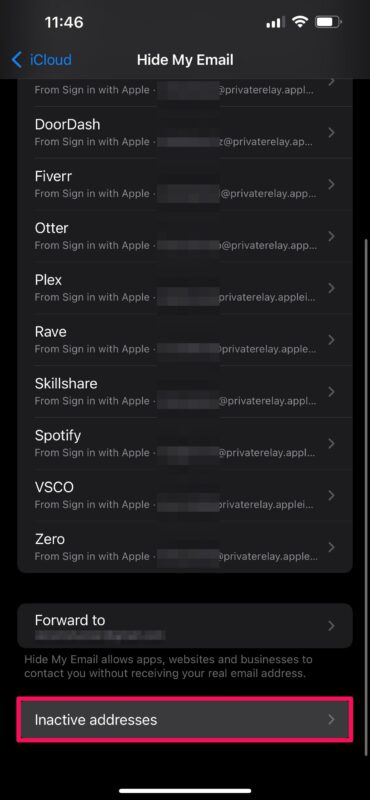
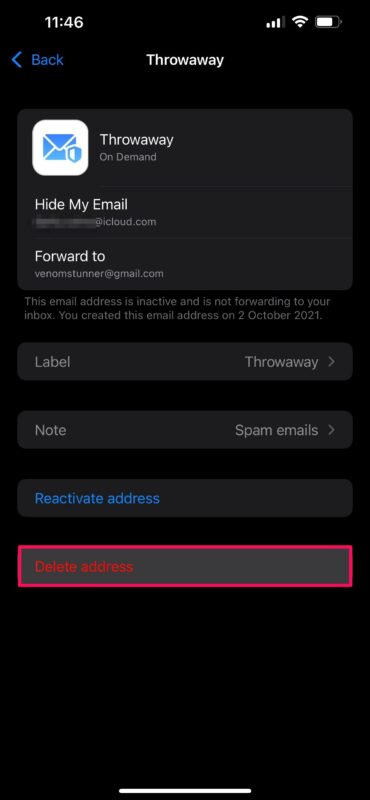
- Once deactivated, it will be considered as an inactive address. If you want to delete it permanently, you can scroll down to the bottom and tap on “Inactive addresses.”
- Select the random address and then choose “Delete address” to permanently remove it from Hide My Email. You can use the same step to reactivate your address when you need it.

There you go. Now, you know what exactly you need to do to set up, deactivate, or delete a random email address with Apple’s Hide My Email.
If you aren’t aware, the new Hide My Email feature is similar to ‘Sign in With Apple’ that came out the previous year. Both allow you to hide your email from apps and signups. However, unlike the newer Hide My Email, which works everywhere on the web, Sign In With Apple is limited to the apps and sites participating in the program.
Likewise, you can also set up and use Hide My Email on your Mac, provided it’s running macOS Monterey or later. Besides Hide My Email, Apple’s iCloud+ service also includes a handy feature called Private Relay, which works sort of like a VPN to mask your actual IP address as you browse the web in Safari.
Are you enjoying these handy security features that Apple bundles with your iCloud plan? What are your first impressions of Hide My Email and Private Relay? Share your valuable thoughts with us, and don’t forget to leave your personal feedback in the comments section below.

My iPad won’t let me do this. I don’t understand why.
Same here, I’m running ipados 15.1 and can’t use Hide my email. It says cannot complete your request.
Be sure you have subscribed to the optional iCloud+ service before trying to use this.
If you have subscribed (for the monthly fee), and it’s still not working, you may have turned on a security feature in Settings -> Screen Time -> Content & Privacy Restrictions -> Account Changes -> don’t allow
change this to Allow, and make your change, and perhaps enable don’t allow account changes again.
Note the screen time account changes control is an extra precaution to prevent thieves from taking over your account if they get access to your iPhone. It’s important the screen time passcode is different than your iPhone passcode.