How to Make a Calendar Public on Mac
Are you looking to share your calendar with a lot of people from a Mac? In that case, adding those users to your shared calendar one by one can be a hassle. In such instances, you can make use of the Public Calendar feature that the Calendar app on macOS has to offer.
Most people who use the stock Calendar app on their Macs may already be familiar with the built-in calendar sharing feature. The feature allows you to conveniently organize meetings with your colleagues, collaborate on events, or simply stay updated with your schedule in general. In addition to this, there’s an optional Public Calendar feature which if enabled will allow anyone to subscribe to a read-only version of your calendar.
How to Make a Public Calendar from a Mac
The following steps are applicable to all recent versions of macOS since you’re basically just using the built-in Calendar app. So, without further ado, let’s get started:
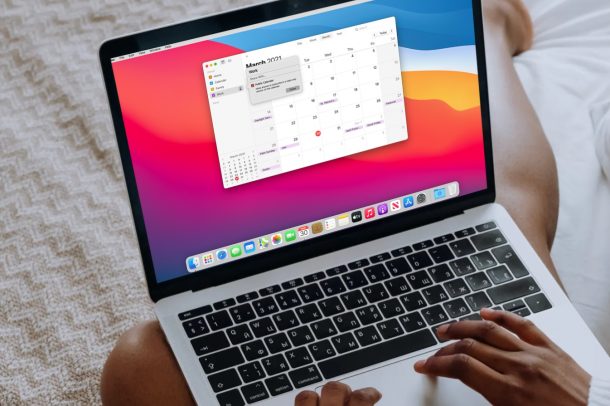
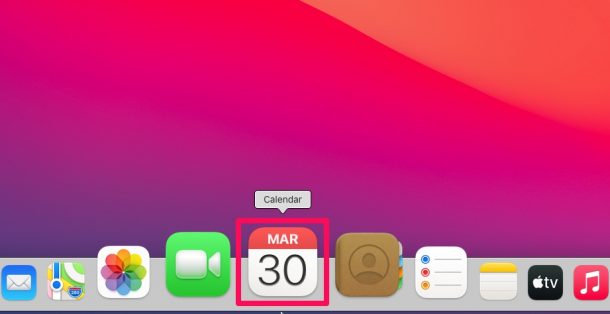
- First, open the Calendar app on the Mac.

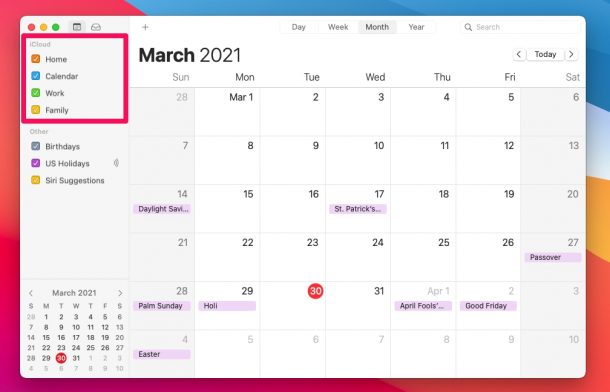
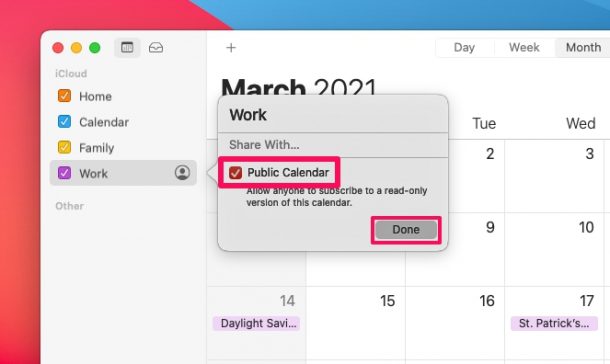
- Once the Calendar app opens into a new window, you’ll find the list of calendars on the left pane. Right-click or Control-click on any of the calendars that are stored on iCloud to access the context menu.
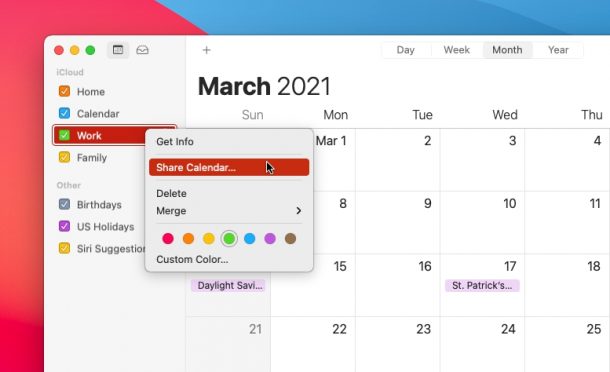
- Now, choose the “Share Calendar” option from the context menu to access the sharing options.
- Here, you’ll find the option to add a person to your calendar as usual. However, right below the Share With field, you’ll find the Public Calendar option. Check the box next to Public Calendar to enable it and click on “Done” to save your changes.
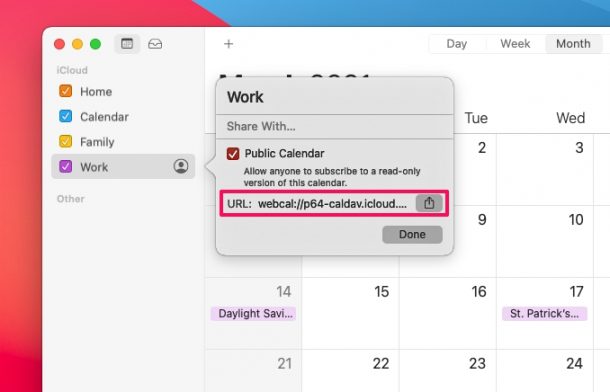
- The calendar is now public. You’ll now notice the calendar URL being displayed in the sharing menu. Just click on the share icon to share your calendar URL with anyone who wants access.
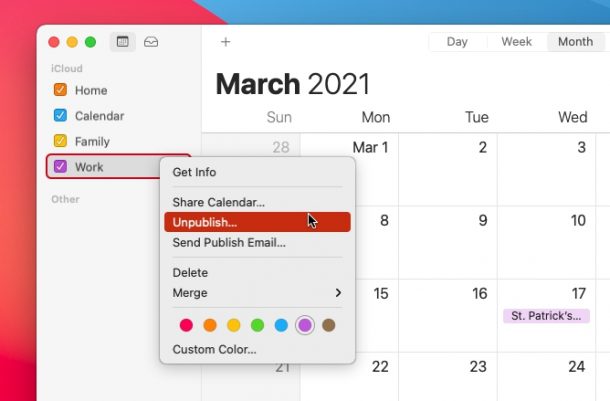
- To stop sharing your calendar with everyone at any given time, you could simply uncheck the Public Calendar option or right-click on the public calendar and choose “Unpublish” from the context menu as shown below.
That’s all you have to do to make a calendar public on your macOS machine.
Note that just enabling the Public Calendar feature won’t make the calendar immediately accessible to everyone. Only the people who have your calendar URL can access your shared calendar and all the events stored in it. Unlike the regular sharing feature, you cannot remove a specific user from your shared calendar.
Additionally, the people who have access to your shared public calendar will not be able to make any changes to your calendar or the events in it since they basically just have access to the read-only version of your calendar. Therefore, if you want others to make edits as well, you’ll need to keep the calendar private and add the users one by one using the regular sharing method.
Do you own an iPhone or iPad as well? In that case, you may be interested in learning how to use the Public Calendar feature using the Calendar app for iOS and iPadOS devices too. It’s pretty identical in terms of how you set it up and how it works.
If you wanted to share your calendar events with a large group of people, the Public Sharing feature should help considerably. Share your experiences and thoughts in the comments.
