How to Add a Mouse to macOS Sonoma & Ventura

Many users like to use an external mouse with their Mac, but not everyone knows how to sync and add a mouse to their Mac. The process of pairing a mouse with a Mac is fairly straight forward, but like many things with modern MacOS versions and the System Settings experience, it may be less than obvious to some.
We’re going to walk through the steps of setting up a mouse for use with MacOS Sonoma and MacOS Ventura. Whether you plan on using an external mouse with a MacBook Pro, MacBook Air, iMac, Mac mini, Mac Studio, or Mac Pro, you’ll find the process is the same.
How to Pair & Setup a Mouse with MacOS
- Turn on the Mac and make sure that Bluetooth is enabled, if you have not done so already
- Place the Bluetooth mouse into pairing mode, this is usually done by pressing or holding a button on the bottom of the mouse and then a light will often flicker to signal that it is in pairing mode
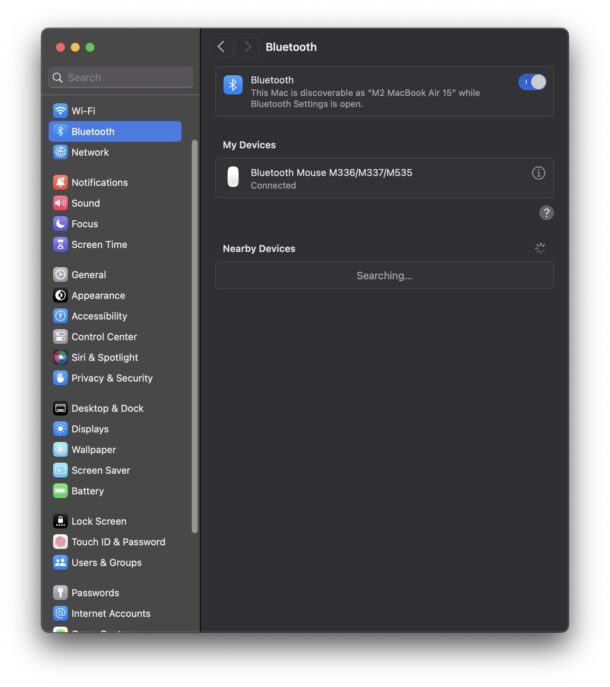
- On MacOS, go to Apple menu > System Settings > Bluetooth
- When the mouse shows as a found Bluetooth device, hover the cursor over the mouse and to find and click on the “Connect” button
- In a moment, the mouse will be under the “My Devices” list in the Bluetooth settings panel on MacOS, signifying the mouse is paired and ready to use
- Now back in System Settings, scroll down to the “Mouse” section to configure your mouse settings, including things like; tracking speed, natural scrolling, secondary click (aka right-click), double click speed, scrolling speed, and advanced mouse options
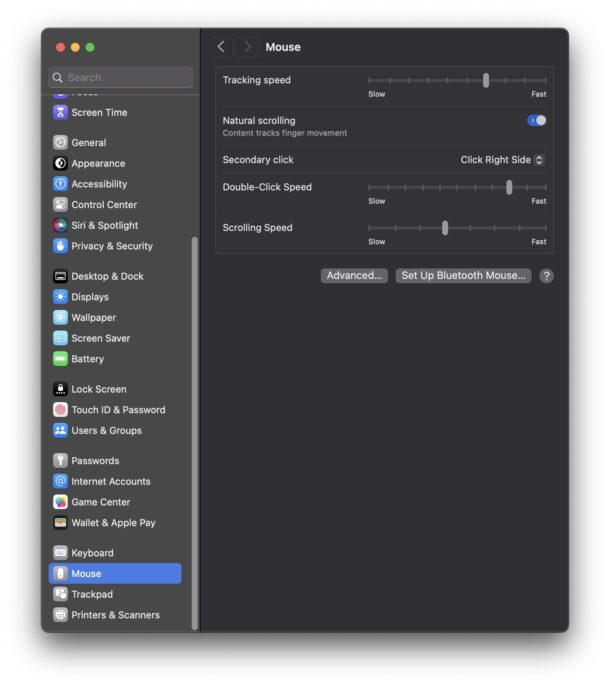
Note the “Mouse” System Settings panel will not appear unless a mouse is actively connected to the Mac.
Now you’re free to use the mouse as usual.
If you’re new to using a mouse with a Mac, you might want to familiarize yourself with the right click, which offers many useful contextual menus within apps and the operating system itself, and get familiar with the scrollwheel, which makes reading documents and websites much easier.
Using an external mouse with a MacBook Pro or MacBook Air can be a nice way to turn a Mac laptop into a desktop workstation, and some users simply prefer a mouse to a trackpad anyway. Also, some desktop Mac users may prefer a third party mouse to the bundled mouse or trackpad that comes with an iMac, for example.
In the article here, the Bluetooth mouse paired is the popular and reliable Logitech M535, which is being replaced by the Logitech M650. Both are excellent mice that work well with all Macs.
For most users, a mouse works flawlessly with the Mac. However, it’s worth noting that some macOS Sonoma users are experiencing issues with mouse clicks not working, if you experience that, go here to troubleshoot.

This article is great, if you have a mouse currently connected, so that you can navigate to through the menus. A better article would have been how to enable a Bluetooth mouse without already having a touchpad or mouse connected. The actual key shortcuts needed to navigate the menus.
You can’t even install macOS without a pointing device attached, and so cannot get to bluetooth preferences either.
If you have a new mac, or haven’t turned off the setting previously, a mac will automatically look for both keyboard and mouse via bluetooth at startup.