How to Use Hover Text on Mac to Magnify On-Screen Text
Hover Text is an interesting macOS accessibility feature that magnifies the text that’s displayed on your screen. This can be any regular text, a menu item, or a button. As the name suggests, when you hover your mouse cursor over the text, macOS will magnify and display a high-resolution zoomed version of the text in a separate window. This makes reading content a whole lot easier, whether the font size is tiny, or even if the screen is far away from where you’re seated.
This is an accessibility feature, but really anyone who use computers with high-resolution displays can potentially find utility in this capability. Anyone who has used any modern device knows how difficult it can be to read tiny text sometimes, so having the ability to magnify text is obviously helpful. Sure, you can increase system text size by using a scaled display resolution, but that’s not always practical, or even possible. Whether you have a multi-monitor setup, are using a display that’s at a range (as is often the case when giving presentations or using a TV as external display), or even if your eyesight is less than perfect, this is exactly where Hover Text comes in handy on the Mac.
How to Use Hover Text to Magnify Any Text on Mac
Before you get started, make sure your Mac is running macOS Catalina or later since Hover Text isn’t available in older versions. Now, let’s see what you need to do:
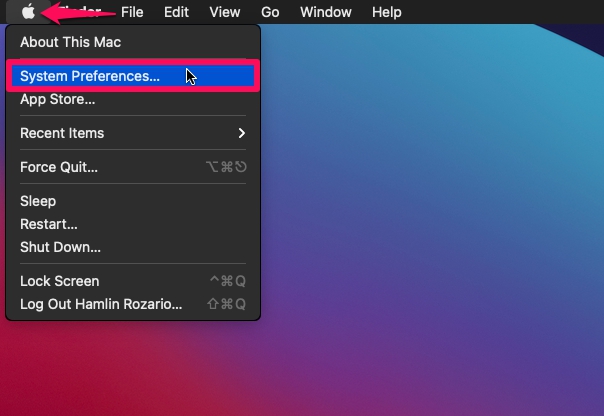
- Click on the Apple menu from the top-left corner and choose “System Settings” (macOS Sonoma, Ventura, and newer) or “System Preferences” (macOS Monterey and earlier) from the dropdown menu.

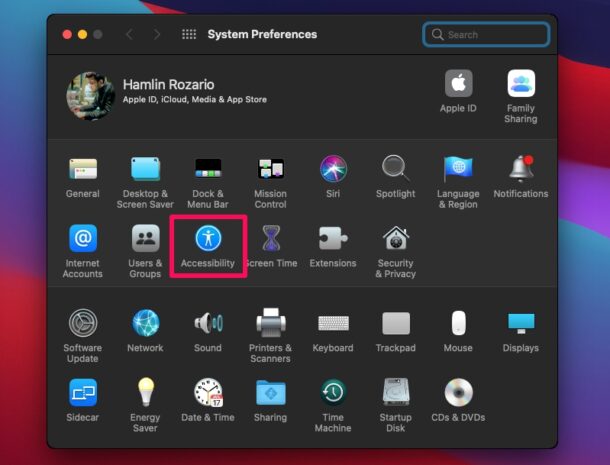
- Once the System Preferences panel opens up, click on “Accessibility” as shown in the screenshot below.
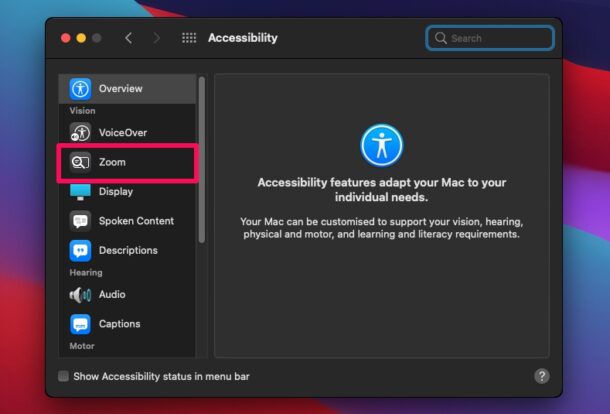
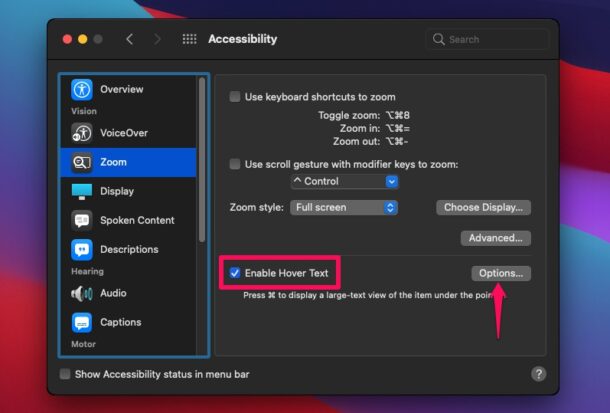
- This will take you to the Overview section of accessibility settings. Here, select “Zoom” from the left pane to proceed.
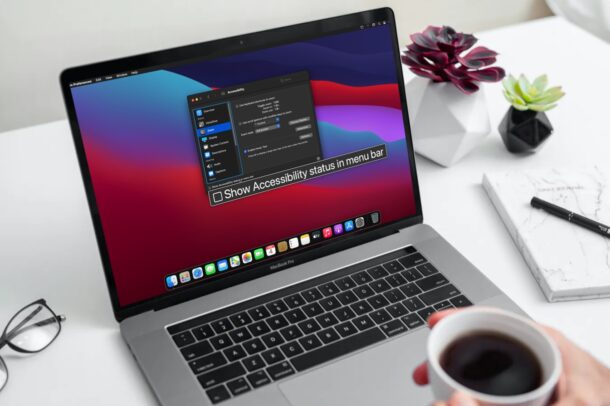
- Now, check the box next to “Enable Hover Text”. To further customize this feature, click on “Options” right next to it.
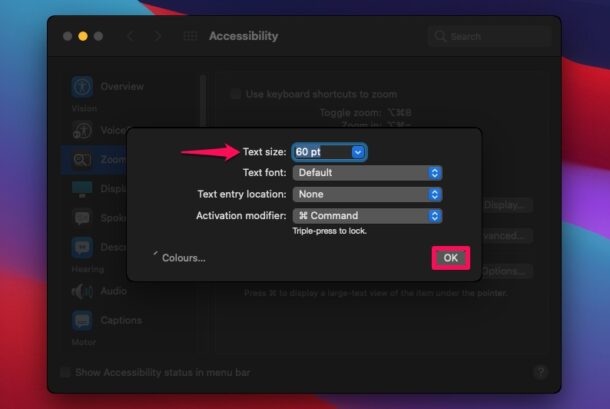
- This will give you access to additional settings for the Hover Text feature where you can change the text size, font style, and activation modifier. Once you’re done making the changes, click on “OK”.
- As per the default settings, if you hover the cursor over any text that’s displayed on your screen while pressing the Command key, macOS will bring up the zoomed version right below it, as you can see below.
There you go. You’ve learned how to make use of Hover Text to make reading easier on your Mac.
By default, the Command key is the activation modifier for Hover Text. However, this can be changed to a different key if desired, but you cannot completely remove it.
Having to press the activation key every time you want to use Hover Text might be inconvenient for a lot of users, especially if you rely on it quite often. In such cases, what you can do is press the activation key three times to lock Hover Text and then use it as much as you want. Once you’re done, you can triple-press the key again and exit Hover Text mode.
If you use a MacBook with a Touch Bar, you’ll have access to another similar feature called Touch Bar Zoom in the same menu right below Hover Text. Enabling this will bring up the Touch Bar at the bottom of your MacBook’s screen whenever you hold your finger on the Touch Bar.
We hope you were able to make good use of Hover Text whenever you needed an extra hand to read written content on your screen. What’s your overall take on this nifty accessibility feature and how often do you use it? What other macOS accessibility features have you tried so far? Do share your experiences and drop your valuable opinions in the comments section down below.

That looked interesting and thanks for the tip!
However (sorry) I’m in the habit of zooming the entire screen with the option-command + and option command – keys which works quickly and easily with just thumb and middle
The activation key is working for text and touch-bar zooming (mac book pro-Sonoma). However, pressing the activation key three times to lock Hover Text doesn’t work for me. I appreciate your recommendations.
The triple-click is an option you have to turn on, something not mentioned in the instructions.
Also not mentioned is that Sonoma doesn’t have an “Options” button, it has a circled ℹ︎ you have to click.
I used to like the ideal of high resolution screens and taking advantage of all that extra desktop space. Well, until my 60 something eyes told me different. Now I use the looks like scale of 1280 x800 on my 15 inch MacBook Air. Yeah, it looks like a throwback to those non-retina days. But it is more pleasing on my eyes than trying to use zoom features or a magnifier. Not so bad when I use Stage manager too. 20/20 people enjoy the screen real-estate while you can.
How cool. I have my desktop resolution set high, and there are occasions where the font is too small to read well. This will help.