How to Add or Remove Trusted Phone Numbers on iPhone, iPad, Mac

Want to link a new phone number to your Apple ID so that you can receive two-factor authentication codes? Thankfully, adding and removing trusted phone numbers is a pretty straightforward procedure and you can do this right on your iPhone, iPad, or Mac.
For people who aren’t aware, trusted phone numbers are used to verify your identity when you’re attempting to sign in to a new device with your Apple account, and also to help recover your account if you forget your password. By default, when you enable two-factor authentication on your Apple account, the phone number that you use with your iPhone is automatically added as a trusted number. However, you can remove this or add any other number according to your preference.
Looking forward to learning how you can do this on your iOS, iPadOS, or MacOS device? Then read on, we’ll cover the process for iPhone and iPad first, and Mac second.
How to Add or Remove Trusted Phone Numbers on iPhone & iPad
Before you go ahead with the following procedure, make sure you’ve enabled two-factor authentication on your Apple account. Once you’re done, simply follow the steps below to get started.
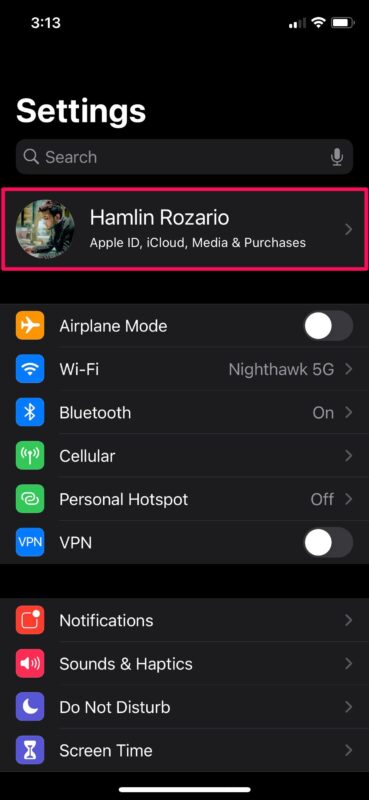
- Open “Settings” from the home screen of your iPhone or iPad.

- In the settings menu, tap on your Apple ID name located right at the top.
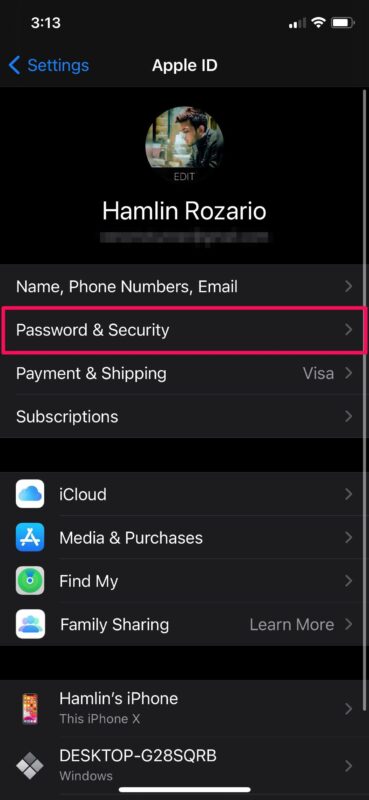
- Here, head over to “Password & Security” for managing your two-factor authentication settings.
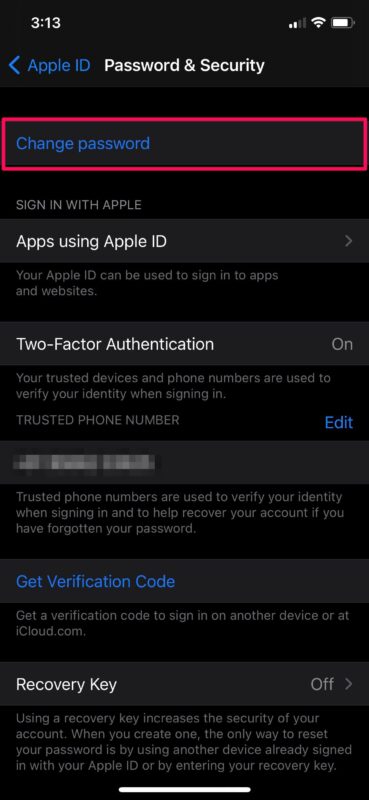
- Now, tap on “Edit” located to the right of Trusted phone numbers, as shown below.
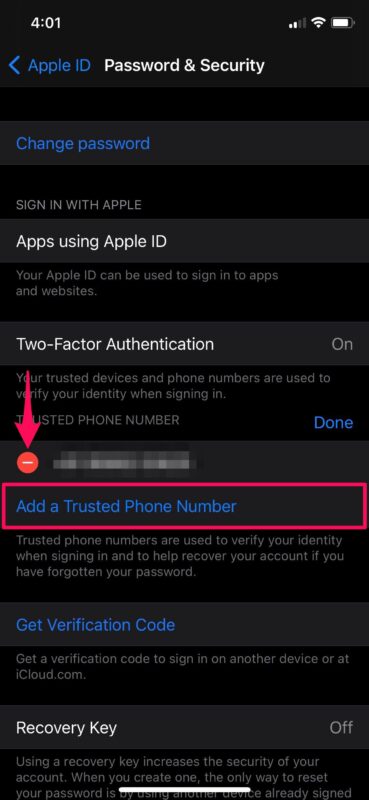
- Now, you can tap on the “-” icon right next to a phone number, to remove it from the trusted phone numbers list. On the other hand, to use a new phone number for receiving verification codes, tap on “Add a Trusted Phone Number”.
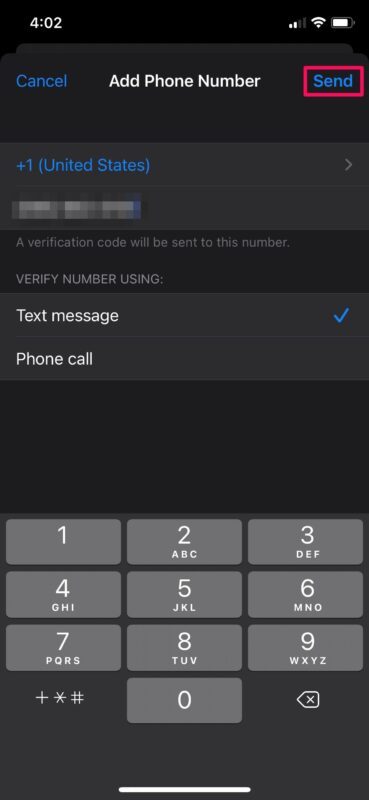
- You’ll be asked to enter your device passcode to proceed to the next step. Now, type in your new phone number and choose either “Text message” or “Phone call” for verification according to your preference. Tap on “Send” to receive the verification code. You’ll be prompted to type in the code that was sent to you.
That’s pretty much all there is to it. Now you know how easy it is to add or remove trusted phone numbers on your iOS device.
How to Add or Remove Trusted Phone Numbers on Mac
Be sure to have enabled two-factor authentication on your Apple ID.
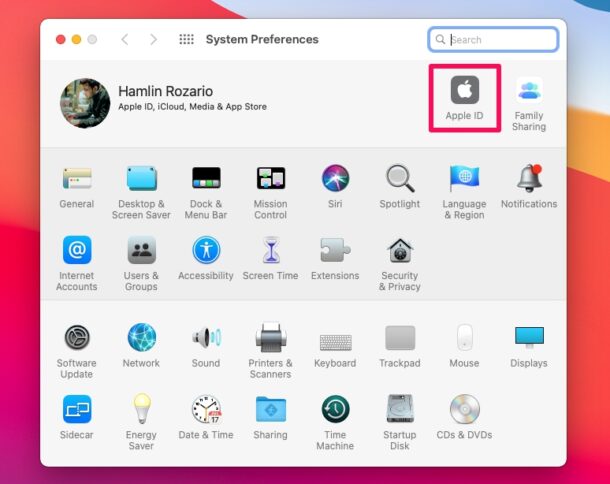
- Head over to “System Preferences” on your Mac from the Dock.
- This will open a new window on your Mac. Click on “Apple ID” located next to your Apple account name at the top.
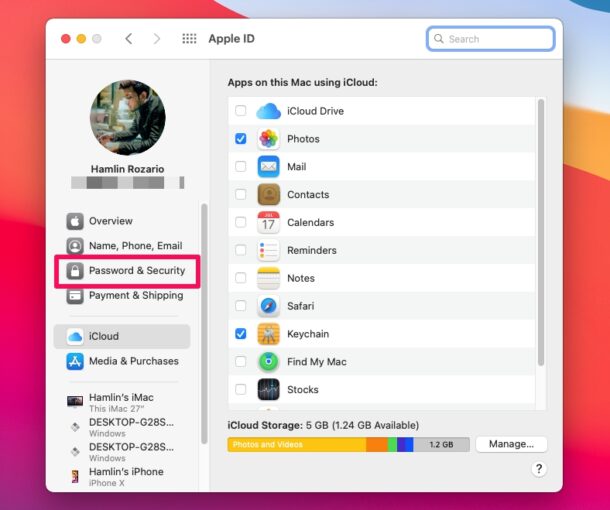
- This will take you to the iCloud section. Choose “Password & Security” from the left pane to proceed.
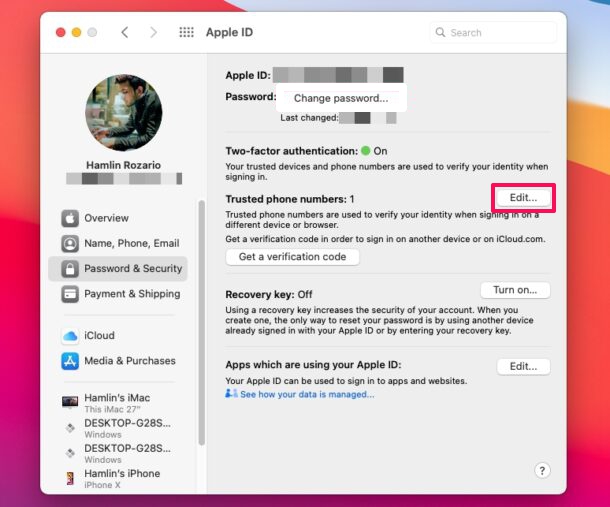
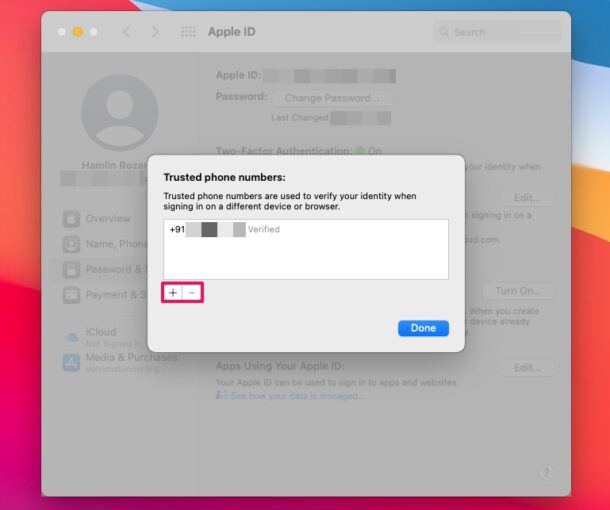
- Here, click on “Edit” located to the right of Trusted phone numbers, as shown below.
- Now, you can select a phone number and click on the “-” option to remove it from the Trusted phone numbers list. To add a new phone number, click “+”.
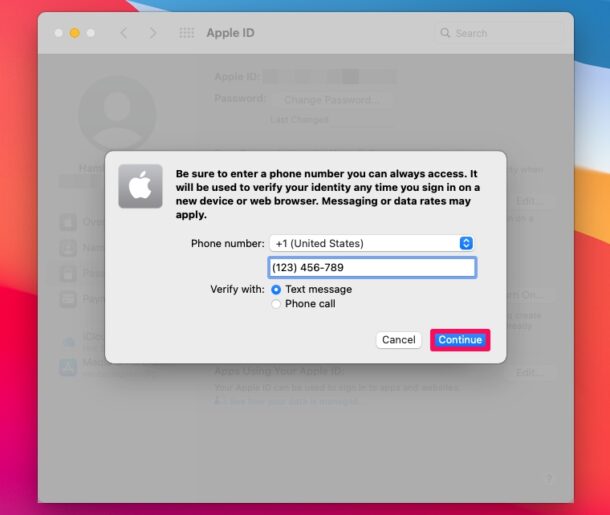
- You’ll be asked to enter your Mac user password to proceed to the next step. Now, type in your new phone number and choose either “Text message” or “Phone call” for verification according to your preference. Click “Continue” to receive the verification code. Now, you’ll be prompted to type in the code that was sent to you.

There you go. That’s how you add or remove trusted phone numbers to your Apple account from your Mac. Pretty easy, right?
From now on, whenever you sign in to a new device with your Apple account, you’ll be able to receive verification codes on your newly added phone number as well, if needed.
Two-factor authentication ensures that you’re the only person who can access your account, even if someone else somehow knows your password. Consider it to be an additional layer of security for your Apple account.
Adding multiple phone numbers to the trusted phone numbers list could come in handy if you temporarily can’t access your primary phone number or your own devices. For instance, you can add a phone number used by your family member or close friend to make sure you’re not locked out of your Apple account.
Apart from trusted phone numbers, trusted devices like the iPhones, Mac, or iPad you use are also capable of receiving verification codes when you make a sign-in request on a new device. If you don’t automatically receive the code as a pop-up on your device, you can manually get a verification code from Settings on your trusted device.
We hope you were able to learn how to remove or add multiple phone numbers as trusted phone numbers for your Apple account. What are your overall thoughts on Apple’s implementation of two-factor authentication? Do share your valuable opinions and experiences in the comments section down below.
