Ever noticed that when you copy an email address from OS X Mail app and paste it elsewhere that you get the addressees full name as well as their email address? Try it yourself by right-clicking on someones email address like someonesname@domain.com and copy it, then paste it elsewhere and it will show up as “Someones Name “, which can be fairly annoying if you just want an address.
The next time you’re in desperate need to crack open a beer bottle, reach for your iPad power adapter. Say what? Well, apparently it can double as a bottle opener, not that we’d recommend that.
This may be the ultimate Apple-geek party trick and I’m sure college students the world over are rejoicing in their dorms right now at this exciting new discovery, but that doesn’t mean anyone endorses this practice or that we’d recommend you trying.
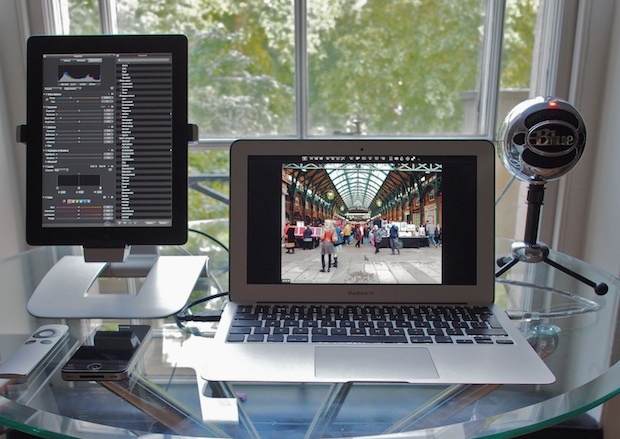
Many people equate productivity with screen size and assume it’s difficult to get much work done on a small screen. That simply isn’t true, I use a MacBook Air with the 11″ display and use the following tips to stay focused and maximize productivity with the small screen.
We’ve shown you how to generate MAC addresses randomly and then how to go about changing a MAC address in OS X Lion and OS X Mountain Lion, but why have those be two separate actions? Using the command line, you can combine the two events into a single action to generate a valid MAC and then set it immediately.
Launch the Terminal and paste the following onto a single line:
openssl rand -hex 1 | tr '[:lower:]' '[:upper:]' | xargs echo "obase=2;ibase=16;" | bc | cut -c1-6 | sed 's/$/00/' | xargs echo "obase=16;ibase=2;" | bc | sed "s/$/:$(openssl rand -hex 5 | sed 's/\(..\)/\1:/g; s/.$//' | tr '[:lower:]' '[:upper:]')/" | xargs sudo ifconfig en0 ether
There is no confirmation or output, the MAC address is set immediately which you can verify with the following command:
ifconfig en0 |grep ether
You will probably need to reconnect to the wireless router after issuing the command, and in some cases turn wi-fi on and off again.
If you intend on using this often, setting up an alias in .bash_profile would be a good idea to avoid having to cut and paste the massive block of text.
Apple has issued an update to OS X Mountain Lion Developer Preview 3. The new build comes as 12A193i and is available through Software Update, which in turn downloads through the Mac App Store, making the update available to all developers with OS X Mountain Lion DP3 currently installed.
Noticeable changes in the new OS X 10.8 build are to Mission Control, Messages, System Preferences, Notifications Center, iCloud integration, and Preview app, but otherwise there do not appear to be significant differences in the Developer Preview 3.1 update. Of course, many bug fixes and resolutions to issues identified in the previous build have also been included, and an update to XCode 4.4 Developer Preview 4 was released alongside the update to build applications for the latest developer release.
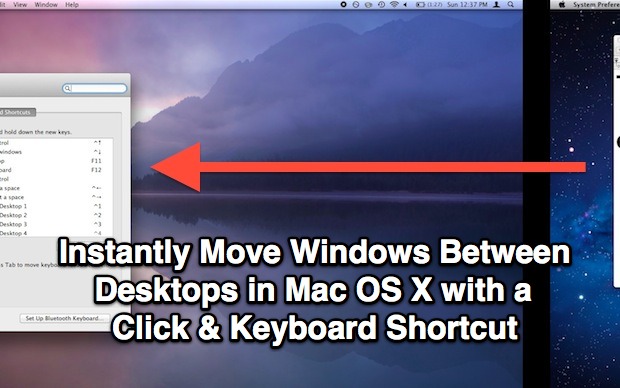
Full Screen apps in Mac OS X are managed by Mission Control, this means that if switch beween or gesture swipe from one full screen app to a desktop or another app, it follows the order of desktops and apps shown at the top of Mission Control.
This also means that you can rearrange the placement of fullscreened apps easily.
If you’ve ever tried to do web research with concurrent browser windows from the iPad, you’ve probably found yourself either opening tons of Safari tabs, emailing yourself lots of links, dumping things into Pocket or a similar app, or just giving up and getting on a Mac laptop. A better solution is an iOS app called Dual Browser, which as you may have guessed splits the browser window so you can view two web pages at the same time, side by side.
Each time you connect an iPhone, iPad, or iPod to a computer, iTunes launches and immediately begins to automatically sync all content between the iOS device and the connected computer.
If you’re annoyed with the auto-syncing aspect of iTunes, or you just want to disable it on an auxiliary Mac or Windows computer, here is how to do so.
Did you take a great picture with your iPhone, but your iPhone camera orientation was upside-down or sideways? This happens pretty often, and if you ever need to correct the orientation of an image by rotating or flipping a photo, you can easily do so right on your iPhone, iPad, or iPod touch.
The image rotation and flipping tools are built directly into the Photos app of iOS, thus there is no need to download additional software for this simple image editing purpose. Here is how to easily correct and rotate a photo directly on iPhone or iPad:
Do you want to join a group of songs together in iTunes to play together as a compilation even when iTunes on a Mac or Windows PC (or an iPhone, iPad, or iPod) is set to shuffle through a music collection?
For example, let’s say you have a large album you want to shuffle between, but you don’t want to shuffle other songs in iTunes.
That’s easy to accomplish in iTunes on Mac or PC, here is how to set this up:
Whenever a new Terminal window is launched, a variety of system logs are read to provide information on the last login. One way to speed up launching a new terminal window is to delete those .asl log files, but you can achieve a substantial speed boost by simply setting Terminal to open a shell rather than /usr/bin/login. This is achieved through the same means of changing the shell and is just a few quick steps within Terminal settings.
Firefox is a great web browser but it has a few quirks that make it a less than ideal browser for OS X Lion and Mountain Lion users. A major issue is scrolling performance, which can stutter or appear slow and clunky, it’s noticeable enough that certainly anyone who has used Firefox in Mac OS X has experienced it before. Here’s the strange part, it’s completely remedied with a preference setting that is buried away:
Open Preferences from the Firefox menu
Click on “Advanced” and under ‘General’ check the box next to “Use smooth scrolling”
Now try scrolling up or down in a lengthy browser window to experience the perfectly smooth scrolling that is standard in other web browsers, the difference is night and day.
The big question of course is this: why on earth isn’t this enabled by default in Firefox? With smooth scrolling enabled, Firefox does use slightly more CPU only when scrolling pages, but it’s certainly not egregious enough to warrant disabling by default except perhaps on the oldest of Macs with limited resources.
Anyway, enjoy your newly improved Firefox browser and don’t miss some other Firefox tips. Heads up to ZeroDistraction for pointing out this little fluke.
Using sysctl we can get extended information on a Macs processor, covering everything from CPU brand and identifier, clock speed, number of cores, thread count, thermal sensor data, cache size, and some significantly more technical information.
This is a handy way to get detailed processor specs and info without turning to the system profiler in Mac OS X, as the entire task is handled from the command line.
It seems like all Mac users these days have an iPhone or iPad to compliment their setups, and this weeks Mac setup shot from Andreas H has the best of all worlds. Hardware shown is:
Outside of the picture is an Apple Magic Mouse, an old PowerBook G4 12″ from 2003, an Apple TV2, two AirPort Extremes, two AirPort Express, and assorted other peripherals.
Want your Mac setup featured? Send pictures of Apple & Mac setups to osxdailycom@gmail.com and include some brief hardware details and what you use it for.
You probably know that tapping once on the screen within the Camera app will cause the iPhone to automatically focus and adjust exposure to that region in the viewfinder, but if you’re trying to take a picture with challenging lighting or depth conditions the auto adjustments are not always ideal.
Instead, use the excellent focus and exposure lock feature to get the exact lighting and focus you want out of a picture. The feature is quite literal, as you can point to a specific lighting or depth, lock it, then reorient the camera to the desired picture while maintaining the previously locked lighting conditions. Here’s how to use this awesome feature:
Login Items are applications and helpers that launch immediately when a user logs in to Mac OS X. These apps and utilities are easily adjusted and managed in system preferences on a user level, but you can also temporarily disable them on a per-boot and per-login basis if need be.
To stop the automatic login items in OS X on a temporary per-boot basis, you need to use a keystroke modifier at just the right time. This is slightly different depending on the status of password protection on the Mac, but the basic idea is the same.
iPhoto for iOS has a great feature that lets you wirelessly beam pictures from one iOS device to another, this means that if you’re editing a photo on an iPad you can immediately send it over to an iPhone and vice versa, without ever leaving the app.
Launch iPhoto on both iOS devices
Tap the gear icon in the lower right corner and tap to turn on Wireless Beaming
Now tap the photo or picture album that you want to beam, tap the arrow icon at the top of the screen, and choose “Beam”
Confirm the pictures to wirelessly beam, then tap the recipient iOS device and tap “Beam Photos”
From the receiving iOS device, tap “Yes” to start receiving the beamed photos
You will need Location Services enabled to use beaming with iPhoto, this is usually on by default but can be turned on quickly through general iOS Settings > Location Services.
iPhoto isn’t the only way to move pictures between iOS devices though, with iCloud enabled and Photo Stream, pictures taken on one device will appear automatically on each device using the same iCloud account, and pictures can also be sent through iMessage or a group of photos can be sent with email. The latter two options also work to send pictures between iOS and OS X, though preferably a future version of iPhoto for Mac will include the same beam option.
If you don’t have it, iPhoto is $5 on the App Store and comes as a universal app, meaning the same version will run on all compatible iOS devices.
If you’ve opened the sim card tray on a newer iPhone, you’ve probably noticed the card is considerably smaller than an average sim, these tiny cards are known as a micro SIM. The smaller SIM format is gaining traction but there are still tons of cell providers and phones that use the regular sized SIM card, including T-Mobile, many prepaid plans. and pay-go plans that you’ll find both at home and abroad. Now, obviously that full sized sim isn’t going to fit into the micro tray, but guess what? You can cut it down to size and convert any standard SIM to a micro SIM.