Manage Clipboard History in Mac OS X with ClipMenu

Dec 30, 2011 - 9 Comments

Clipboard history manager for Mac

ClipMenu is an awesome free clipboard history manager for Mac OS X that keeps track of nearly anything copied into the clipboard, ranging from plain and rich text, URLs, images, even files.

Read more »

By Paul Horowitz - Mac OS, Tips & Tricks - 9 Comments

Apple Spoofs Ghostbusters in Outrageously Cheesy 1984 Sales Video

Dec 29, 2011 - 10 Comments

Ghostbusters Apple Spoof video

In 1984, Apple spoofed the classic Ghostbusters song by Ray Parker Jr, and this outrageously cheesy video is the result.

Read more »

By Paul Horowitz - Fun, News, Retro - 10 Comments

How to Move Apps Out of the Applications Folder in Mac OS X

Dec 29, 2011 - 13 Comments

Move Applications out of the Applications folder in OS X Lion

Have you noticed when you try and move an application out of the /Applications folder in modern versions of Mac OS X, you will end up creating an alias of the app instead?

What if you want to move an application out of the Applications folder of MacOS, and put the app somewhere else?

Read more »

By Paul Horowitz - Mac OS, Tips & Tricks - 13 Comments

Redsn0w 0.9.10b3 Jailbreak Released with Bug Fixes [Download Links]

Dec 29, 2011 - 17 Comments

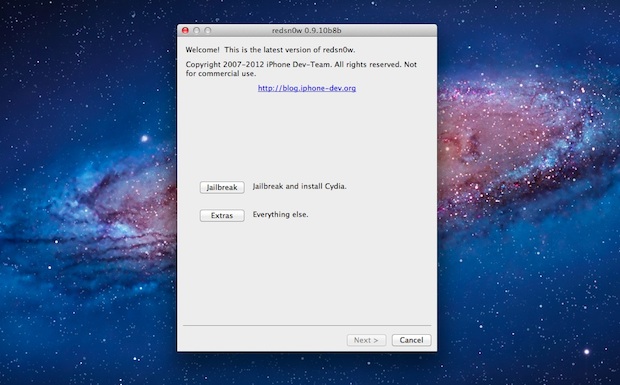
redsnow Another day another version of redsn0w is released… Redsn0w 0.9.10b3 includes a bug fix that caused some apps to not be able to run after the jailbreak was completed. I didn’t run into any problems on an iPhone 4, but if you did encounter any issues with apps crashing with the prior redsn0w jailbreak then you can go ahead and use the latest version to resolve them.

To fix an existing jailbroken device, all you need to do is run the newest 0.9.10b3 version over your existing jailbreak, just be sure to uncheck the “Install Cydia” option.

Nothing else is different about this release, it continues to be an untethered jailbreak for iOS 5.0.1 on iPhone 4, iPhone 3GS, iPod touch 3rd & 4th gen, and iPad 1. If you’re not sure what to do, read our guide to jailbreak iOS 5.0.1 untethered using Redsn0w.

Download Redsn0w 0.9.10b3

If you are not currently experiencing problems with your jailbreak, this is probably not a necessary download.

By Matt Chan - iPad, iPhone - 17 Comments

Turn the iPhone into a Scientific Calculator by Rotating Calculator App

Dec 29, 2011 - 21 Comments

Scientific Calculator for iPhone

Need to use a scientific calculator on the iPhone? Instead of downloading a new app, just do the following ot instantly transform your iPhone into a complete scientific calculator:

Read more »

By Paul Horowitz - iPhone, Tips & Tricks - 21 Comments

How to Check Wireless Signal Strength and Optimize WiFi Networks in Mac OS X

Dec 28, 2011 - 47 Comments

Wi-Fi

Wi-Fi Diagnostics is an incredibly useful utility to troubleshoot and optimize any wireless network and the signal strength of computers that are connecting to it. This utility first came bundled in Mac OS X Lion and works with all wireless routers and not only the Apple branded ones, meaning you can improve the performance of just about any wifi network by using it and making some adjustments along the way. It’s easy to use and we’ll walk you through the process of getting the best wireless signal using the app, but first we have to uncover the tool itself.

The Wi-Fi Diagnostics app is buried within Mac OS X 10.7 & OS X 10.8, here’s how to access it:

  • From the OS X desktop, hit Command+Shift+G and enter the following path:
  • /System/Library/CoreServices/

  • Sort alphabetically and find “Wi-Fi Diagnostics”, if you plan to use the app even somewhat frequently it’s recommended to drag Wi-Fi Diagnostics into Launchpad for easy access

With Wi-Fi Diagnostics now in the easier to access Launchpad… open Wi-Fi Diagnostics.app, then:

  • For OS X Lion users, check the radiobox next to “Monitor wireless performance” then click on the “Continue” button
  • For OS X Mountain Lion (and later) users, pull down the “View” menu and choose “Performance”, or just hit Command+5

Why Apple changed the process between OS X 10.7 and 10.8 is a mystery, but the feature remains in the newest versions of Mac OS X regardless. Anyhow…

Monitor WiFi Performance

Now is when the fun begins. The chart you see is a live wireless signal strength and noise meter, you want the yellow signal strength bar to be as high as possible. Pay attention to the green line of noise as well, you want that to be as low as possible in relation to the yellow line of signal strength.

Monitor wireless signal strength

If the signal strength is high and noise is low, you’re already good and you don’t need to change much. For most of us, signal will be lower than we want it to be, depending on where the wireless router is stored in relation to our computer gear.

Here are some tips to try out and to improve signal strength, keep an eye on the signal as you make adjustments:

  • Tweak the physical antennas on the wireless router and aim them in different directions
  • Move the wireless router away from walls, fireplaces, etc – even just a foot or two of space can make a big difference
  • Move the wifi router away from TV’s, microwaves, refrigerators, and other electronics that may interfere with signal
  • Relocate the Mac in relation to the router, this is obviously easiest with a MacBook Air or Pro
  • Consider changing Wi-Fi network channels if there are many matching channels from nearby routers

Once you have arrived at a reasonable compromise to how your hardware is physically configured and the resulting signal strength, enjoy your newly optmized wifi network.

Wifi signal meter

Some important things to remember here: not all internet connections are capable of transferring data at optimum wireless speeds, so you may not notice much of a difference in internet connectivity speed if any at all with these adjustments. This basically means that a weaker wireless signal may be more than adequate to transfer data at your ISP’s maximum bandwidth. Regardless, you’ll want the noise level to be as low as possible, since large amounts of wifi network noise can result in lost packets, reduced speeds, quirky behavior, random wireless connection dropping, and a variety of other problems.

If a wireless network is configured well and you continue to have problems with connectivity, check out some of our past articles on resolving such issues:

Using Wi-Fi Diagnostics I discovered my wireless signal to be much weaker when keeping the wifi router out of sight behind an LCD TV, simply moving the router away from the TV a few feet dramatically boosted signal strength. Run the app yourself and see what kind of performance boost you can get by adjusting your own wifi network.

How to Take a Screenshot on iPad, iPad Air, iPad Mini

Dec 28, 2011 - 4 Comments

How to screenshot iPad with Home button

Need to take a screenshot on the iPad? If the iPad has a Home button, like the iPad, iPad Air, iPad mini, and the first generation iPad Pro models, then taking a screenshot is extremely simple with a simple button press combination.

Read more »

By Matt Chan - iPad, Tips & Tricks - 4 Comments

Enable a Hidden Disc Eject Menu in OS X

Dec 28, 2011 - 8 Comments

Hidden disk eject menu

If you use a lot of DVD’s or CD’s on a regular basis, you may find some use enabling a hidden disk eject menu item. Once enabled, you’ll have a Finder pull down menu that lists discs, and selecting a disk from the menu ejects it:

  • Hit Command+Shift+G to bring up the Go To Folder window, using the following path:
  • /System/Library/CoreServices/Menu Extras/

  • Locate and double-click the menu item named “Eject.menu”

To remove the Eject menu, just hold down the Command key and drag it out of the Mac OS X menu bar.

The Disk Eject menu works in OS X Lion but is probably only going to be useful for Mac owners who have a CD or DVD drive, because it doesn’t seem to show external USB devices in testing. It also seems to be connected to the same eject mechanism of just dragging a disk to the Trash, so if you have a stuck disc it’s probably not going to be as effective as a forced eject.

On a side note, once you’re in the Menu Extras folder you will find a variety of other menu bar items you can add by double-clicking. Most of these are also available by enabling various settings in System Preferences, but Eject seems to be unavailable elsewhere.

By Paul Horowitz - Mac OS, Tips & Tricks - 8 Comments

Show an iOS App in the Mac OS X Finder

Dec 28, 2011 - 1 Comment

Show an iOS app in the Finder

We recently showed you where iOS apps are stored locally on the computer, but if you just want to quickly access that folder or get to a single app in the Mac OS X Finder, you can do so with a right-click within iTunes:

  • Open iTunes and click on “Apps” under the library listing
  • Right-click on the app icon and choose “Show in Finder”

The Mobile Applications folder will immediately open with the selected app highlighted. These .ipa files can then be backed up manually and copied to other computers that are authorized with the same iTunes account that originally purchased the app.

By William Pearson - iPad, iPhone, iTunes, Mac OS, Tips & Tricks - 1 Comment

Remove Shadows from Mac OS X with ShadowKiller

Dec 27, 2011 - 16 Comments

Remove Shadows from Windows in Mac OS X

Ever wanted to remove shadows from windows, menus, and box items in Mac OS X? You can with a free tool called ShadowKiller, and it works in newish versions of OS X too. All you need to do is launch the app, the screen will flicker briefly, and all on screen windows will appear shadowless. You can get the shadows back by just relaunching the app again. If you want to have the window shadows always disabled, you’ll need to throw ShadowKiller into Login Items.
Read more »

By Paul Horowitz - Mac OS, Tips & Tricks - 16 Comments

Untether an Existing Tethered iOS 5.0.1 Jailbreak with Corona

Dec 27, 2011 - 28 Comments

Corona Untether for iOS 5.0.1 A new tool has been released that untethers existing tethered jailbreaks for iOS 5.0.1. This means that if you are using a tethered jailbreak right now, you can download a free package from Cydia to untether your jailbreak and never have to boot with redsn0w assistance again. The package is called Corona and it’s very easy to install.

The current version of Corona untether is compatible with iOS 5.01 on iPhone 4, iPhone 3GS, iPod touch 3rd or 4th gen, iPad 1.

How to Convert a Tethered iOS 5.0.1 Jailbreak into Untethered with Corona

Do this from the currently tethered jailbroken device running iOS 5.0.1:

  • Launch the Cydia app and search for “Corona”
  • Tap on “Corona 5.0.1 Untether” and then tap the “Install” button in the upper right corner
  • Reboot the device

The iOS device will now be untethered, able to reboot at will without connecting to a computer.

If for whatever reason you don’t want to use Corona, you can also download the untethered redsn0w and jailbreak iOS 5.0.1 untethered by running the new version over an existing tethered base, but that is more work than necessary. Corona is by far the easiest choice, and unless you plan on performing a clean installation, it’s the way to go.

By Matt Chan - iPad, iPhone - 28 Comments

How to Jailbreak iOS 5.0.1 Untethered with Redsn0w

Dec 27, 2011 - 239 Comments

How to Use Untethered jailbreak for iOS 5.0.1

The untethered iOS 5.0.1 jailbreak has finally arrived, and it’s extremely easy to use. We’ll walk you through the process, but before proceeding make sure you meet the following requirements:

iPad 2 and iPhone 4S are not yet compatible due to their use of the A5 CPU, that is a currently a work in progress.

How to Jailbreak iOS 5.0.1 Untethered Using Redsn0w

This walkthrough is intended for those who are currently unjailbroken and using a stock iOS 5.0.1 installation. The instructions are the same for both Mac and Windows and for all iOS hardware:

  • Launch Redsn0w
  • Connect the iOS device to the computer and then turn it off
  • Launch Redsn0w and click on “Jailbreak”
  • Put your iPhone, iPad, or iPod touch into DFU mode: Hold the power button for 3 seconds, continue holding Power button and additionally hold the Home button for 10 seconds, release the Power button but continue to hold the Home button for another 15 seconds
  • Let redsn0w do it’s thing, make sure “Install Cydia” is checked, and let the jailbreak install

The iPhone, iPad, iPod touch will reboot and be jailbroken, find and launch Cydia to verify the jailbreak worked. The untethered solution is obviously much easier than the tethered options, there is no redsn0w boot assistance needed after the device turns on and off, and the installation is simplified as well. Enjoy the jailbreak.

Note for Windows users: be sure to run Redsn0w in Administrator mode, this can be done with a right-click.

Already jailbroken? Here is how to convert a tethered iOS 5.0.1 jailbreak into untethered with Corona, it’s very easy and doesn’t require redsn0w.

By Matt Chan - iPad, iPhone - 239 Comments

Redsn0w 0.9.10b2 Untethered Jailbreak for iOS 5.0.1 Released [Download Links]

Dec 27, 2011 - 27 Comments

Untethered redsn0w for iOS 5.0.1 The much anticipated untethered jailbreak for iOS 5.0.1 has arrived in the form of Redsn0w 0.9.10b1, courtesy of the iPhone Dev Team and jailbreaker @pod2g.

Redsn0w will provide an untethered jailbreak to the following iOS 5.0.1 devices: iPhone 4, iPhone 3GS, iPad 1, iPod touch 3rd gen, iPod touch 4th gen. For iOS devices based on the A5 CPU, like the iPhone 4S and iPad 2, the jailbreak is not yet available but is expected to debut soon.

Download Redsn0w 0.9.10b2

Download and follow the in-app instructions, it’s very easy:

For the Windows version make sure to run it in ‘Administrator’ mode.

If you haven’t upgraded to iOS 5.0.1 yet due to the lack of an untethered jailbreak, you can do that now either with iOS 5.01 IPSW or through iTunes Software Update. After you’re on the latest iOS 5.0.1 version, you can then run redsn0w. If you are already on iOS 5.0.1 and using a tethered jailbreak, you can run this version of redsn0w directly over your existing jailbreak to untether it.

Update: Here is a guide on how to jailbreak iOS 5.0.1 untethered with redsn0w

By Matt Chan - iPad, iPhone, News - 27 Comments

Show Folder History in Mac OS X with Back & Forward Buttons in Finder

Dec 27, 2011 - Leave a Comment

Finder The Back and Forward buttons in Mac OS X Finder work much like their respective buttons in Safari or another browser, meaning not only do they go page or forward within the file system, but now Finder windows also track folder browsing history.

After you’ve visited several folders, click and hold on the Back button to display a pull-down menu of the past directories you have recently been at.
Read more »

By William Pearson - Mac OS, Tips & Tricks - Leave a Comment

Siri Port for iPhone 4, 3GS, iPad, iPod touch, Available for Free

Dec 26, 2011 - 8 Comments

Siri icon An unofficial Siri port called Spire is now available as a free download for jailbroken iOS device owners. Spire is compatible with the iPhone 4, iPhone 3GS, iPad, and iPod touch 3rd and 4th gens, although the sensitivity of microphones on iPad and iPod touch models may impact performance. Weighing in at about 100MB, downloading Spire will also grab the necessary Siri files from Apple via extracting the iOS 5.0.1 IPSW.

If you’re interested in installing and running Spire, you’ll need to jailbreak iOS 5.0.1 on your compatible device, and then setup a Siri proxy to gain access to Apple’s Siri servers. The reason is explained by Spire developer, chpwn:

Apple still requires authorization to use Siri, so information from an iPhone 4S is still required. To insert this information, Spire allows you to enter your own proxy server address. By using this (ancient) SiriProxy fork, you can setup a proxy using your own iPhone 4S to insert the needed information reasonably easily.

Obviously this isn’t the best solution since it continues to require an accessible iPhone 4S, but for those who meet all the requirements it should be a fun mod to their iOS hardware.

Spire can be found as a free download on the Cydia store.

By Matt Chan - iPad, iPhone, News - 8 Comments

Expand or Shrink All Details in Get Info Windows on Mac with an Option Click

Dec 26, 2011 - 5 Comments

Get Info

If you want quickly expand (or minimize) all of the detail sections within a Get Info window on a Mac, you can do so with a super simple keyboard shortcut.

To get started, you’ll need to be in a Get Info panel. Just select a file and access Get Info by hitting Command+i to see how this works.
Read more »

By Paul Horowitz - Mac OS, Tips & Tricks - 5 Comments

Track Santa Claus on the iPhone or iPad

Dec 24, 2011 - 6 Comments

Track Santa with iPhone or iPad

Want to track Santa’s progress as he delivers presents around the world? You’re in luck!

You can follow Santa Claus on his Christmas eve deliveries around the globe right on an iPhone or iPad, and it’s super easy!

Read more »

By Paul Horowitz - Fun, iPad, iPhone - 6 Comments

Mac Setups: A MacBook Christmas

Dec 24, 2011 - 9 Comments

MacBook Christmas

This Mac setup scene depicts what many of us will be doing this weekend; lounging around the Christmas tree with a warm drink and some Apple gear. On the left looks like a MacBook Pro 13″ and the right appears to be a white MacBook, both in the holiday spirit.

I came across this great picture on Flickr while searching Google Images for a Christmas themed desktop picture and had to post it.

Merry Christmas!

By William Pearson - Mac Setups - 9 Comments

Subscribe to OSXDaily

Subscribe to RSS Subscribe to Twitter Feed Follow on Facebook Subscribe to eMail Updates

Tips & Tricks

News

iPhone / iPad

Mac

Troubleshooting

Shop on Amazon to help support this site