How to Reinstall macOS High Sierra or macOS Sierra
Some Mac users may need to reinstall their current macOS system software; typically this is necessary only as a troubleshooting technique, though there may be other reasons to reinstall Sierra or High Sierra as well. The method we are going to outline here will reinstall macOS system software versioned as High Sierra or Sierra without formatting or erasing the Mac, instead only macOS Sierra 10.12 system software will be reinstalled (or macOS High Sierra 10.13, whichever is applicable). The obvious advantage to this approach is that it aims to preserve user files, apps, documents, data, pictures, and customizations, while only reinstalling Mac OS system software itself.
This is not the same as a clean install. A clean install erases everything, a reinstall does not.
You should back up your Mac before beginning this process. Though the intention is to only reinstall macOS system software and not impact anything else, things can still go wrong. Do not skip a backup, backing up with Time Machine is easy and every Mac user should perform regular backups with the service.
How to Reinstall macOS Sierra / macOS High Sierra
You can reinstall macOS Sierra or macOS High Sierra by doing the following:
- Back up the Mac before beginning
- Reboot the Mac and hold down COMMAND + R keys concurrently right after you hear the boot sound, this will boot the Mac into Recovery Mode
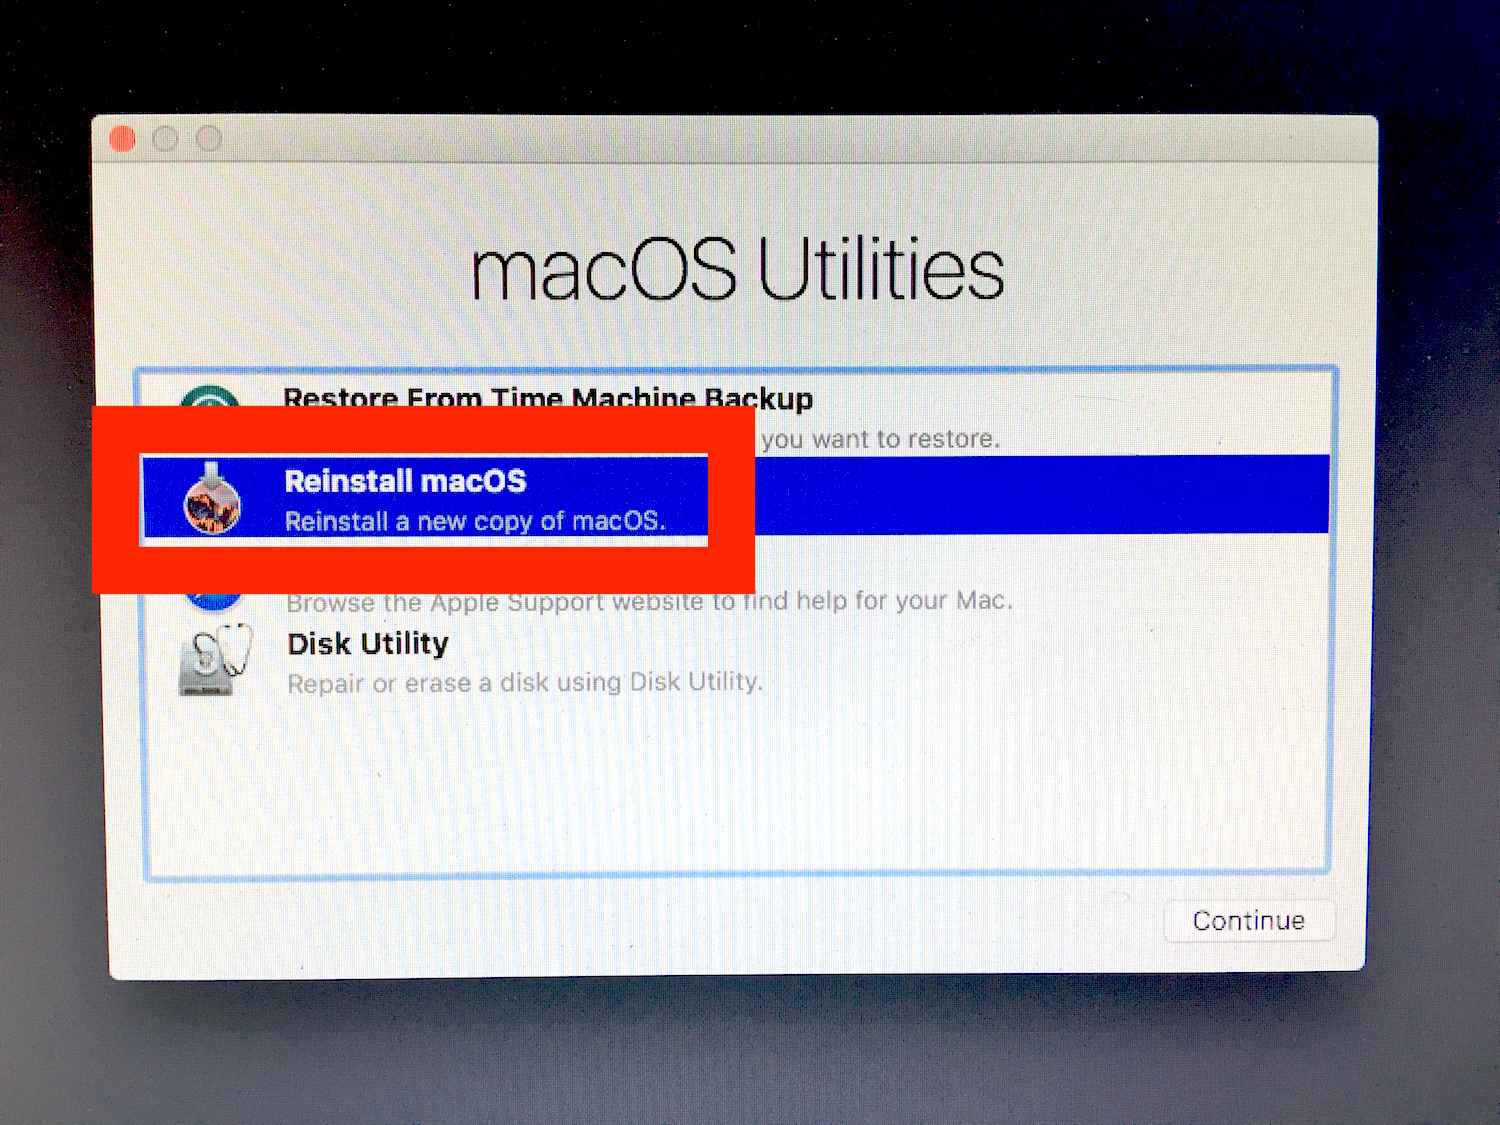
- At the “macOS Utilities” screen choose “Reinstall macOS”
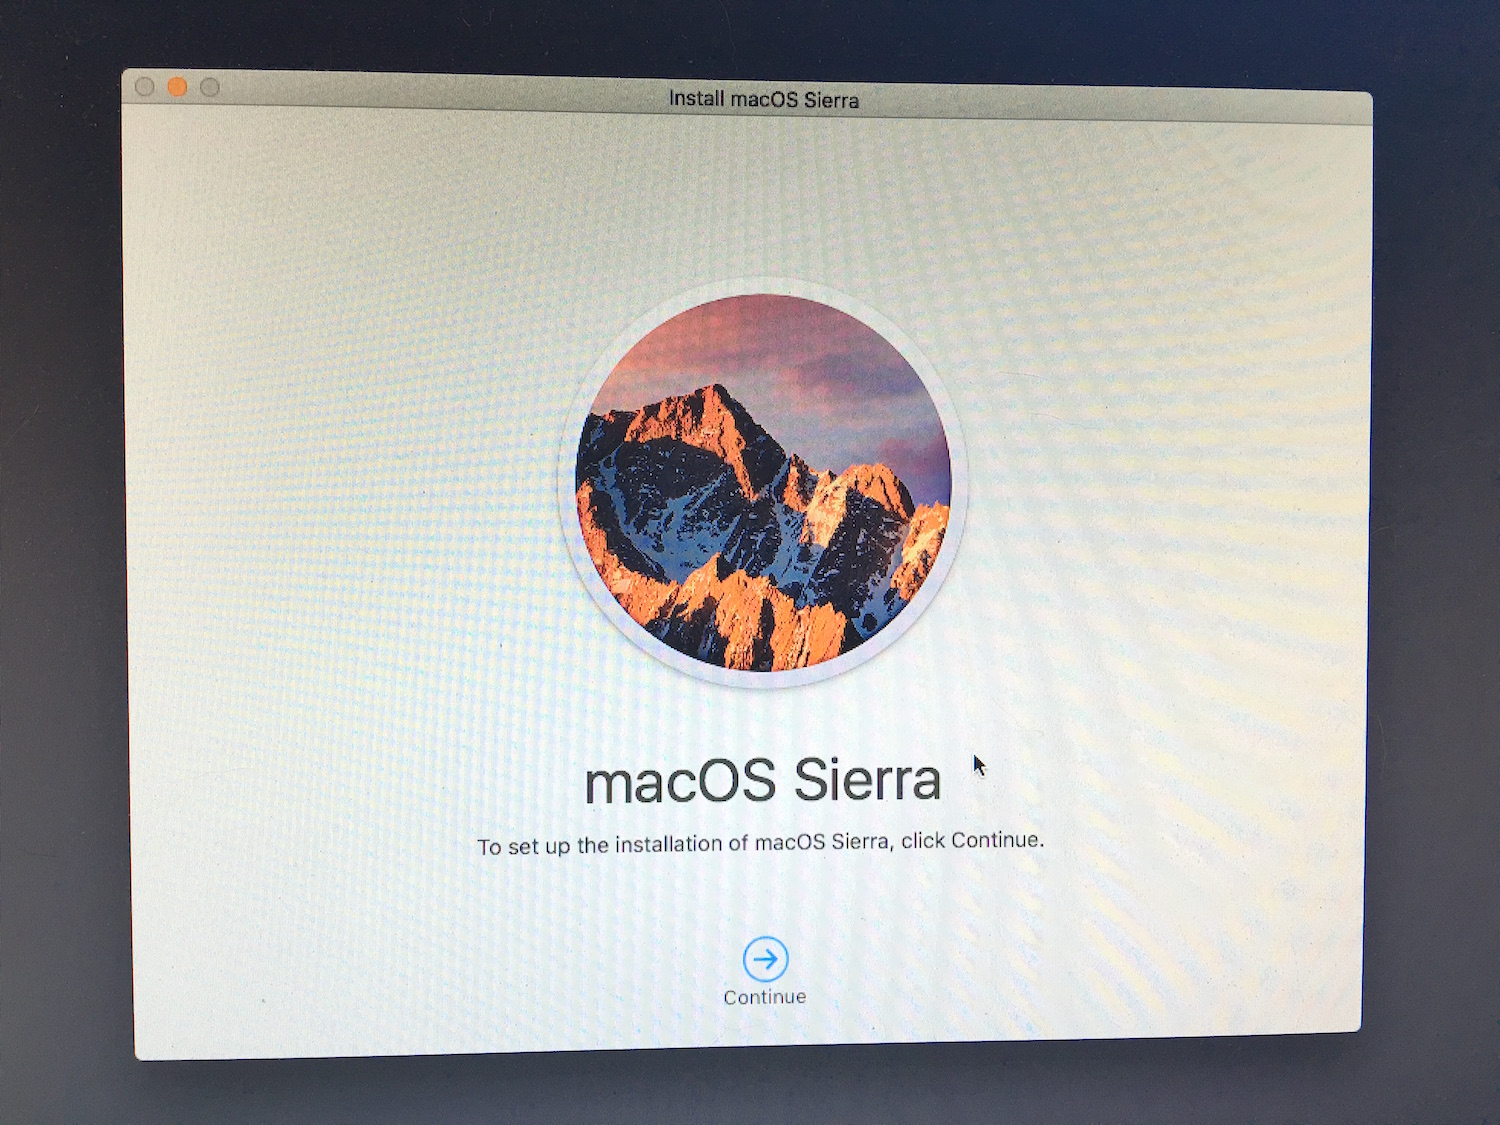
- Click “Continue” and walk through the setup screen
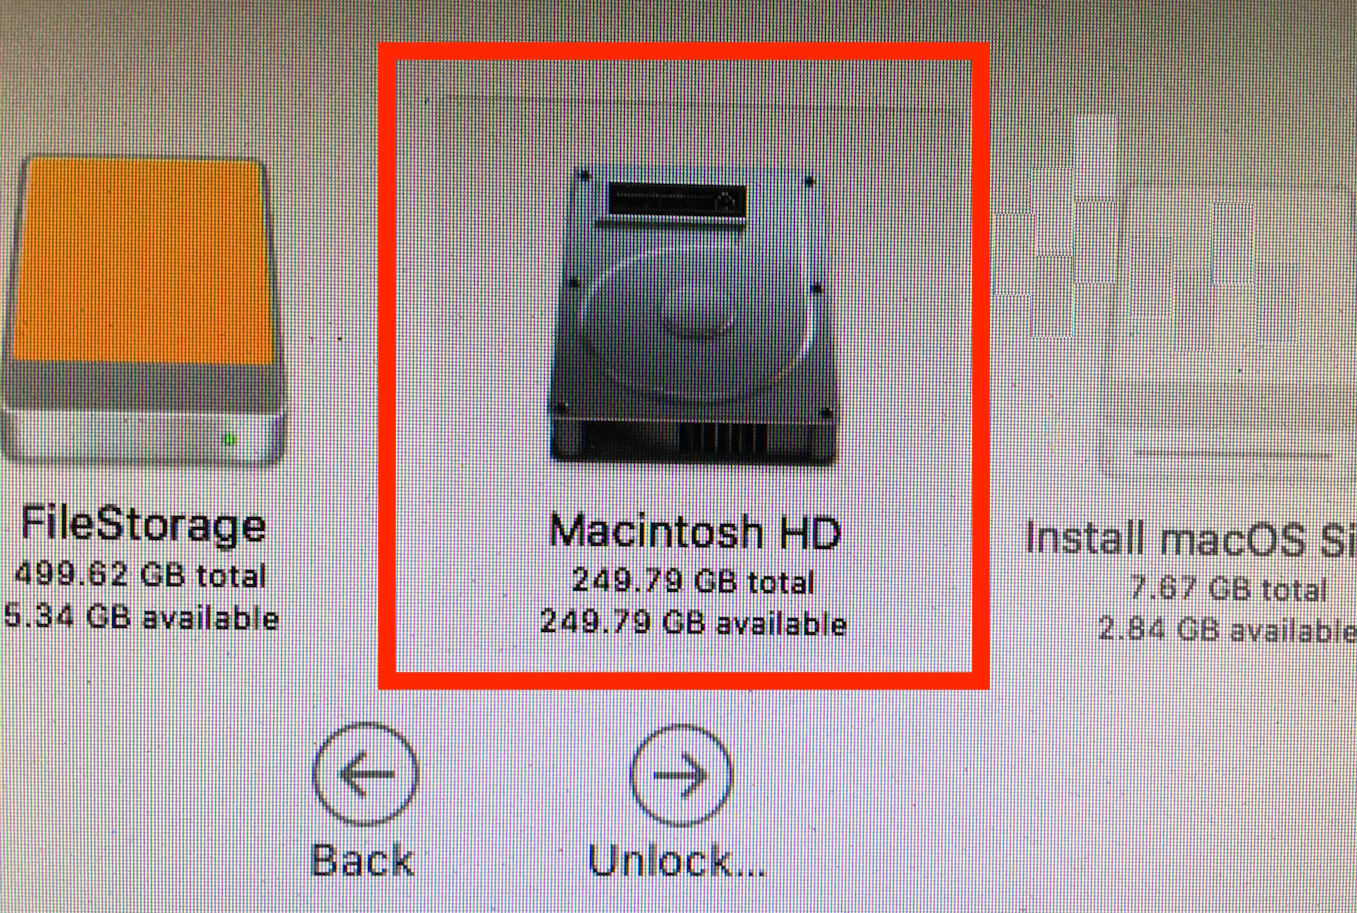
- At the drive selection screen, choose “Macintosh HD” or whatever the name of your hard drive is, this is the drive where macOS Sierra will be reinstalled to, then click on “Continue” or “Unlock” if you use FileVault
Once the reinstall process begins the screen will turn black and an Apple logo with a progress bar will appear, this will give you a loose estimate of how long it will take to reinstall macOS Sierra, but keep in mind it’s not always accurate and the actual installation process can sometimes be faster or slower.
After reinstallation has completed, macOS Sierra / High Sierra will automatically boot up as usual. Your user account, user files, applications, and all data and configurations should be preserved and untouched, only macOS Sierra / macOS High Sierra system software has been reinstalled. Reinstalling will cause Spotlight and other background indexing processes to run again which can give the perception that Sierra is running slow but that will resolve itself after indexing has completed.
If you want to erase everything and start fresh with a completely blank slate, you would perform a clean install of macOS Sierra instead, an entirely different procedure.
Some users have reported that reinstalling macOS Sierra / macOS High Sierra this way has resolved some of the difficulties they have experienced with Sierra or High Sierra, so if you are having problems with macOS Sierra it may be a worthwhile troubleshooting step. In my personal experience I reinstalled and clean installed yet still ran into the same kernel file table full errors, Safari issues, and application launch problems, which is what led me to downgrade from macOS Sierra to El Capitan on a particular Mac. Nonetheless your mileage may vary, and it is certainly worth trying to reinstall using the steps above before turning to more drastic measures.

I did a reset of the computer, because it was passed down from a friend and I want to erase everything, and I am trying to reinstall, and it shows me a message saying that “the recovery server could not be contacted” and I don’t know what I did wrong
Will this reinstall method (i.e.not a clean install) also install the Recovery Partition if it no longer exists?
When my Mac mini goes to sleep the system doesn’t wake. Changing the System Preferences>Energy Saver settings to: “Prevent the hard disc from sleeping” addresses this problem.
We don’t see this with iMacs.
I am very frustrated, I just but this computer and it is already causing problems. I am not able to reinstall macOS Sierra and I’m not sure why, nothing I did, bad quality macs these days …
Still not working. This is not normal, i need to instal some programs for my work.
This is costing me money and time…
Hey guys.
I’m prepping my mac for selling as I’m upgrading how do I clean it up without reloading the software?
Hi I recently had my hard drive changed and mac wiped tried installing OS sierra and it didn’t work when I turn my mac on it automatically goes to macOS utilities when I click reinstall mac os it gets to the page where it asks me to select the disk where I want to install when I go to click the macintosh hd it says fire vault in progress use the security and privacy preference pane to check conversion status..don’t know if I’m being dumb but any idea how to sort things out?
Just like Austin I’ve had problem after problem after upgrading to Sierra. I’d like to try and Reinstall Sierra. My problem is my Time Machine hasn’t worked since Sierra was installed. Went through 24 hrs. of Time Machine saying its preparing backup. I’ve rebooted in safe mode and stopped and restarted Time Machine. Another 24 hrs. of “Preparing backup…”
Any suggestions?
Have the same problem with Time Machine. Get the “preparing backup” for hours on end with no progress. Hoping to get this fixed but now the latest Sierra update locked down the computer. I now have to reinstall Sierra…
Is there a way to do this that will give us 10.12.1? I’d like to get that issue with the wifi fixed without going through all those steps.
Unfortunately this method does not work if you have installed one of the minor updates to Sierra in the meantime.
When you try to reinstall Sierra in that case the affected hard drive is greyed out and the installer reports that it can’t install as a newer version is already installed.
Any workaround for that?
hi Jeffrey,
Facing the same problem, did you find a solution?
It’s a pity this was not published before, over a week of frustration after upgrading to Sierra, anything that could go wrong did from freezing to the dreaded beachball, even saying the HD was corrupt when a diagnostic said it wasn’t, thanks for this article it will be a great help.