How to Downgrade MacOS Mojave Beta to a Prior MacOS
Some adventurous Mac users have installed macOS Mojave 10.14 beta onto their compatible computers, whether for development or testing purposes. While running beta system software can be interesting and exciting, it can also be buggy, less stable than expected, or have some incompatibilities which make consistent use to be impractical or impossible, thus it may be desirable for some to downgrade from MacOS Mojave 10.14 beta and back to a stable build of MacOS system software.
We will cover how you can easily downgrade from MacOS Mojave beta to revert back to another version of MacOS.
Note this particular approach to downgrade MacOS Mojave beta relies on having a Time Machine backup made prior to installing MacOS Mojave beta in the first place. Essentially you will be formatting (erasing) the Mac, then restoring from Time Machine using the backup you have handy. If you do not have a Time Machine backup made prior to installing MacOS Mojave beta, then this technique will not work for you and instead you’d need to rely on likely formatting and performing a clean install of a prior MacOS build.
Warning: Do not proceed without a prior Time Machine backup that you can use to restore to. You will be formatting and erasing the hard drive in this process, this will destroy all files and data on the drive. Do not proceed without having a backup of your files and data. Failure to do so will result in permanent data loss of everything on the drive.
Before beginning, confirm that a Time Machine backup exists from a prior MacOS installation (i.e. made before updating to MacOS Mojave beta) that you can use to restore to. You’ll also want to be sure you have a current backup of your important files and data, and any files or data that is important that was changed between updating to Mojave beta and the decision to revert to a prior MacOS release.
Downgrading from macOS Mojave 10.14 Beta
The guide assumes you have a Time Machine backup made from prior to updating to macOS Mojave beta, the backup can be for another version of MacOS like Sierra, High Sierra, or El Capitan. If you do not have a Time Machine backup from a prior MacOS build, do not proceed with this approach.
- Connect the Time Machine backup drive to the Mac which contains the prior system backup, this is what you’ll be using to restore from
- Reboot the Mac, then immediately hold down Command + R keys to boot into Recovery Mode
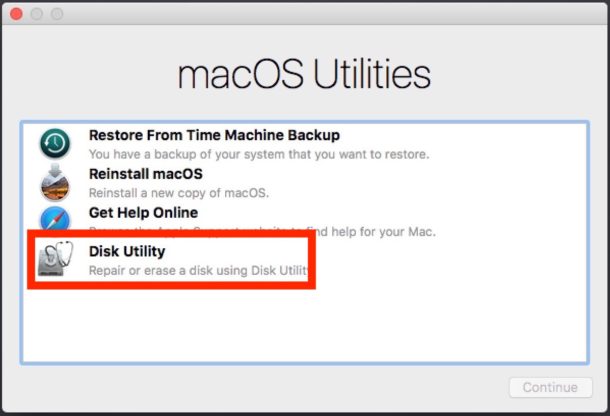
- At the “macOS Utilities” screen, select “Disk Utility” from the available options
- In Disk Utility, choose the disk with macOS Mojave beta currently installed on it, then click the “Erase” button to start the data removal process
- Give the drive a new name and then select either “Apple File System (APFS)” or “Mac OS Extended Journaled (HFS+)” as the file system format, depending on what is appropriate for your Mac and the version of system software you are reverting to*
- When satisfied with the drive configuration and file system, click “Erase” – THIS ERASES ALL DATA ON THE DRIVE, DO NOT PROCEED WITHOUT A BACKUP
- After the drive has finished formatting and erasing, it will be devoid of all data, so quit out of Disk Utility to return to the ‘macOS Utilities’ screen
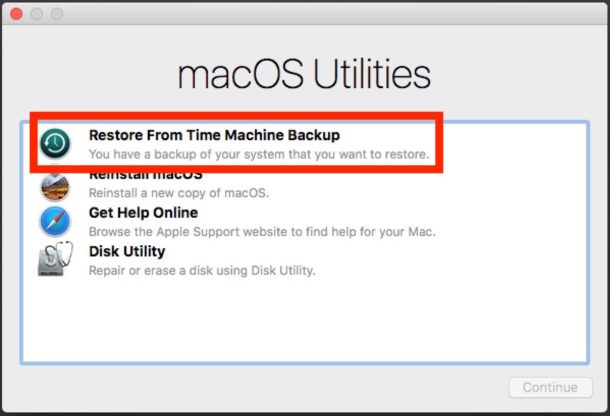
- Back at the MacOS Utilities screen, now choose “Restore from Time Machine Backup”
- Select the Time Machine volume as the backup source, then click Continue
- From the “Select a Backup” screen of Time Machine, select the most recent backup available that corresponds to the version of MacOS you want to revert back to in the downgrade (High Sierra is 10.13, Sierra is 10.12, El Capitan is 10.11, etc), then choose Continue again
- Choose the destination drive to restore that Time Machine backup to, this will be the drive you formatted just a moment ago, then click on “Restore” and confirm that you wish to restore the backup to that drive
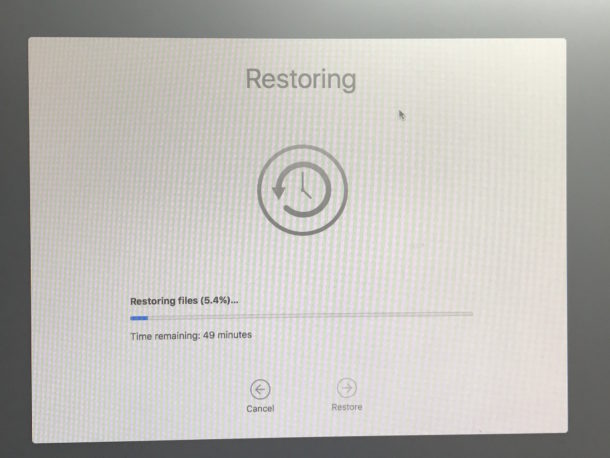
- The restore process will begin to transfer the Time Machine backup to the target drive, effectively downgrading MacOS Mojave to the version of MacOS that was installed when that particular Time Machine backup was made, just let this process complete – it may take a while
Once the backup has restored to the Mac, the computer will reboot back into whatever macOS version was installed when that backup was made. For example, if the Time Machine backup is from macOS High Sierra, it would restore back to that, or if the backup was made with Sierra, then it would downgrade from Mojave back to Sierra using that restored backup.
* Note that choosing APFS or HFS+ depends on your particular Mac as well as what version of system software you are restoring to. For example, Macs restoring to Sierra or El Capitan will use HFS+ but Macs with an SSD restoring to High Sierra would use APFS. Regardless of what file system format you choose, the Mac hard drive will be erased and all contents permanently removed.
This represents the absolute simplest way to revert from macOS Mojave beta back to a different MacOS system software version, whether its High Sierra 10.13.x, Sierra 10.12.x, El Capitan 10.11.x, or otherwise.
Other downgrade options for macOS Mojave
There are other options available to downgrade from MacOS Mojave however, including restoring from an imaged hard drive if you happened to make one before installing Mojave, or even just wiping the drive and performing a clean install of the other version of MacOS system software, whether that’s Sierra, El Capitan, or High Sierra, or performing an internet recovery of whatever version of Mac OS shipped preinstalled on the Mac. Likewise you can also use the MacOS Mojave beta boot installer drive to perform a clean install of MacOS Mojave if you wanted to, though obviously that would not be downgrading anything, it would just be wiping the Mac and performing a clean install of the beta.
If you’re downgrading from MacOS Mojave beta because you have decided that beta system software is just not for you, then that’s OK too, you can always install the final version of macOS 10.14 when it debuts, and Apple has said that MacOS Mojave will be released in the fall of this year.
I don’t have a backup from before installing macOS Mojave beta, what should I do?
If you do not have a Time Machine backup made before you installed macOS Mojave beta, then you should not attempt to downgrade from MacOS Mojave – unless you don’t mind losing all of your data, files, apps, etc because downgrading without a backup requires formatting and performing a clean installation of MacOS system software. A better solution would be to stick with the beta of Mojave and continue to update it with beta software updates until the final version comes out – and yes the beta versions can update to the final version (or at least they have been able to in the past, so assuming that policy continues forward with MacOS Mojave too).
Do you know of another method of downgrading from MacOS Mojave beta back to another version of MacOS? Do you have any comments, questions, or experiences with downgrading and reverting from MacOS Mojave beta to another MacOS build? Let us know in the comments below!
