How to Install OS X Yosemite Beta on a New Partition & Safely Dual Boot
OS X Yosemite is an amazing update to the Mac operating system that’s really better experienced than seen, but due to it’s current early beta status, it’s generally not a good idea to upgrade your primary OS X volume to the 10.10 beta quite yet. Instead, the safest approach is to install OS X Yosemite onto a separate partition of the hard drive, keeping it separate from your primary stable and productive existing OS X experience.
This allows you to check out OS X Yosemite and dual boot between the OS X 10.10 beta and OS X 10.9 (or 10.8) without each operating system impacting one another, and you can safely switch between the two with a simple reboot process. This also allows you to uninstall Yosemite at any point easily if you want to.
This guide is intended for those with access to the OS X Yosemite beta, typically through a developer account.
Prerequisites Before Beginning
- Download OS X Yosemite – At the moment, you will need a Mac developer account to do this, anyone can apply for a dev account and pay the fee if desired, this allows you to download the OS X Yosemite Dev Preview installer through the Mac App Store
- Check system requirements to be sure that the Mac can run OS X Yosemite, generally if the Mac will run Mavericks, it will run Yosemite
- At least 25GB of disk space available to create a separate partition and install Yosemite onto
- Back up your Mac – you’re going to be modifying the partition table of the hard disk and installing beta software. Always back up everything before doing either, the simplest way to do this for most Mac users is simply to use Time Machine and initiate a backup manually.
Once downloaded and having the Mac backed up, do not proceed with the Yosemite installation quite yet, you need to create the partition first if you want to keep the two operating systems separate and dual boot.
Create an OS X Yosemite Partition
The first thing you’ll do is partition the hard drive of the Mac to create a new partition for OS X 10.10 Yosemite to install on. This insures that your primary Mac OS X installation remains separate and preserved while testing Yosemite:
- Open the Disk Utility app, found in /Applications/Utilities/ and choose your hard drive from the left menu
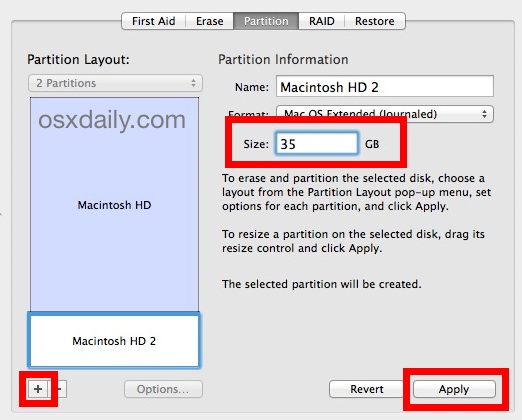
- Choose the “Partition” tab, then click on the [+] plus button to create new partition
- Label the new partition something obvious, like “OS X Yosemite”, and then assign the partition a reasonable amount of space, a minimum of 15GB should be required but allocating more space is better if you plan to use Yosemite often (25GB+)
- Choose “Apply” to modify the partition table to create the new partition
Exit out of Disk Utility when finished, you’re good to start the installation now onto that fresh partition.
Install OS X Yosemite to the New Partition
With the whole system backup complete, Yosemite downloaded, and the partition made, you can now safely install OS X 10.10 onto the separate partition, this will allow you to preserve your existing OS X installation without mucking it up with beta software.
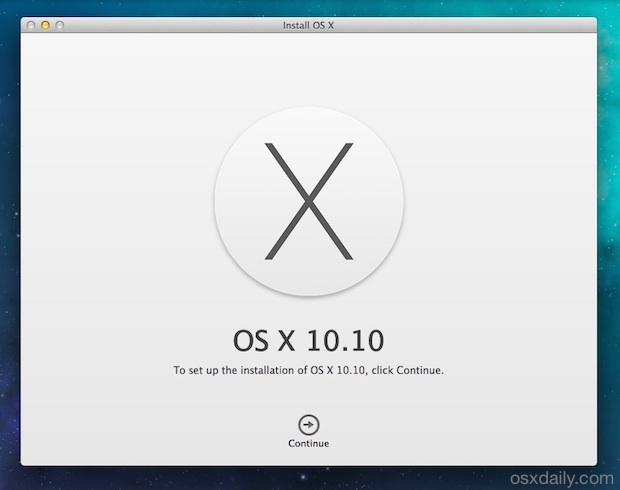
- Return to the OS X Yosemite installer and launch it (look in the /Applications/ folder for “Install OS X 10.10 Developer Preview”
- Select “OS X Yosemite” (or whatever you named the partition) as the installation destination
- Let the installation complete, the Mac will automatically boot into OS X Yosemite when complete
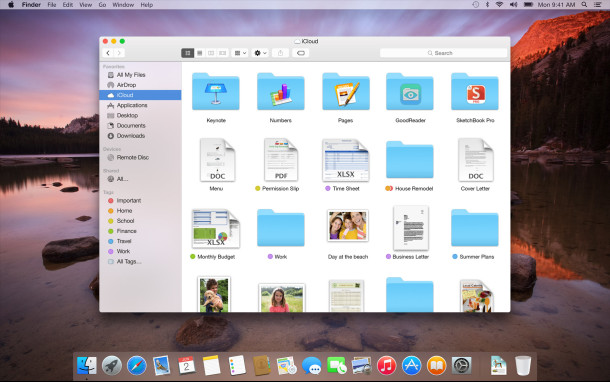
Enjoy OS X Yosemite! Remember, it’s in beta right now, so some things are fairly buggy and not every feature is fully implemented quite yet. Things will continue to evolve with each new release and update though, and you’ll be able to install those updates through the Mac App Store when they become available.
Dual Booting: Switching Between OS X 10.10 and OS X 10.9
Now that the installation is complete, you can dual boot between OS X Yosemite and OS X Mavericks (or whatever OS X you’re running). The easiest way to do this is by holding down the OPTION key during boot and selecting the partition volume according to the version of OS X you want to boot. Assuming you labeled OS X Yosemite partition descriptively enough, it’ll be easy to pick out.
Update: If your Mavericks partition is missing and replaced with an OS X Installer drive, here’s how to fix that!

I can not change or remove Yosemite Beta partition after updating to Yosemite today – it is grayed out and I can make no changes to it, so all that space is tied up. What gives?
hi, how can i merge the partition again ? and what’s the correct way to uninstall the dual boot & yosemite beta ?
i have installed yosemite this way and would like to upgrade my mavericks to yosemite released today.
thank you
Update from Mavericks to Yosemite, then copy your files from the Yosemite Beta partition to the updated Yosemite partition. Then delete the Yosemite Beta partition and resize the primary Yosemite partition to take up the entire drive.
Easy peasy.
Back up first!
Hi.
I have downloaded Yosemite and installed it on a new partition as suggested. All loaded OK with no problems. When I boot into Yosemite though, I can not find my wireless network (or any other network nearby), despite it connecting fine when I boot into Mavericks.
Can’t report this to Apple as the only way to report any problems is via Feedback Assistant, which is no good given I can’t get Internet access via Yosemite.
Any suggestions on what might be causing this problem?
Cheers….Scotty
And should I install it on an external hard drive?
So if u install Yosemite on a separate partition and I is publicly released sometime soon do I just delete the partition and install in on the mavericks partition?
yes, exactly
I’m already on two partition where on one, I have mavericks installed (my main) and on another partition, yosemite DP3 is installed. Can I simple install the public beta on the dp3? I am currently downloading it from the app store using the redemption code I got from Apple.
Is it better to keep on the developer previews? 4, 5, 6 and on until the final version?
Or is it better to install the public beta? I heard it is updated less frequently than the DPs.
In case I try to proceed with the public beta, do I need a clean install? or simply download it from my yosemite dp3 and let it install on the same partition?
If I install and run Yosemite on an external had partition, can I access files stored on the main hd Mavericks partition?
installation is ok, i can use yosemite now.
unfortunately when i want to switch to my old os x i pressed option and selecting partition menu is shown but only the partition where yosemite is installed and restore mac buttons are visible. my old partition is not at the list.
what am i doing wrong?
I did this. But when i hold down the Alt key to boot back to mavericks that partition says “OS X Installer”. It just starts the installer again… any suggestions?
After install, in Yosemite, you have to set Startupdisk in System preferences back to 10.9 (or whatever versionn you had). Otherwise it will just start the installer!
So glad to find this post, I thought my Mavericks disk was gone! Just stuck in Installer until I switched startup disk in Yosemite. All working again – although Yosemite on my 2009 MBP doesn’t accept mouse clicks from the built in trackpad! USB mouse to the rescue.
I’ve had problems removing Yosemite from both within Mavericks and from recovery utils (accessible via Cmd+R), because Yosemite partition had the remove (minus) button grayed out and partitions were converted to Logical Volume Group (notice also the “Yosemite” name for whole disk instead of “APPLE SSD…”.
I solved this by going to recovery utils (Cmd+R during boot), open Terminal and type in without quotes “diskutil corestorage list” and find if your Yosemite partition is revertable and find its Logical Volume UUID (long hexadecimal ID), then type “diskutil coreStorage revert ” and partitions are back to native type. Now open Disk Utility (still in recovery utils) and remove your Yosemite partition and apply changes. Disk Utility will erase this partition and show it as unused space. At this moment I was unable to resize back my Mavericks (Macintosh HD) partition, so I rebooted back to Mavericks and ran Disk Utility, here I was able to resize Mavericks partition back to full size. Even the old disk name came back!
Use this at your own risk, this is what helped me find the commands: http://forums.macrumors.com/showthread.php?p=19215722
I just noticed the site stripped out part of the command for revert, behind the revert you should enter the Yosemite partition’s Logical Volume UUID as shown with the list command.
Hi, I did this procedure but in my main Mavericks session and it did work. No need to go into recovery mode.
Beware there are Two Yosemite HD entries in the corestorage list : the Logical Volume Group (root of the tree) and the Logical Volume. You want to revert the Logical Volume (at the bottom of the tree).
Then Diskutil can remove the Yosemite HD partition.
Installed on all 3 of my Mac’s in 2nd partition and so far no problems other then my canon scanner software doesn’t work.
Waiting for some other apps to get updated but otherwise a very stable first developer preview release.
I’m actually still running Snow Leopard and I would like to do this to test whether Mavericks does work with some of my software packages. Or should I just install Mavericks and restore from time machine in case I don’t like it?
Another issue is that I’m using a Bluetooth keyboard; I don’t think I can hold the option key before the OS has actually started… What do you think?
Thanks!
@Darla I had the same issue. Boot into 10.9 Recovery and then quit it. You’ll be asked which disk to boot from on restart and from there you’ll be able to select Mavericks. After that it should all work as expected with the option to choose either your original Mavericks install or your copy of the Yosemite DP1 when you hold the option key down at startup.
i created the new partition alright, but i cannot access it from the yosemite installer. i cannot select the partition to install to. i have repeated the exercise about 4 times – delete partition, merge, restart, disk utility, create partition – as specified above. partition created, but when i run installer, it does not give me option to install into the 35Gb partition i created. suggestions please on what to do. thank you
Just beware of the following known issue:
I added a new partition and installed Yosemite DP1 but the installer somehow conspired to rename the logical volume group with the name of the new partition so now I’ve got:
Yosemite Dev
Macintosh HD
Yosemite Dev
when I should have:
APPLE SSD SM256E Media
Macintosh HD
Yosemite Dev
The same thing happened to me as well. The original name of my HD changed from APPLE SSD to OS X Yosemite which I named for my partition. My original HD Macintosh HD falls under that. Also, when holding down the “Option” key to boot it shows OS X Installer, OS X Yosemite and OS X 10.9 Recovery…. so I have NO clue how to boot Mavericks.
I’m having this problem too, I thought I lost my original install, just boot either Yosemite or the recovery partition and change your startup disk back to ‘Macintosh HD’ and reboot and you can flip back between them that way.
I’ve tried the ‘option’ key and using refit/refind to try and boot into different partitions and it doesn’t seem to find it properly.
Could the boot record be broken ?
Installing on MacBook pro 13″ mid 2012 as a partition on internal hd. The install seems to be stuck for past 2 hours stating “less than a minute remaining”. Anyone else run into this issue? Any suggestions as what to do at this point? I was just going to do a hard restart then run Mavericks.
Well i got impatient and did a hard reboot…it worked! I held down option to select the yosemite partition, it booted up & went through the set up procedure. I’m good to go! Hopefully this helps someone else in distress.
I’m in the same boat here. I’ll give it another hour; if I hard reboot and it screws up, I have my TM back-up ready to go. From what I understand from the Apple Support website and other users, “Less than a minute remaining” means that it’s doing optimizations but is done with the actual install itself. Hopefully hard reboot will work. Any others have this problem?
Yep same problem here I’m going to do a hard reboot and report back in a few….
Holy Cow it worked!!!!!! Thank you guys so much!! Doing a hard reboot and holding down the alt key and selecting the partition worked like a charm.
Can these 2 installations share the same unique user account?
You really want to keep the two OS X builds completely separate to preserve your file data, so it is not recommended to link the user accounts between a beta build and a stable build. Technically, you could do such a thing with the ln command, but it is very strongly not recommended.
It is worth noting that if you have an external backup drive, you can partition that using the same manner. It may be a bit slower on startup but ultimately it is much safer and then you don’t have to take away space from your Mavericks partition.
I’ve done this, too, but already quiet some days back. Since than I’ve already reinstellend Yosemite 2 Times as I got an anoying still waiting for root device bug. (Legit MacBook Pro 13″ 2012)
It feels very alpha.
I don’t if it’s related to being installed on a second partition of my fusion drive (like bootcamp) but I cannot even restore Privilegs as this option is great out for Yosemite, while it’s not for Mavericks using the Yosemite Recovery HD.
However what I’ve seen so far I do really like! Especially the dark mode which not only changes the Systems GUI but also the bootscreen (white Apple and loadingbar on black background) and even the bootdrive selection screens background. What I do miss are changes to the drive icons to match the rest of the modern style look. Well there’s much more to wait, I think. Well See!
this sounds all very nice but doesn’t this installation ‘trick’ mess up the, existing, Mavericks recovery partition?! Because Yosemite installation might try to update the Mavericks recovery partition and if that happens it might become useless when one needs to make use of the recovery partition, for any reason?
I always prefer to use a fast external drive for any extra OS installs
Does running FileVault effect the needed steps at all?
Can you get rid of the partition (without loosing my main partition) after being done testing?
Yes absolutely, you just need to return to Disk Utility and remove the Yosemite partition when finished with it.
I can’t delete it, every option is greyed, and Disk Utility do not recognize my HDD as a hard drive, but as a “Logical Volume Group”. Can you help me please ?
Anyone can get a free copy of Yosemite from the OS X Beta Seed Program on the Apple website if they are one of the first million to request it. It may not be as robust or up to date as the developer version, but you can’t beat the price.
https://appleseed.apple.com/sp/betaprogram/
Absolutely, this is a great point! The beta seed for Yosemite will be available in the summer.
When Yosemite is officially out, can I delete this secondary OS and merge the 2 partitions back?
Yes, you can remove the Yosemite beta partition at any time by going back to Disk Utility, selecting the Yosemite beta partition that was created, and then deleting it. Then you just resize the previously existing partition (Mavericks or otherwise) back to the full size of the hard drive.
Thanx a lot :)
Another trick when booting from two different Mac OS X versions is to modify the /etc/fstab file to prevent both partitions from automatically mounting (http://hints.macworld.com/article.php?story=20060930150059172).
That makes a big difference, because it prevents Spotlight from auto indexing both hard drives all the time, which causes it to display duplicate applications, many of which are incompatible, and apps that are not on the current boot drive, which causes them to copy over. If you intend to make heavy use of spotlight in Yosemite, this is pretty important.
Additionally, not having both drives mounted is friendly to hard drives. The drive won’t work as hard in the case of spinning hard drives, where as with both mounted, it seeks between two localized partitions rapidly.
Can this partition and OS be installed on an SD card?
I believe so, as long as the SD card is large enough. I would recommend installing on a storage device with faster transfer speed. Most SD card’s r/w speeds don’t even come close to USB 2, let alone FW800, USB 3.0, and Thunderbolt.
I like to live dangerously I installed it as my main OS. Its the only way I can test the bugs and report them, using it as I would normally. I have a backup so not too worried!
Indeed, living dangerously! That situation is really best for advanced users. But, as long as you have a backup of all your important documents and data you should be ok, though you will be experiencing quite a few bugs.
;)
Just read that the public beta will be launching tomorrow. I am not a developer but I really want to use Yosemite and test it as I normally would use my mac, living dangerously as you put it lol. I am just a college student who uses my mac for email, internet, and papers. What would you recommend…you think it’s safe enough for me to just download as is, or make the separate partition?
Yes I did too! If it’s not my normal Home folder and apps, it would be hard to test.
So far not any major issues, just minor stuff.
I’m surprised no one has mentioned that iTunes now allows you to rearrange the icons on your iPhone! That was on my wish list. (it works, for the most part lol)
I made my partition size too small. How do I change the partition sizes? They appear to be greyed out.
Resizing partitions is simple in Disk Utility, just select the little corner drag widget on the partition to resize and drag it to the new size as desired. Or you can select the partition and enter in a new number (you may need to reduce the size of the other partition to accomplish that). More information here: https://osxdaily.com/2009/11/20/resize-partitions-in-mac-os-x-with-disk-utility/
After I did this, I used the finder icon from Yosemite for the partition. It even shows up after holding down the option key.
Man, wish I would’ve seen this a couple days ago. That’s a great idea. How can I go back and do that if I’ve already upgraded to OS X Yosemite?
If you’re already running OS X Yosemite the easiest thing to do would be restore to OS X Mavericks (or your prior OS X) using Time Machine or your backup restoration process of choice, and then when that’s done create a partition and install Yosemite onto it as described here.
In the same boat – can you give more detail on how to restore Mavericks? I tried to re-download it from the App Store, but that doesn’t seem to work.