How to Get “Hey Siri” on Unsupported Macs
Have an older Mac but want Hey Siri voice commands? With a little effort, you can get ‘Hey Siri’ on unsupported Macs by using a creative workaround. While new Mac models can enable Hey Siri on the Mac as easily as checking a setting in system preferences, older Macs do not support the same Hey Siri feature. This tutorial will show you how you can replicate the exact same “Hey Siri” capability on any Mac that does not support Hey Siri by default, as long as it has regular Siri functionality.
This has been tested and confirmed to work on Macs that have Siri and without official Hey Siri support. This includes Macs running macOS Mojave, High Sierra, and Sierra, as long as Siri is enabled on the Mac you will be able to use this workaround approach to mimic Hey Siri functionality. You will need a microphone, and the Mac must have Siri support. The rest is just a matter of configuring the Mac to listen for a special command and then tie that command to Siri to replicate Hey Siri hands-free voice commands on a Mac.
How to Enable “Hey Siri” on Unsupported Macs
This is a multiple-step process to setup Hey Siri on an unsupported Mac, follow the steps carefully:
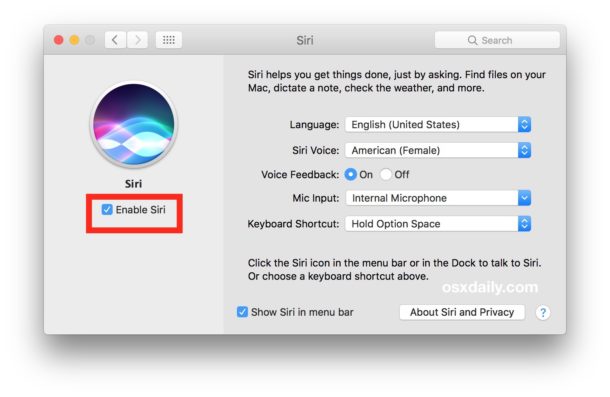
- Go to Apple menu and choose “System Preferences”
- Choose “Siri” preference panel and make sure Siri is enabled
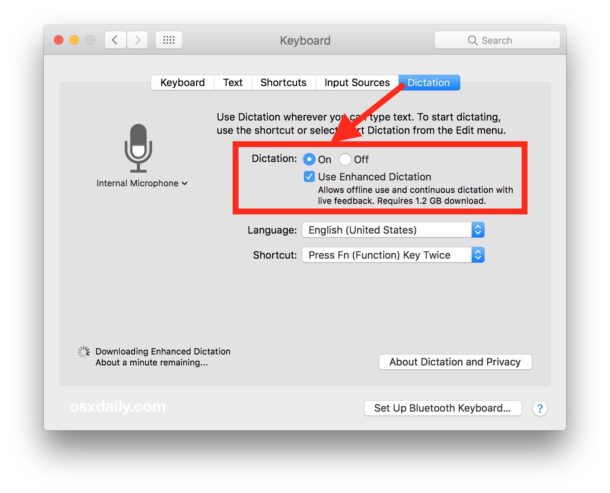
- Now go to the “Keyboard” preference panel and to the “Dictation” tab and check the box for “Dictation” to ON and then check “Use Enhanced Dictation” as well
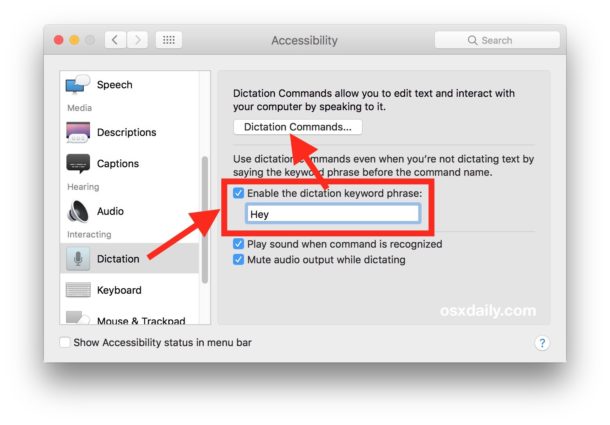
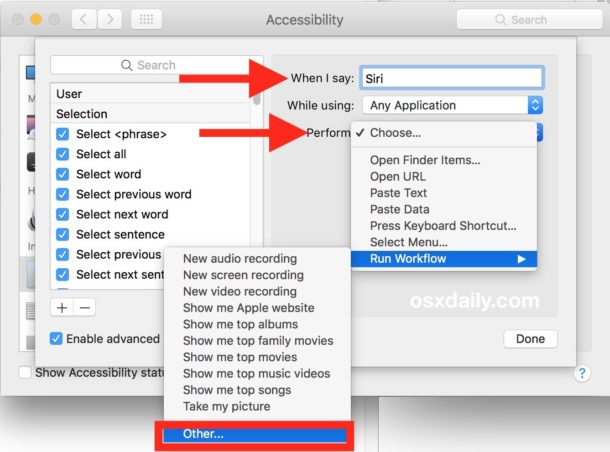
- Next go to the “Accessibility” system preference panel and choose ‘Dictation’ from the sidebar, and check the box for “Enable dictation keyword phrase” and type in ‘Hey’ * and then click the “Dictation Commands” button
- Check the box for “Use advanced commands” then click the + plus button
- Configure the advanced Dictation command as follows:
- When I say: “Siri”
- While using: “Any Application”
- Perform: Run Workflow -> Other -> Navigate to /Applications folder and select “Siri.app”
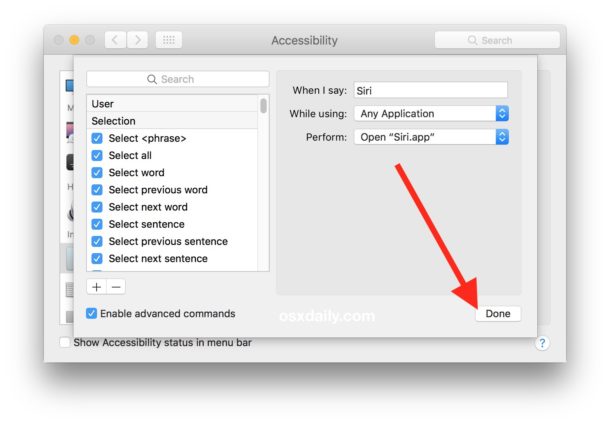
- The configuration should look like the following, with the Perform action being “Open Siri.app”, if everything matches choose “Done”
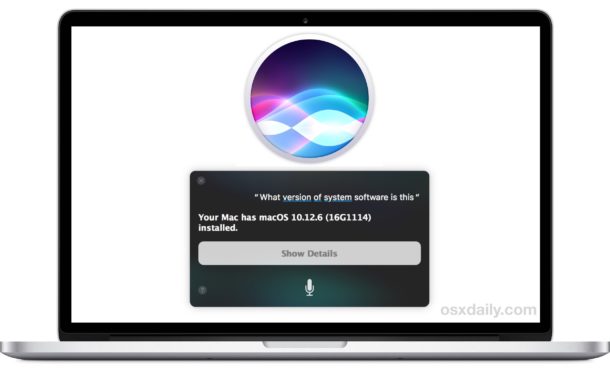
- Confirm that the “Hey Siri” trick is working by saying “Hey Siri what’s the weather” or some other Siri command

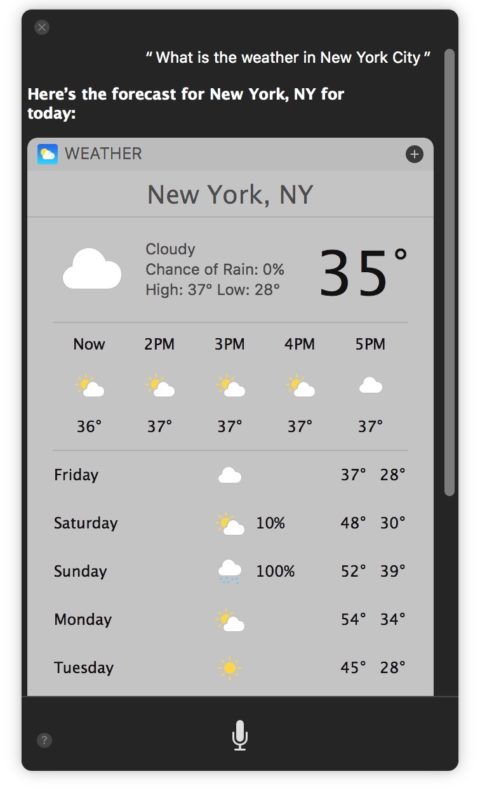
Assuming you configured things as described above, you will now have a fully functioning “Hey Siri” hands-free voice commanded assistant on a Mac, even if that Mac does not officially support Hey Siri.
Try it out yourself, it works! The response time and accuracy seems about the same as official Hey Siri on the Mac.

Basically anything from the Mac Siri commands list will work when activated through voice this way.
* You can use any other dictation keyword phrase, we’re using “Hey” so that we can mimic the “Hey Siri” feature. But you can use “Open the pod bay doors Hal” or something else if you feel like it.
How to Turn Off the Hey Siri Workaround on Older Macs
If you want to turn this off, you can return to the Accessibility Dictation section and uncheck the various boxes. If you want to disable Enhanced Dictation and disable Siri in general you can do that too. You may have noticed that Enhanced Dictation downloads a 1.2gb package for it to work, but you can remove Enhanced Dictation to reclaim that disk space on the Mac if desired.
While this is obviously for the Mac, enabling Hey Siri on iPhone or iPad is easy and supports many devices, and you can enable Hey Siri on Apple Watch too. Whichever device you use Siri on you can use many Siri commands from the list and yes even the funny Siri commands that are just plain goofy.
If you have any tips, tricks, suggestions, or experiences using this or another method to mimic Hey Siri on a Mac that does not support the feature, share with us in the comments below!

As another commenter mentioned, recent versions of MacOS make this much easier. You still need a camera/mic connected, of course, but here’s the new process.
Open System Settings – Accessibility. Click and enable Voice Control. Under “Commands”, click the plus sign to add a new command. Type either “Siri” or “Hey Siri” or any other command you like. Next to “Perform”, click “Open File” and choose Siri.app in your Applications folder. Click Done and that’s it.
Thats why tutorial sets just ‘Siri’ and not ‘Hey Siri’. I am aware of this issue and this solves it with no doubts.
This is different on Catalina. There is no box for enhanced. It is moved to the accessibility section and is called enable voice control/
after Catalina update today, it no longer works for me 2015 mbp
can it be done ?
Thanks so much! worked perfectly on the first try on my 2014 MBP on Mojave
Great tip, thank you!
i followed all the instructions carefully and it’s not working ! i have a macbook pro touchbar 2017 running 10.14.3
any idea ?
I got it working first try on MacBook Pro, I would advise trying again and starting from the beginning. Most likely there is a step that has been missed, skipped, or error somewhere along the way. Some of the steps are not covered in the visuals, so go on the text instruction.
But to me, Hey Siri is not that useful on Mac. I have it on the iPhone and use it to check weather and that is about it.
Thanks for your reply.
it actually started working after a while…
all I did was close all the other apps, gave it some time and it worked, so I restarted the MacBook and now it’s working without any issues…
sometimes it’s handy but not that frequent.
But it is to mention, that if you have a new iPhone or HomePod in range with “Hey Siri” also activated, that they also react. And not in the smooth way doing it that one device stops when on another device Siri was activated. In the example Siri is now giving feedback on the Mac and most likely also on the iPhone or HomePod.
It’s working. Thanks Paul!
Oh god NO!!