How to Markup Screenshots on iPhone & iPad
Do you want to annotate the screenshots you captured on your iPhone and iPad? Sure, there are plenty of third-party annotation apps on the App Store that you could settle for, but those aren’t always necessary once you become aware of how to use the built-in Markup tool in iOS and iPadOS, which allows you to annotate and markup screenshots easily right on iPhone and iPad.
With Markup, iPhone and iPad users can easily edit screenshots and photos by adding texts, shapes, handwriting and a lot more. It can be even be used to sign PDF documents, if you’re using your device for work purposes. Since this feature works flawlessly, you don’t necessarily need to install a third-party application from the App Store.
Are you interested in figuring out how this works, so you can try it for yourself on your iOS device? Here we will cover how you can markup screenshots on your iPhone & iPad.
How to Markup Screenshots on iPhone & iPad
Users can access Markup tool within the built-in photo editing section on iOS Photos app. Additionally, you can also access it for a brief period right after you take the screenshot by tapping the preview that shows up at the bottom-left corner of the screen. Considering you want to add annotations to existing screenshots, we’ll be following the first method. Without further ado, let’s take a look at the necessary steps.
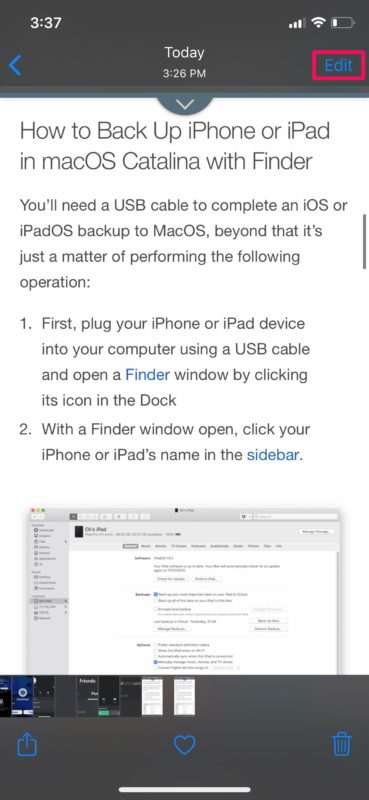
- Head over to the stock “Photos” app from the home screen of your device and open the screenshot that you want to edit.

- Tap on “Edit” at the top-right corner of the screen to access the photo editing menu.
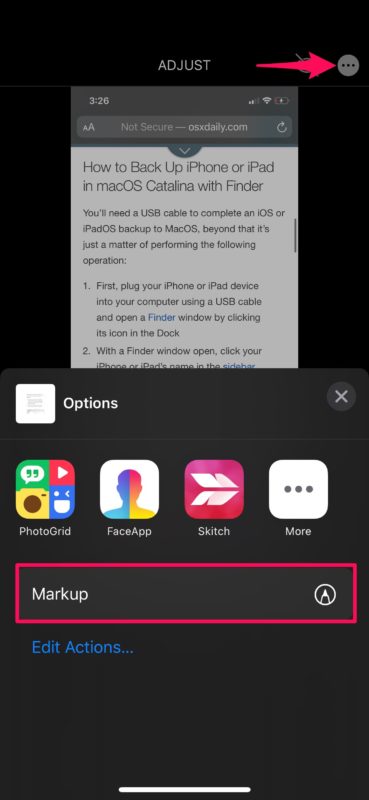
- Now, tap on the “triple dot” icon at the top-right corner of the screen and select “Markup” as shown in the screenshot below.
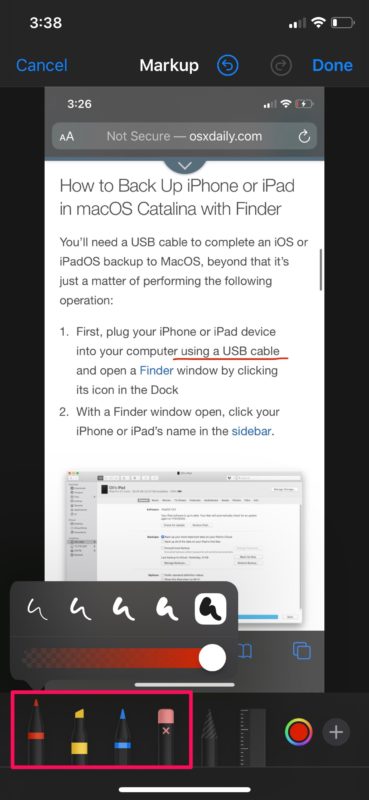
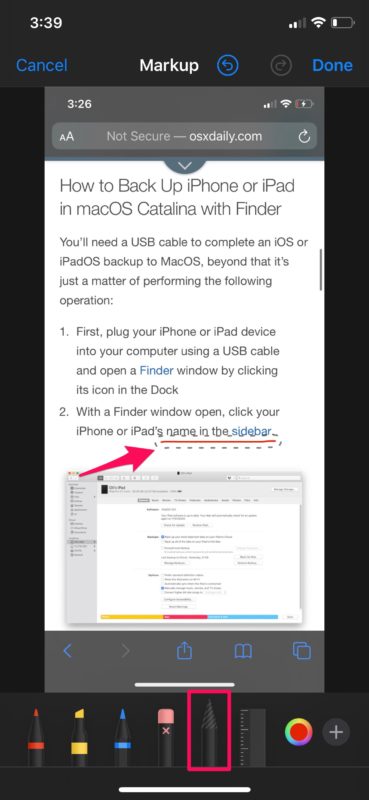
- At the bottom, you’ll notice a bunch of tools that can be used to annotate your screenshot. The first four tools from left to right are pen, marker, pencil and eraser. These can be used to add or remove drawings.
- Next, we have the lasso tool located right next to the Eraser. This can be used to select a drawing in your screenshot and move it around according to your preference.
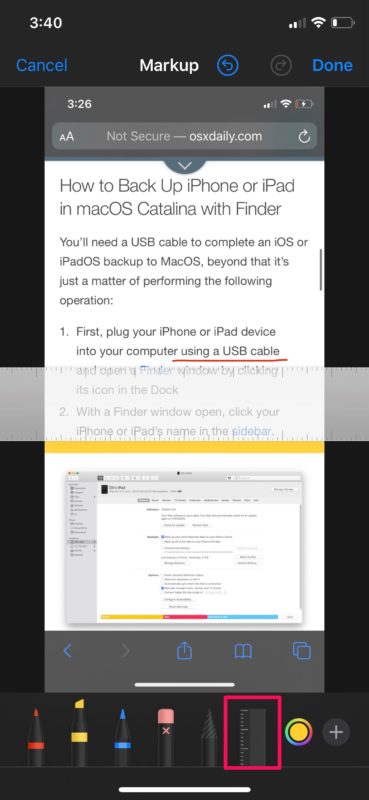
- Moving on, we have the ruler located right next to the lasso tool. You can use this to draw straight lines in the screenshot. It’s intended to be used in conjunction with the three drawing tools that are available.
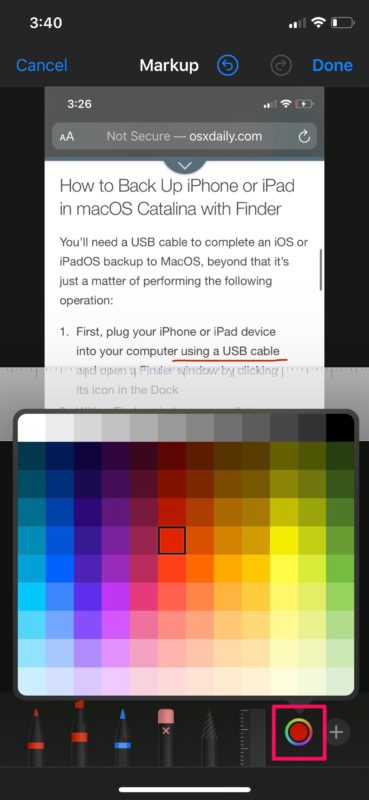
- If you want to change the color of the drawing tools, you can select the color palette and choose a desirable color as shown below.
- That’s not everything that Markup has to offer. Simply tap the “+” icon at bottom-right corner of the screen to access more features like being able to add texts, shapes and even signatures to your screenshot.
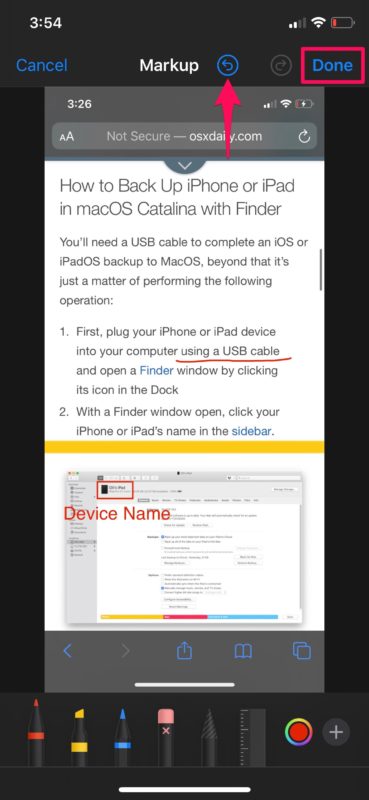
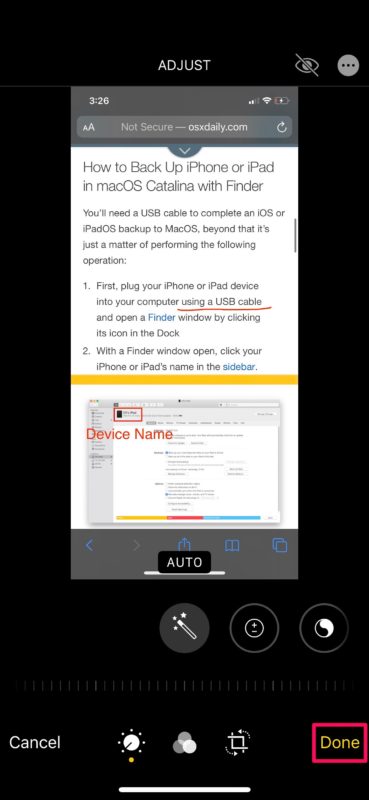
- If you want to revert an action at any point, just use the “Undo” option that’s located at the top. Once you’re done adding annotations, tap “Done” at the top-right corner of the screen to exit the Markup section.
- Now, tap “Done” again to save the edited screenshot.

It’s worth noting that the annotated screenshot will overwrite the original image file. However, you can always remove all your edits by heading back to the Edit menu and pressing “Revert”.
In addition to being able to draw and add texts to screenshots, Markup tool can save multiple signatures that can be used later on for quickly signing PDF documents which you might find to be useful for work-related purposes.
Another Way to Markup Screenshots on iPhone & iPad
If you freshly snap a screenshot, there’s yet another way you can markup those screenshots on the iPhone and iPad.
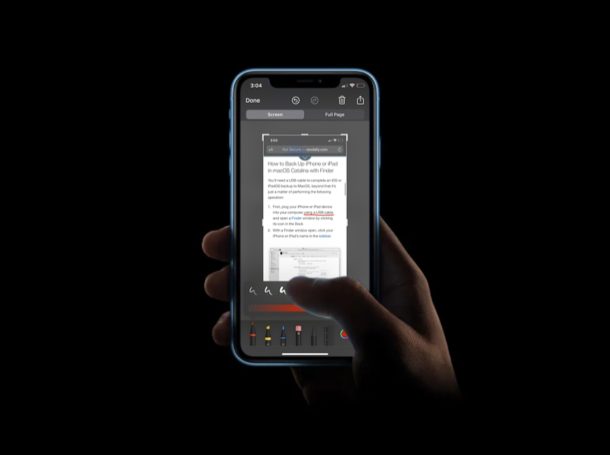
Start by taking a screenshot as usual, then tapping on the preview thumbnail icon that appears in the corner of the screen.
By opening the preview that shows up for a brief window right after you take a screenshot, you can quickly add annotations before the screenshot gets permanently saved in the Photos app. The markup feature here is the same as if you opened the image manually through the Photos app or Screenshots photo album.
This makes Markup the fastest way to edit your screenshots, making it a huge reason why most of you would prefer it over any third party solution.
Not quite content with the Markup tool? Don’t fret, because the App Store offers plenty of third-party annotation apps for both the iPhone and iPad, like Annotate, Skitch, LiquidText, PDF Viewer to name a few. Some of them even offer more features and flexibility than the built-in Markup tool, so we wouldn’t be surprised if you replace it with a third-party app.
We hope you managed to annotate a bunch of your existing screenshots as you needed to by using this method. What do you think about this nifty tool that’s baked into the Photos app? Care to point out your thoughts on Markup for screenshots? Let us know your opinions in the comments section down below.

I thought it would explain how to do a signature?
And what is it, for instance, that you could do “quickly” before a screenshot moves to photos?
These instructions work fine on iPhone but when I try it on iPad all I see is ONE markup tool i.e. a pen. No pencil, no marker, no pencil, no eraser, no lasso tool & no ruler. iPad is 5th generation using OS 13.4.1
Tap on the pen and you’ll access the rest of the markup tools
I had no clue this was here. Many thanks.