How to Screen Share iPhone with Facebook Messenger
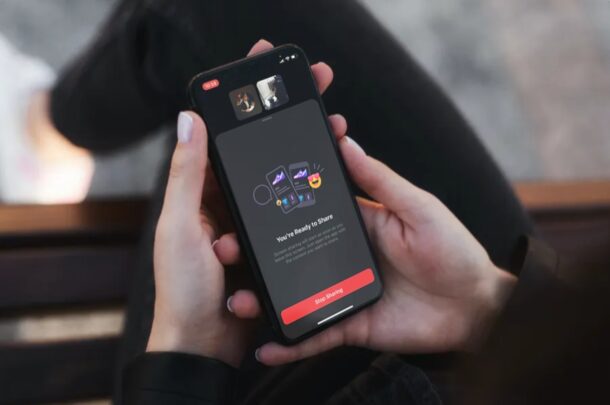
How would you like to screen share your iPhone using Facebook Messenger? If you use Facebook Messenger to make video calls with friends and colleagues from your iPhone, you’ll be pleased to know that Facebook has included screen sharing capabilities in the Messenger app for iOS and iPadOS.
With over 2.6 billion monthly active users, Facebook is without a doubt the biggest social network in the world. Since many people already have Facebook accounts, and Messenger app has multi-platform support, you can video call people who own Android and Windows devices as well. With screen sharing, you can show exactly what’s displayed on your iPhone or iPad screen during an active video chat, which could come in handy for sharing presentations and other work-related stuff.
This article will be guiding you through the process of screen sharing your iPhone or iPad with Facebook Messenger.
How to Use Facebook Messenger Screen Share with iPhone or iPad
In order to take advantage of this screen sharing feature, your iPhone or iPad must be running iOS 11 or later so that it has the native screen recording function. Make sure you’ve updated Messenger to the latest version from the App Store and simply follow the steps below to get started.
- Open “Messenger” on your iPhone and sign in with your Facebook account.

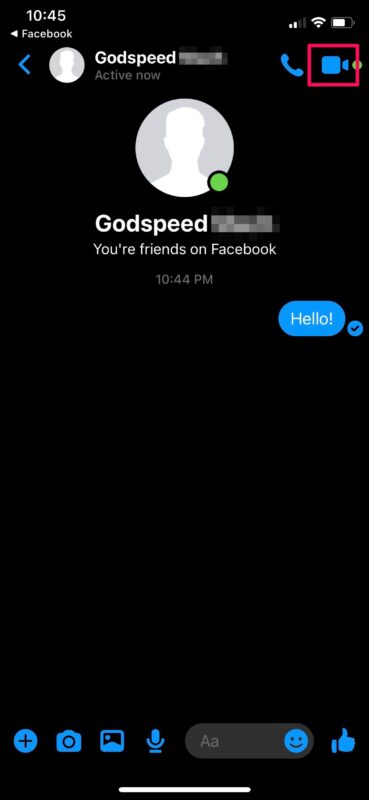
- Open a conversation with someone you want to video chat with. Tap on the video icon to begin the video call.

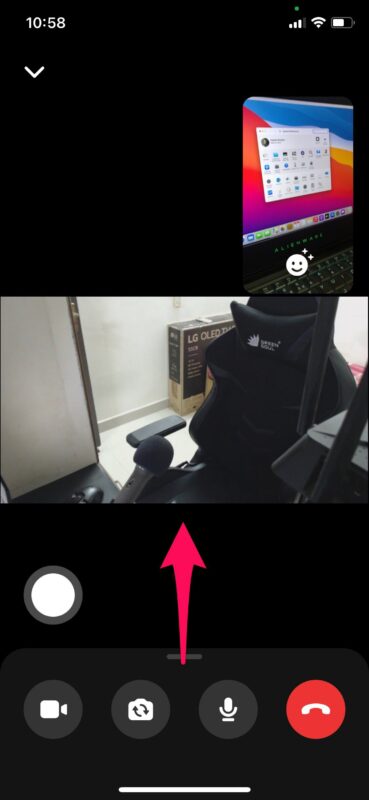
- Once you’re in the video call, swipe up on the card as shown below to access more options.

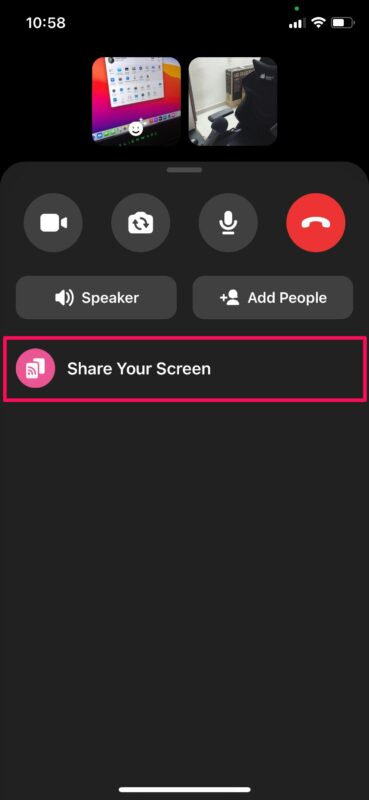
- Now, tap on “Share Your Screen” to proceed to the next step.

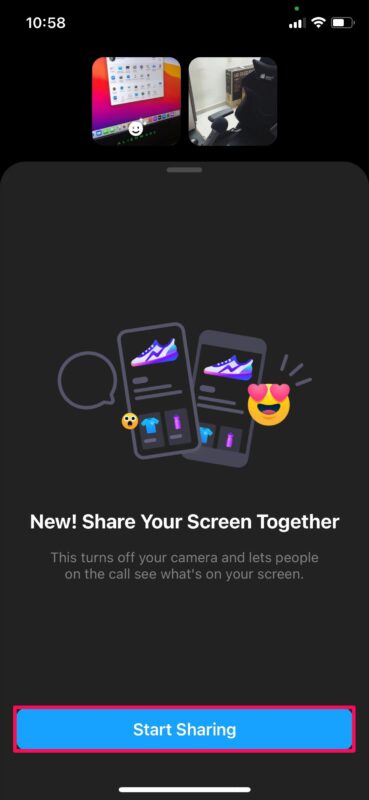
- You’ll be notified that your camera will be turned off when you’re screen sharing. Tap on “Start Sharing” to continue.

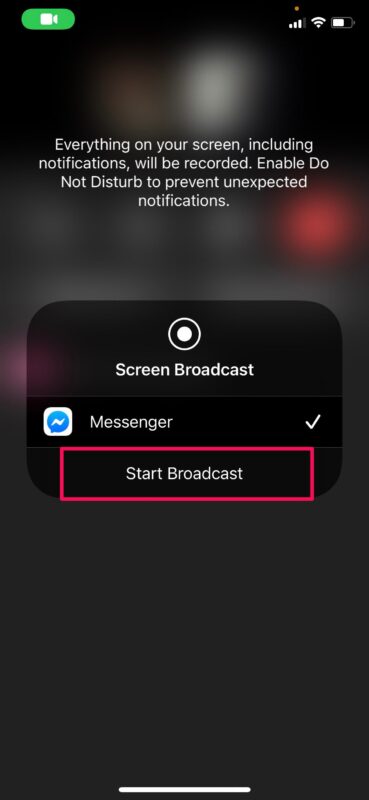
- This will open the screen recording tool in the iOS Control Center. Tap on “Start Broadcast”.

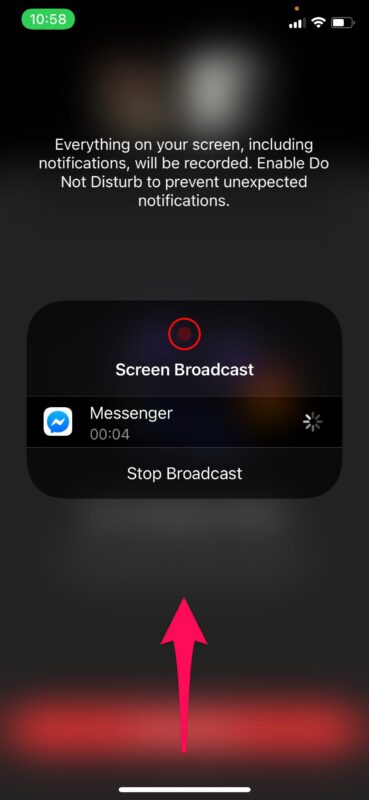
- After the countdown, you can swipe up from the bottom to exit this menu.

- You’ll be informed that screen sharing will begin as soon as you leave the following screen. You can open any other app on your iPhone and the screen will be shared with the other user seamlessly.

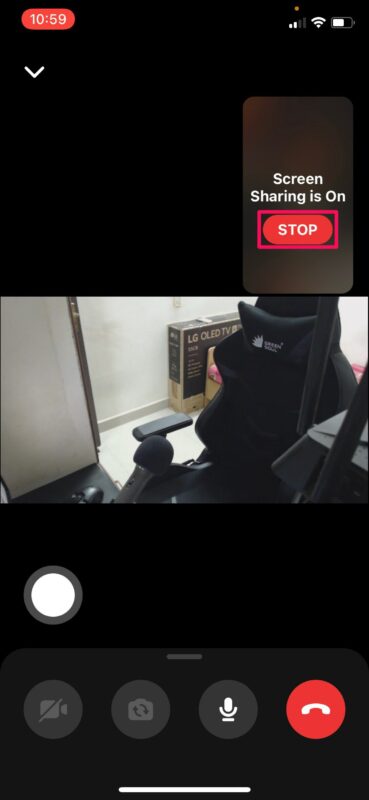
- When you’re done screen sharing, you can return to the Messenger app and tap on “STOP” as shown in the screenshot below.

That’s pretty much all there is to it. Now you know how easy it is to share your iPhone’s screen using Facebook Messenger.
Although we were primarily focusing on Messenger for iOS devices in this article, you can use the above steps to share the screen from your iPad or even Android smartphone as well.
Messenger isn’t the only app that lets you share your screen during a video call. Therefore, if you aren’t content with Messenger, you can try out screen sharing with Zoom or using Skype to screen share in a very similar way via the iOS Control Center.
Aside from screen sharing, there are many other compelling video conferencing options available too if you just want to make video calls, with Zoom Meetings on iPhone and iPad, group FaceTime video chat with iPhone and iPad and Group FaceTime on Mac, and plenty of others too.
What do you think of Facebook’s screen sharing feature in Messenger? Do you have a preferred option for screen sharing in iOS and iPadOS? Share your thoughts, experiences, and opinions in the comments.

