How to Use Speak Selection on iPhone & iPad
Did you know that your iPhone and iPad can read highlighted texts out loud? This is a feature that could come in handy for any number of reasons, but it may be particularly useful if you’re busy focusing on something else, want to know how to say or pronounce something, want something read to you, or even as an accessibility feature.
Speak Selection is one of the many accessibility features that iOS and iPadOS has to offer. With Speak Selection, iPhone and iPad users have complete control over when it is activated, unlike VoiceOver, a feature for people with visual impairment. You could use Speak Selection wherever you’re able to select text on your device, including emails, web content, notes, ebooks, and more.
Interested in taking advantage of this accessibility feature on your device? It’s pretty great, so read along to learn how to use Speak Selection on either the iPhone and iPad.
How to Use Speak Selection on iPhone & iPad
Turning on Speak Selection on an iOS or ipadOS device is a fairly easy and straightforward procedure. Your device doesn’t need to be on the latest system software version either, as this feature has been around for quite a while. Simply follow the steps below to get started.
- Head over to “Settings” on your iPhone or iPad.

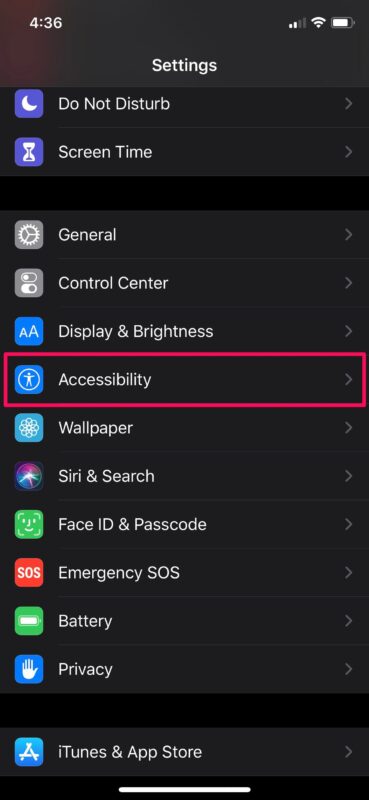
- In the Settings menu, scroll down and tap on “Accessibility”.
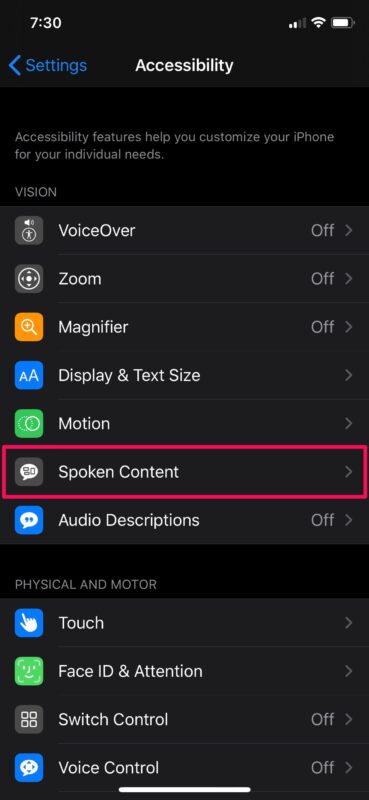
- Here, under the “Vision” category, tap on “Spoken Content” as shown in the screenshot below.
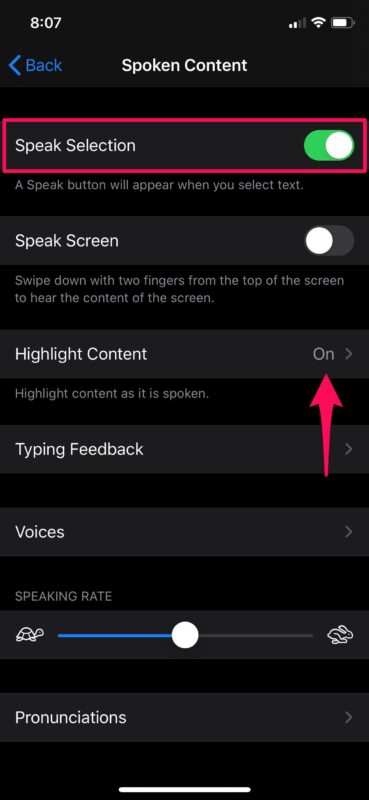
- Now, use the toggle to enable “Speak Selection” on your device. As you can see here, you also have the option to “Highlight Content” as it’s spoken.
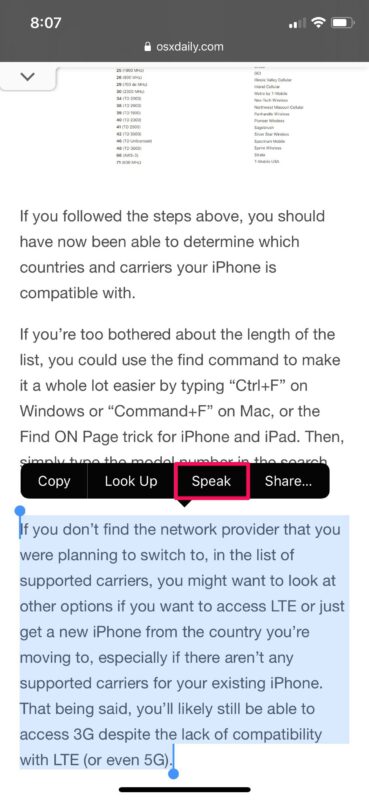
- Next, open any app where you’re able to select text. In this instance, we’ll be using our webpage in Safari. Long-press on any word to select it and drag the ends to extend the selection to a sentence or paragraph. Now, tap on the “Speak” option when the selection tools pop up.
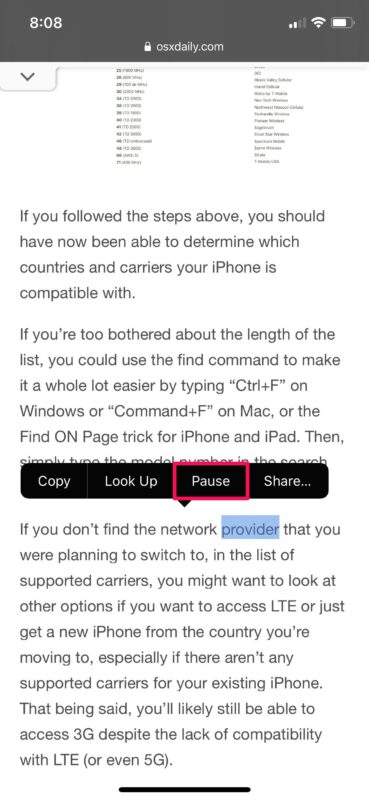
- Your iOS device will now start reading the text out loud. Tap on “Pause” if you want to pause the speech at any time.
That’s pretty much all there is to it.
Speak Text from Nearly Anywhere on iPhone & iPad
Once this feature is enabled, you can access the “Speak” selection option from anywhere you can select or highlight text.
- Locate the text you want to speak out loud, whether on a web page, email, note, ebook, or another app
- Tap and hold (or long press) on the word or selection to speak aloud, drag the selector as desired
- Tap on “Speak” to have the selected text spoken to you
Now you know how you can make your iPhone or iPad speak selected texts.
This feature could prove to be extremely useful not only for those with less than perfect eyesight, but also if you’re a multitasker. Let’s say you’re doing something on your computer. You could select a long email on your iPhone and use Speak Selection to read it out loud. This could be also used to check the pronunciation of certain words that you’re not familiar with, without having to look them up on YouTube. You can also use a variation of this cool trick to spell out words.
If you liked using Speak Selection on your iOS or iPadOS device, you might be interested in Speak Screen as well. It’s pretty similar, except for the fact that your device speaks whatever that’s displayed on the screen, which could in handy for reading ebooks or even written content on the web, like some of our articles.
Plus, you can even ask Siri to read the screen for you, which is a very handy extended feature of the speak screen capability.
In addition to this, iOS and iPadOS has many other accessibility features that can help people with visual or hearing impairment like VoiceOver, Display Accommodations, closed captioning, Live Listen, etc, and the features are handy for just about anyone. Even something like using Bold Text or Reduce Motion can improve device usability for many people. Check out the various Accessibility options, as some of these are particularly cool, for example with the Live Listen feature, you can sort of use your AirPods as hearing aids.
We hope you were able to take advantage of Speak Selection to read text aloud from your iPhone or iPad. What are your overall thoughts on this feature? Have you tried asking Siri to read the screen for you as well? Leave your experiences, thoughts, and opinions in the comments, and of course if you have any handy tips or advice, share those too!

I went back over the steps and I found out how to slow it down. Thanks anyway. Al
How do you slow down the speed? Thanks.
You can adjust the speech speed in Settings > Accessibility > Spoken Content
IT WORKED, BUT IT WAS AT AN EXTREMELY FAST SPEED OF SPEECH. I DON’T KNOW HOW TO SLOW IT DOWN. Can you help?