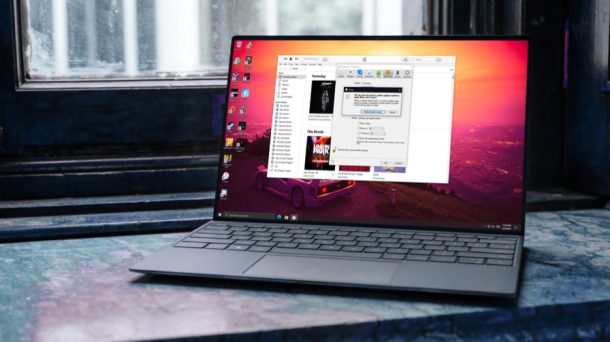
How to Use Restrictions in iTunes to Limit Access to Features & Content
Do you use iTunes on a Windows computer that’s shared with someone else? Or perhaps, you want to stop your kid from accessing certain content that’s available on iTunes? This is easily made possible with the help of iTunes Restrictions and if you’re a parent, you’ll have access to a ton of controls.
If you’re an iPhone or iPad user, you may be already familiar with how restrictions work on these devices with Screen Time. It basically gives you access to a bunch of parental control tools that can block or limit apps and features. It’s basically the same thing in iTunes as well, except you’ll be limiting features that are accessible within iTunes such as the iTunes Store, Apple Music, Podcasts, music with explicit content, and more.
Interested in learning how you can access these options? We’re here to help. In this article, we’ll be discussing exactly how to use restrictions in iTunes to limit access to content on your computer.
How to Limit Access to iTunes with Restrictions (Windows or Mac)
The following steps are applicable to all versions of iTunes, so it doesn’t matter whether you installed it from the Microsoft Store or downloaded it from Apple’s website. So, let’s get started:
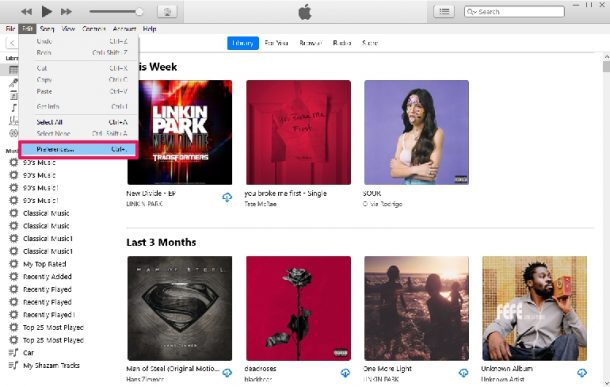
- Open iTunes on your computer and then click on “Edit” from the menu bar which is located just below the playback controls.

- Next, click on “Preferences” from the dropdown menu to continue.
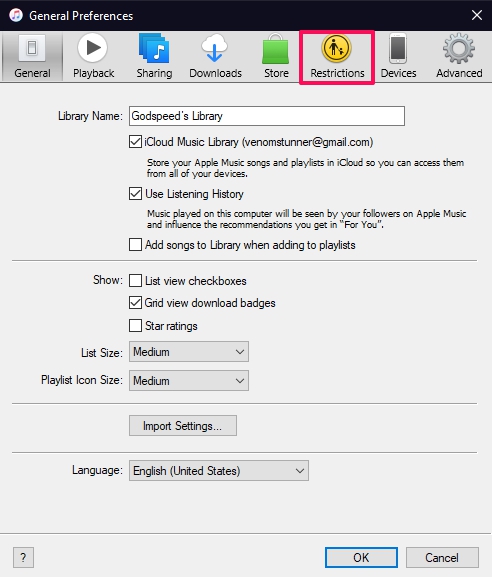
- This will launch a dedicated settings panel within iTunes. Here, click on “Restrictions” from the row of icons at the top.
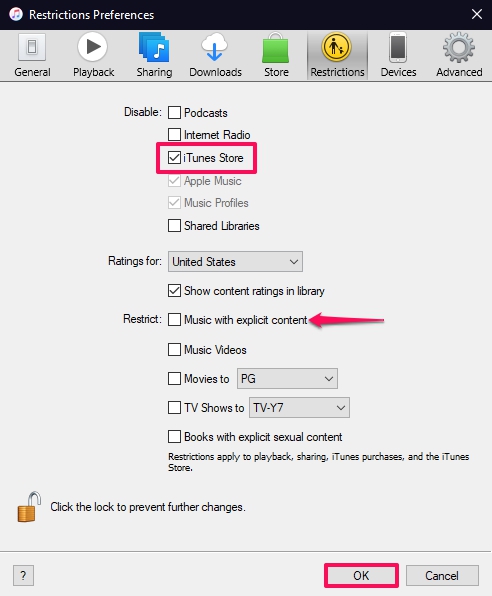
- Here, you’ll be able to see all the features that you’ll be able to restrict or disable. Simply check the boxes next to the features that you want to restrict in iTunes and click on “OK” to save your changes.
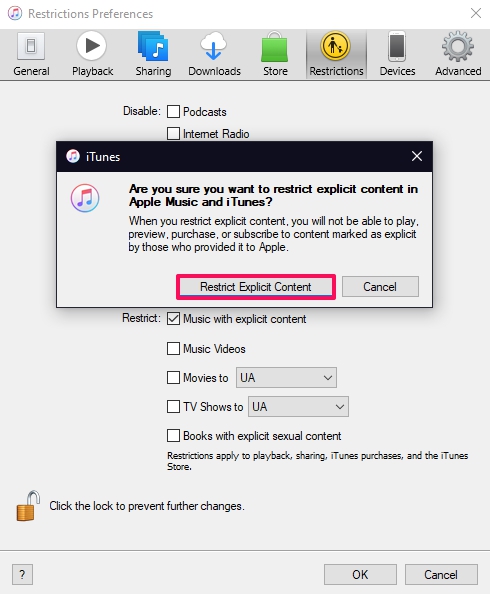
- Additionally, for certain restrictions like music playback with explicit content, you may get an additional prompt for confirmation as shown below.
That’s all you needed to learn. Now, you know how to properly make use of restrictions in iTunes.
Don’t forget to click “OK” in the preferences panel when you’re done disabling or restricting features. Otherwise, all the changes you’ve made here will be reset immediately and you may fail to notice it.
If you think the other user you’re sharing the computer may access and change these restrictions, you can prevent it by clicking on the lock icon in the Preferences panel. This basically prevents any further changes to the Restrictions section without an administrator password.
Do you use a Mac instead of a PC? Although iTunes is no longer available for Macs, you can still access all these restrictions from the Music app on macOS. Simply click on Music -> Preferences from the menu bar, head over to Restrictions and you’re good to go.
Hopefully, you were able to make all the necessary changes to limit someone else from accessing specific content on iTunes. What are your thoughts on these parental control features? Do you wish you had known about it sooner? Feel free to share your impressions and make sure to leave your valuable feedback in the comments section down below.
