How to Add & Remove People in Family Sharing Groups from Mac

Did you know that you can share your purchases and subscriptions with other Apple users? As long as you’re on a supported plan, Apple will allow you to share your subscriptions with up to five people at the same time. This is made possible with the help of Family Sharing. You can easily add and remove people from Family Groups from the Mac, as we’ll cover here (and yes you can also do this from iPhone or iPad).
Family Sharing can be put to good use if two or more people in your family use a particular service, let’s say Apple Music, iCloud, Apple TV+, or any other service that supports the feature really. This allows you to cut down costs on monthly subscriptions since the one subscription is shared with multiple users. That being said, these five slots for Family Sharing can fill up really fast especially if you’re adding your friends to your family group. Hence, you may also want to update the list of people in your family group every now and then.
How to Add & Remove People to Family Sharing Groups from a Mac
Getting started with Family Sharing is actually a lot easier than you may think. The following steps are identical regardless of the macOS version your system is running:
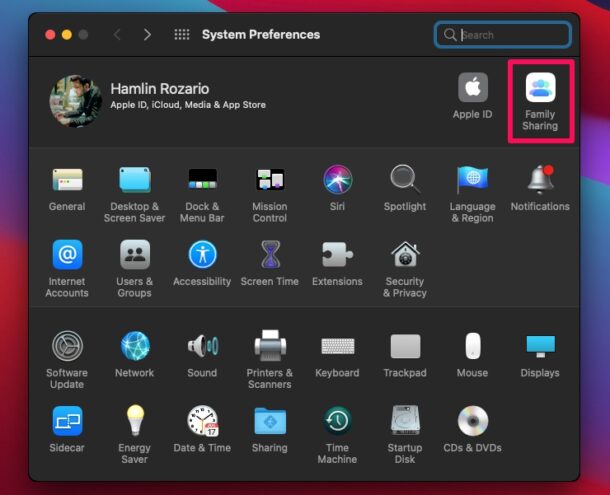
- Open “System Preferences” on your Mac from Dock or the Apple menu.

- Next, click on the Family Sharing option located at the top-right corner of the window as shown in the screenshot below.

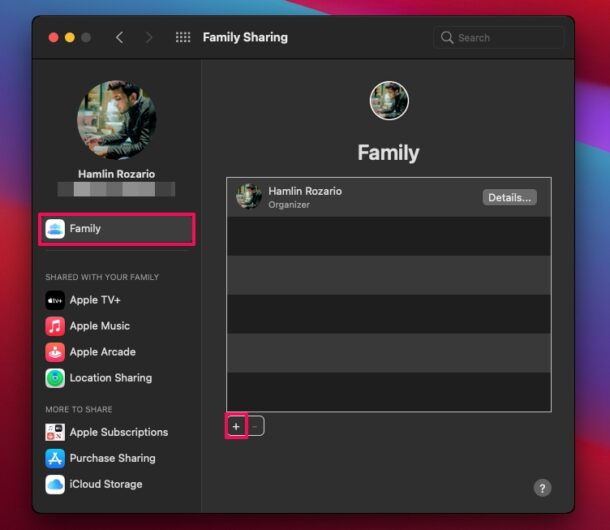
- This will take you to the dedicated Family Sharing section. Here, click on “Family” from the left pane. You’ll be able to see your Apple ID as the organizer on the right. Now, click on the “+” icon as shown in the screenshot below.

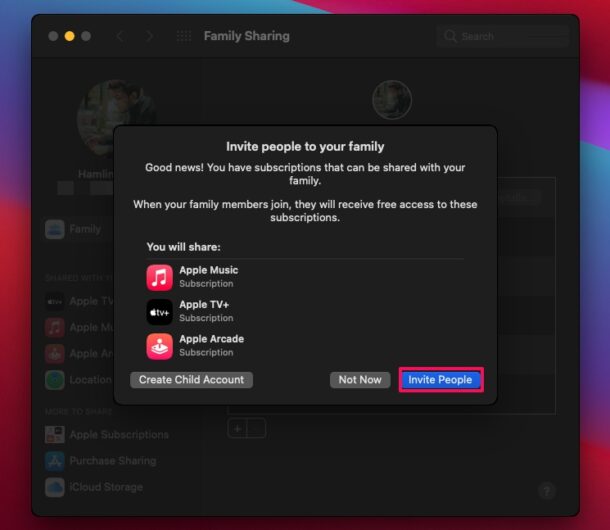
- Next, you’ll be shown a list of all the services that will be shared once you add someone to your family group. Click on “Invite People” to continue. If the person you’re trying to add is less than 13 years old, you can create a child account instead.

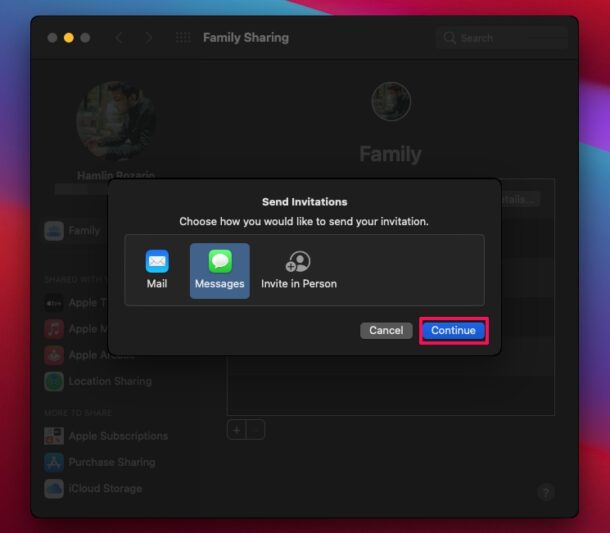
- Now, you’ll have the option to invite anyone you want. The invite can be sent via AirDrop, Mail, or Messages. Simply choose your desired mode of sending the invite and click “Continue”. You’ll be asked to select the contact for sending the invite.

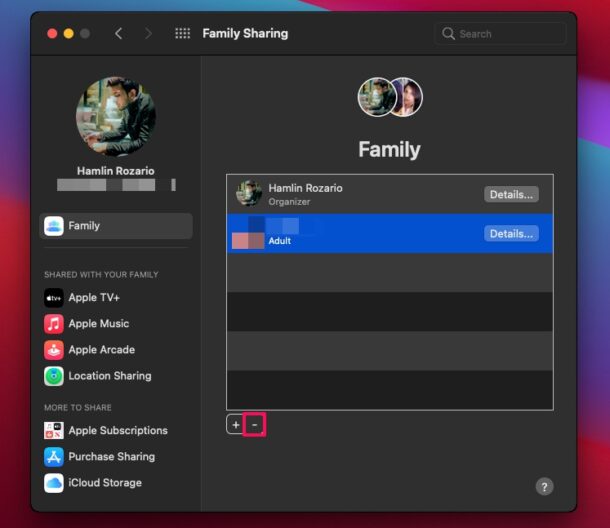
- Once the user you’ve invited accepts the invite, they’ll show up in your family group as shown below. To remove someone from your family group, select the user you want to remove and click on the “-” option.

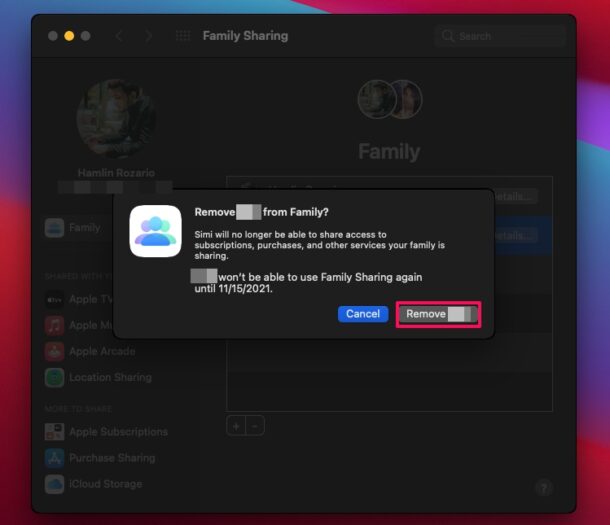
- When you’re prompted to confirm, click on “Remove” and you’re good to go.

That’s it. Now you have a clear idea of how to take advantage of Family Sharing on your Mac and to add and remove people.
Don’t forget that you can only share your services if you’re on the respective plans with Family Sharing support. For example, if you’re trying to share Apple Music, you need to be subscribed to the Family plan. Or, if you’re trying to share your iCloud storage, you need to be on the 200 GB or 2 TB tier. Apple One subscribers need to be on the Family plan to share all the services in the bundle as well.
We’d like to point out that if you ever choose to stop using Family Sharing, all the members in your family group will be removed immediately. And, if you decide to re-enable this feature at a later point, you’ll need to add all of them one by one.
Of course, we were focusing on Mac in this article, but we haven’t forgotten our iOS readers. Considering most Mac users own an iPhone or iPad as well, you may also be interested in learning how you can add or remove members from your family group from iPhone or iPad too
We hope you were able to make good use of Family Sharing to share your subscriptions with multiple people. What’s your take on this nifty feature? How many users are there in your family group? Do share your valuable thoughts and opinions in the comments section down below.

