How to Backup Voice Memos from iPhone
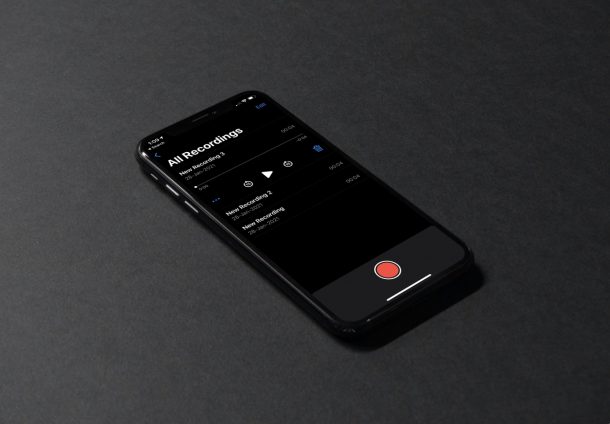
Do you use the built-in Voice Memos app on iPhone or iPad for recording your voice or other external audio? If you’re a regular Voice Memos user, you may want to back up all your recordings to make sure you don’t permanently lose them.
Apple’s Voice Memos app makes it really easy to record stuff using your iPhone, iPad, or Mac. With the right hardware like an external microphone, you can actually use it to make podcasts from the comfort of your home. Several users of the app do this already. If you use the app for anything important, having a copy of all your recorded files is extremely crucial. Fortunately, you have multiple ways to keep your voice memos backed up. Let’s take a look at how different methods for backing up voice memos from an iPhone, including using iCloud, AirDrop, and sharing.
How to Back Up Voice Memos from iPhone to iCloud
Let’s start off with the easiest and automated way to back up all your voice recordings. All you need to do is enable one particular option and you’re set. Here’s what you need to do;
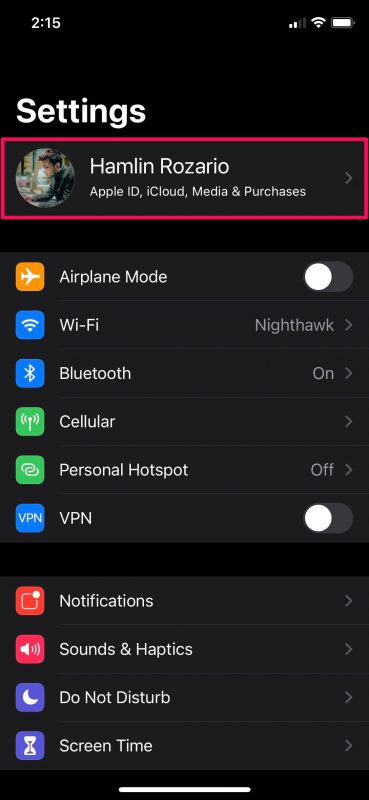
- Head over to “Settings” from the home screen of your iPhone.

- In the settings menu, tap on your Apple ID name located right at the top.

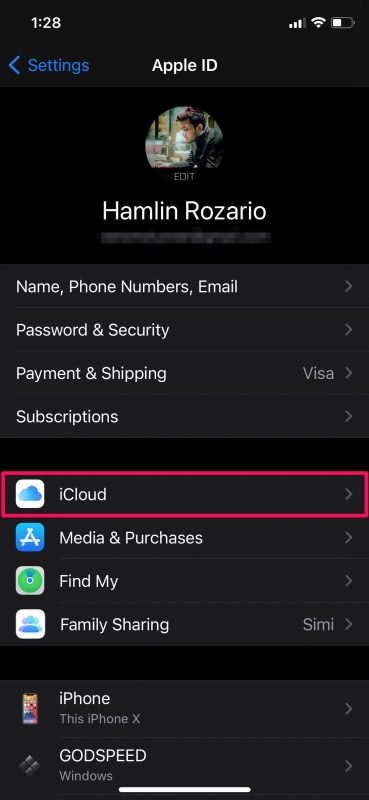
- Here, select iCloud to see what apps have access to the service for backing up data.

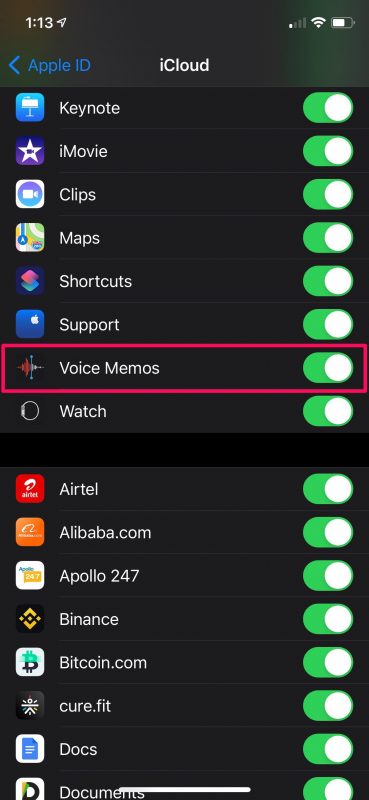
- Now, scroll down below and find the Voice Memos app. If the toggle is already enabled, you’re good to go. If not, turn it ON to make sure all your recordings are backed up to the cloud.

From now on, every recording that you create using the Voice Memos app will be automatically uploaded and stored on iCloud. Do keep in mind that this will count against your iCloud storage space. So, make sure you have enough space necessary to store all your files.
How to Back Up Voice Memos from iPhone Using AirDrop
If you’re not paying for iCloud, you’ll have to resort to slightly less convenient ways to back up your voice recordings. This particular method can be useful if you have another Apple device, especially a Mac. Let’s take a look at the steps, shall we?
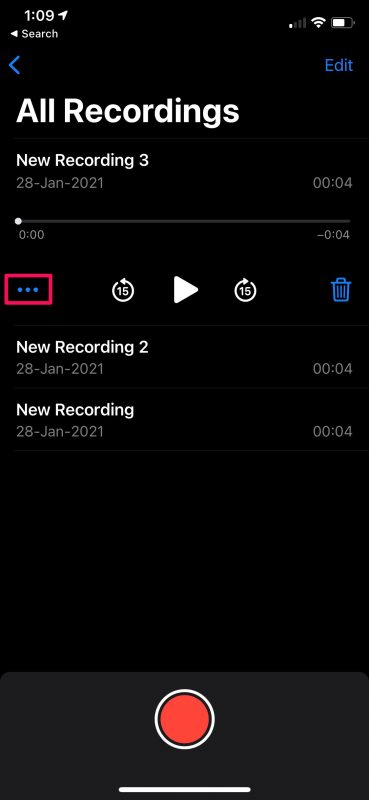
- Open the Voice Memos app on your iPhone and tap on the voice recording that you want to back up. You’ll get access to the playback controls. Now, tap on the three dots icon to view more options.

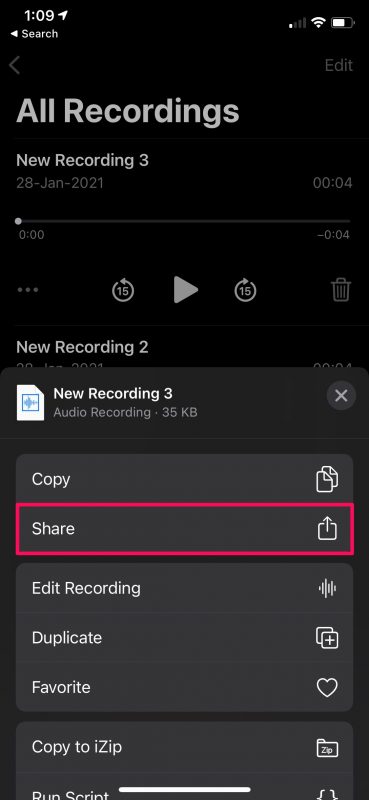
- A new menu will show up from the bottom of your screen. Here, tap on “Share” to bring up the iOS share sheet on your iPhone.

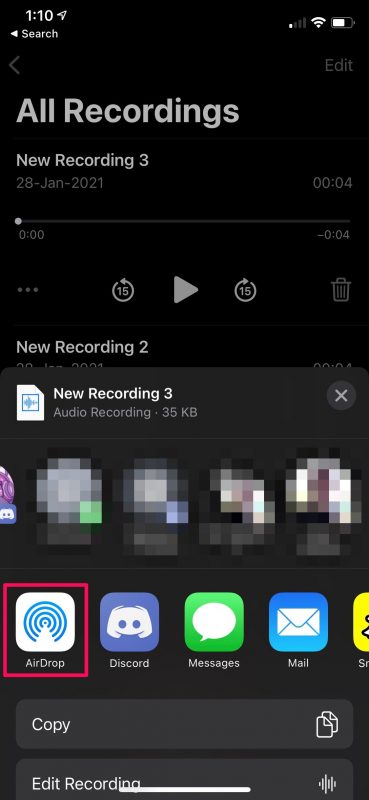
- Once you’re in the Share Sheet menu, select “AirDrop” which is shown along with other apps here.

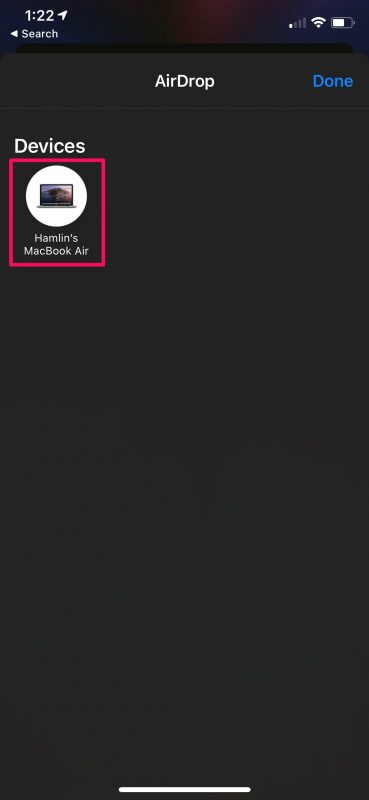
- If you have AirDrop enabled on your other device, it should show up under Devices here. Tap on it to initiate the file transfer. This could take a few seconds to complete. You’ll get a notification on the receiving device. If it’s a Mac, it will automatically open a Finder window to show you the exact location where the file is stored.

That’s all you have to do. You’ll need to repeat these steps to back up your other voice recordings too. If you have too many of them, we hate to break it to you, but there’s no option in the Voice Memos app to AirDrop multiple recordings at once.
How to Back Up Voice Memos By Sharing from iPhone
Don’t have another Apple device? No problem. There are still other ways to share your voice recordings from your iPhone. This particular method works best with your email. Here, we’ll just be mailing all the voice memos to yourself. Just follow these steps:
- Select the voice recording that you want to back up and tap on the three dots icon to bring up additional options.

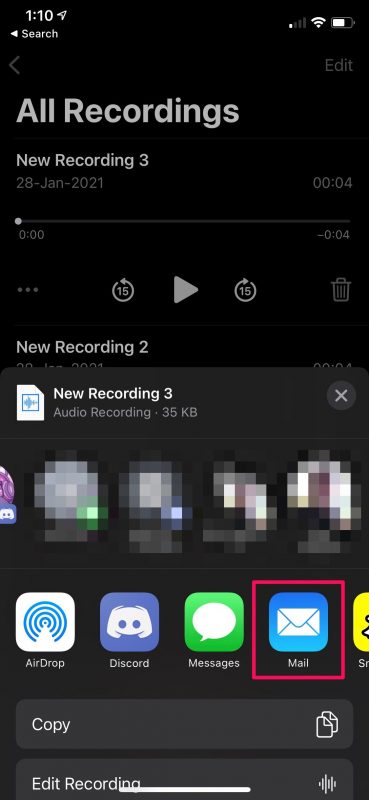
- Next, tap on “Share” from the menu that pops up from the bottom of your screen. To this point, it’s identical to the AirDrop method as you can see here.

- Now, select the stock Mail app which is usually located along with the other apps. If you use a third-party mail app like Gmail, it should show up here too.

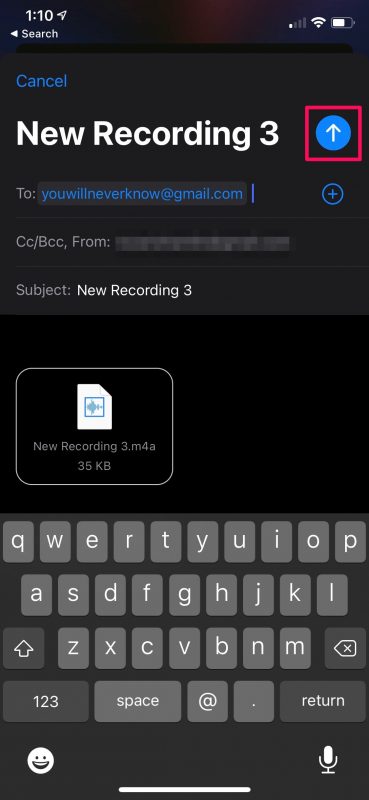
- Now, just make sure the recipient’s email address is same as the sender’s email address and then hit the Send button to mail the recording to yourself.

You’ll now find the email with the recording in your inbox. You’ll need to repeat these steps if you want to keep a copy of your other recordings too because, for some reason, Voice Memos doesn’t allow you to select multiple items and share them.
We understand that a lot of iPad users utilize the Voice Memos app to record content too. No worries, as you’ll be able to make use of all the above methods to keep your audio files backed up, since iPadOS is just iOS redesigned for the iPad.
As long as you regularly back up your iPhone, whether it’s iCloud or iTunes, your voice memos should be safe already, as restoring your iPhone from backup should restore all the voice memos that you may have accidentally lost. However, if you haven’t backed up your data yet, you can learn how to back up your iPhone/iPad to iCloud. And, if you don’t have an iCloud subscription, you can use back up all your data using your Mac or Windows PC.
Likewise, if you use Voice Memos on your Mac for audio recordings, it should sync across all your Apple devices as long as you’re using iCloud. But if you don’t, you should be able to easily copy all your recordings to an external hard drive.
We hope you were able to store all your iPhone voice memos in multiple different locations using the methods we covered here. Which method did you go with? Do you know any other convenient ways to back up voice memos? If so, do share your knowledge with us in the comments. Don’t forget to leave your valuable feedback below as well.


Hello, I want to back up about 800 voice memos. Is there a batch operation for this or do you have to go one at a time? I tried syncing to iCloud, and although I am seeing my iPhone 7 voice memos on my newer iPhone 12, I’m not seeing the voice memos in my desktop iCloud.com account.
As soon as they took away the method of backing up via Itunes I moved apps.
I use Awesome Voice Recorder which is vastly superior to voice recorder in my opinion. It has e mail, icloud, dropbox, box, onedrive, googledrive as share options as well as airdrop and even soundcloud.
It has different save options, playback options and noise reduction.
Plus it is free.