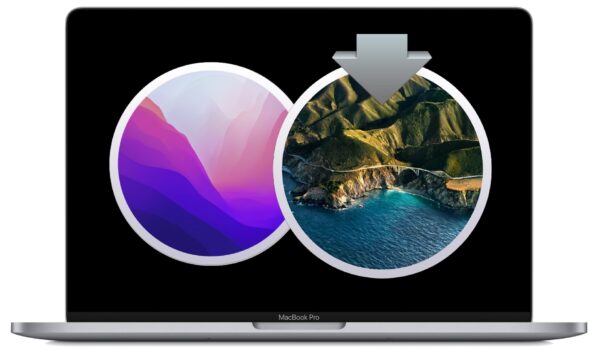
How to Downgrade MacOS Monterey to macOS Big Sur
If you have recently installed MacOS Monterey and regret doing so for whatever reason, perhaps incompatibility with some critical applications, general instability, or experiencing some other problems with MacOS Monterey that make it unworkable for you, you may be interested in downgrading from MacOS Monterey back to macOS Big Sur, or whatever the prior macOS release was.
Downgrading macOS Monterey involves erasing the Mac, reinstalling macOS, and then using Time Machine to restore the data, and that is the method we will cover here. The process is a bit different on Intel Macs versus Apple Silicon Macs.
If you don’t have a Time Machine backup available from before you updated to macOS Monterey, do not proceed.
Downgrading prerequisites
- A complete backup made of the Mac prior to installing MacOS Monterey (from Big Sur, etc)
- A bootable macOS Big Sur installer drive handy for reinstalling macOS (for Apple Silicon Macs)
- An active internet connection
Note for Apple Silicon Macs, you will be limited to downgrading to macOS Big Sur since that is the earliest version supported by Big Sur. The latest M1 Max and M1 Pro Macs can not downgrade from Monterey.
How to Downgrade MacOS Monterey to Big Sur
Always perform a complete Time Machine backup before proceeding. Also, be certain that you have an older Time Machine backup available from before you updated to MacOS Monterey.
Note that any data discrepancy between the two backups must be manually resolved, by copying those files created between the Monterey and prior macOS backup, to something like an external hard drive, so they can be restored after downgrading.
Downgrading involves erasing the Mac, reinstalling macOS, then restoring from Time Machine.
- Restart the Mac, and then do the following depending on Mac architecture
- For M1 Mac: immediately hold the Power button until you see the boot options, then choose “Options” and continue
- For Intel Mac: immediately hold down the Command + R keys to boot your Mac into Recovery mode
- Now in Recovery mode, choose “Disk Utility” from the options
- Select the drive where macOS Monterey is installed and then choose “Erase” from the options – this will delete all data on the Mac
- Select “Apple File System (APFS)” (most likely) or “Mac OS Extended Journaled (HFS+)” (typically older Macs without SSD drives) as the file system type, then click on “Erase” to format the Mac THIS ERASES ALL DATA ON THE DRIVE which is why it is important to have a data backup available
- Exit out of Disk Utility when the drive is finished erasing
- For Intel Mac, choose “Restore from Time Machine” from the macOS Utilities menu
- Select the Time Machine drive that’s connected to your Mac and choose “Continue”, then at the “Select a Backup” screen, choose the most recent backup made with the macOS version you want to downgrade to
- Click on “Restore” to begin the restore/downgrade process to that version of macOS
- For Apple Silicon M1 Mac:** restart the Mac and boot from a macOS Big Sur installer USB drive by connecting the USB installer to the Mac and holding the Power button to select the macOS installer from the boot menu
- Choose to “Reinstall macOS Big Sur” on the Mac and go through the installation steps
- After macOS Big Sur has finished installing, you will go through the typical Mac setup screen where you can select to restore from a Time Machine backup, select the macOS Big Sur Time Machine backup to restore from and proceed as usual
* Note that you may need to allow external drive booting on the Mac with T2 chip if you’re attempting to boot an Intel Mac with a bootable USB drive.
** You can also reinstall macOS Big Sur on an Apple Silicon Mac by using Internet Recovery, which is accessible from the boot menu options when holding down the Power button at system start. Depending on your internet connection speed, this may be slower than using a USB key.
When all is finished, you’ll be restored back to macOS Big Sur.
Now is the time to resolve any file discrepancy, so if you had data that you manually backed up between the Monterey update and restored Big Sur backup, you’ll want to copy those files over.
Did you downgrade from MacOS Monterey to macOS Big Sur? Why? How did it go? Did you use the methods above or did you use internet recovery? Let us know your experiences in the comments.

This is simply not true. If you have an M1 Mac and it shipped with 12.2.1, say, and you upgraded to 12.4, it is impossible to downgrade to 12.2.1 or 12.3.1. It does not recognize the USB bootable installer. I tried two different times. Neither is recognized in the Startup Utility. It just sits and spins. On two different USB drives.
M1 on Monterey is a different cat. Upgrade at your own peril. There is no going back.
there is no step to install big sur. goes directly to restore from time machine…
Downgrading because Monterey removed support for 1080i displays. We use a projector connected to a Black Magic Design system for a weekly live presentation, and are unable to use this Mac now due to Apple only supporting 1080p.
I have a MacBook Air M1 that shipped with Monterey but I want to test something on Big Sur and my Big Sur USB installed isn’t recognized, but my Monterey one is. In recovery mode, Disk Utility sees My Big Sur USB but it won’t let me boot from it. Also I’ve set the Startup Utility to reduced restrictions. I also erased the Mac. Because it shipped with Monterey, does that mean I can’t downgrade?
Thanks for this article. I’m considering the downgrade due to the instability in MacOS Monterey that Apple is not addressing; mostly, as I suspect, this is because Intel Macs are more likely to exhibit problems. So perhaps Apple doesn’t feel obligated. Honestly, very frustrating.
What instability? I’m still on Big Sur and came here looking for information on stability. It’s on version 12.3.1 now, and I figured that would be on the mend, if there were any problems.
Displays don’t work correctly. Finder cannot keep up with the OS (missing mouse clicks). Issues with many different mice and latency. To say Monterey is bad is an understatement. It fails at things we had figured out by Windows XP (BAD lag).
I started having sound/audio issues aster upgrading to Monterey
Much easier if you clone vs using TM.
Connect and boot to your clone backup by holding option upon start up.
Launch clone application (SuperDuper, CarbonCopyCloner, et al) and clone the backup to your computers drive.
Depending on how much data is on the backup clone, this will take some time, as it does with TM.
When complete your computer will be EXACTLY as it was at the time of the last clone backup.This includes all your 3rd party software WITHOUT the need to reauthorize which is often the case with TM.
Agree. Seems a Clone would do a much better job. Hopefully, you performed this clone before you installed Monterey. =) Good idea to keep multiple clones at different good, times.