How to Automatically Erase Apple Watch After Failed Passcode Attempts
Did you know that you can set your Apple Watch to automatically erase all its data if someone’s trying to break into it? Fortunately, this is pretty is easy to do and all you need is just a few seconds to enable this optional feature. Much like you can set iPhone to automatically erase on failed passcode entries, you can setup the same feature on Apple Watch too.
Out of the box, Apple lets you create a simple 4-digit passcode for your Apple Watch. This allows you to secure your wearable as soon as you take it off your wrist. However, the issue with 4-digit passcodes is that there are only 10000 possible combinations that you can use, thereby making it vulnerable to break-ins if the Watch is lost or stolen, or held by an unscrupulous party. To avoid this, Apple Watch gives you the option to wipe all the stored data after 10 failed passcode attempts.
If you’re interested in using this security feature on your Apple Watch, then read on.
How to Automatically Erase Apple Watch After Failed Passcode Attempts
Setting up automatic erase is a pretty simple and straightforward procedure regardless of what Apple Watch model you use. Just follow the steps below to get started.
- Press the Digital Crown on your Apple Watch to access the home screen. Scroll around and find the Settings app. Tap on it to proceed.

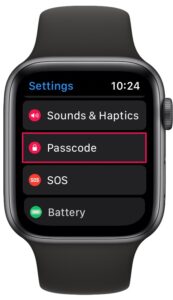
- In the settings menu, scroll down and tap on “Passcode” as shown in the screenshot below.
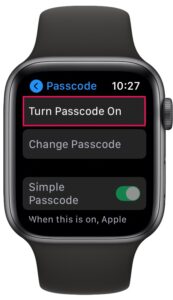
- If you’re already using a passcode, you can skip this step. If not, tap on “Turn Passcode On” to be able to access the auto-erase feature.
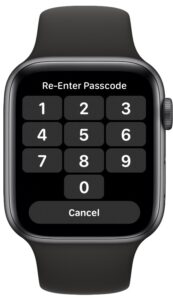
- Next, type in a preferred passcode for your Apple Watch and re-enter it to verify it.
- Now, in the same menu, scroll down and tap on the toggle to use “Erase Data”.

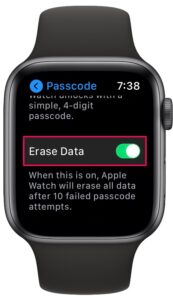
And there you have it, you’ve set up your Apple Watch to wipe all its data after multiple failed passcode attempts.
From now on, you don’t have to worry about people trying out different passcode combinations to unlock your Apple Watch. However, it’s important to note that they have 10 attempts before your Apple Watch gets erased.
If you want peace of mind, there are other ways to enhance the security of your Apple Watch. For instance, you can disable the simple passcode on your Apple Watch and use a much stronger one with a maximum limit of 10 digits. This way, you can use the same 6-digit passcode that you use to unlock your iPhone. Apart from this, to make sure your Apple Watch always stays locked when you’re not wearing it, keep Wrist Detection enabled.
Once the data on your Apple Watch is automatically erased after so many failed passcode attempts, you’ll need to configure your Apple Watch as a new device and go through the initial set-up process all over again.
In the passcode settings, you’ll also find an grayed out option to unlock your Apple Watch with your iPhone. You can enable/disable this feature within the Watch app for iOS. However, keep in mind that unlocking your iPhone will only unlock your Apple Watch as long as you’re wearing it.
Remember, a similar feature exists on iPhone too, so you may be interested in set the iPhone to erase itself automatically upon failed passcode entries that is paired with your Apple Watch as well.
Did you setup this feature on your Apple Watch? What’s your take on the passcode security features that Apple Watch has to offer? Do share your valuable thoughts and opinions in the comments section down below.
