We have discussed the powerful new Wi-Fi Scanner tool in OS X but it turns out there’s a much easier way to access the Wi-Fi Diagnostics app than to dig around in /System/Library/CoreServices/ and make a Dock or LaunchPad alias.
Instead, you can quickly launch the excellent wi-fi diagnostics app on a Mac at any time just by doing the following: Read more »
The iPhone and iPad default to use a 12 hour clock in the USA and Canada, but you can easily switch to 24 hour time (often called Military time) through a quick settings adjustment in iOS. The 24 hour clock can be desirable for many users, and even outside of military time it’s used widely in other parts of the world as well for international business, travelers, time scheduling, and much more. So it’s easy to see why many iPhone and iPad users may wish to use the 24 hour clock feature on their devices.
This walkthrough will show you how you can use a military time 24 hour clock on any iPhone or iPad.
With rumors and some new evidence suggesting the new iPhone display will have a 640×1136 screen resolution, developers and designers may find it interesting to alter the iOS Simulator to accomodate such a resolution. This can be done fairly easily by adding a basic text file to a directory, and then altering a plist file within the the iOS Simulator to add the new dimensions.
Grab this text file, save it as plain text named “File.txt” into ~/Library/Application Support/iPhone Simulator/
Now locate the iPhone Simulator and modify the plist file stored at the following location – you will need admin privileges to edit the plist file: /Applications/Xcode.app/Contents/Developer/Platforms/iPhoneSimulator.platform/Developer/Applications/iPhone Simulator.app/Contents/Resources/Devices/iPhone (Retina).deviceinfo/Info.plist
Add the following keys near the bottom of the plist but before the closing dict and plist tags, like so:
Relaunch iOS Simulator and select iPhone Retina as the device type to see the changes
This was discovered by Cedric Luthi and works with the latest versions of Xcode.
By comparison, the current iPhone 4 and 4S retina display is 3.5″ and has a resolution of 640×960 pixels.
Mac OS X includes a great built-in utility that helps you test existing password strength, and also generate new strong passwords. If you’re wondering if your password is secure this is a great safe way to test the quality of it, and it’s also a safe way to create new strong passwords that you know will be considered secure.
The new Notes app in OS X features a default font that is kind of hard to read and looks a bit goofy, nearly like Comic Sans. If you want a more professional looking font that’s easier on the eyes, you can easily switch the default font from “Noteworthy” to the always classic Helvetica, or another font of your choice.
Apple is airing a new iPad commercial titled “All On iPad”. As with previous iPad commercials, the advertisement focuses on what can be done with an iPad, and demonstrates a variety of actions and apps in use. The video is embedded below, and the text of the commercial is as follows:
Read it
Tweet it
Be surprised
Be productive
Make a sale
Make some lunch
Make it movie night
Play a game
Or an old favorite
Do it all more beautifully with the retina display, on iPad.
Need to edit or modify the hosts file on a Mac? This guide will show you exactly how to edit the hosts file in Mac OS. You’ll find hosts in Mac OS X is stored at /private/etc/hosts but it can also be accessed at the more traditional location of /etc/hosts. That said, if you’re looking to edit hosts, you’ll want to target the file located in /private/etc/ though.
We’ll walk through how to manually edit the hosts file in macOS Big Sur, MacOS Mojave, MacOS Catalina, MacOS High Sierra, MacOS Sierra, OS X El Capitan, Yosemite, OS X Lion, OS X Mountain Lion, and OS X Mavericks, this will be done with the command line using the simple text editor called nano. Don’t let the command line or Terminal sound intimidating though because it’s not, we’ll make the entire process of editing a Mac hosts file super easy.
The next iPhone has been said to have a larger 4″ display for some time now, but new evidence from 9to5mac possibly confirms longstanding speculation on how that extra 0.5″ of display space may be used with the device. Rather than increasing the size of icons or adding a widget area, it appears as though the new iPhone display could accomodate a 5th layer of home screen icons.
This discovery was made through tweaking the iOS Simulator to accomodate the rumored 640×1136 display resolution of the next iPhone, which in the new iOS 6 beta 4 and Xcode release, displays the 5th row of icons, rather than the normal 4 rows of icons in prior iOS versions.
To add further support to the claim, adjusting the resolution with previous versions of the iOS Simulator does not cause the 5th row of homescreen icons to appear, suggesting a uniqueness to the 640×1136 resolution in the latest version of Xcode and iOS 6 beta.
Part leaks claiming to be of the new iPhone demonstrate a screen that is taller rather than wider.
Ever wondered what it would look like if you ordered 100 MacBook Pro’s? Now you know.
These neatly arranged boxes aren’t from the living room of some eccentric Howard Hughes-esque Mac fan though, they’re Kent College’s fresh batch of MacBooks for the incoming student cohort this Fall. Each new student there gets a 13″ MacBook Pro with 2.5GHz Core i5, 4GB of RAM, and a 500GB hard drive as part of their 1-to-1 MacBook program, which, understandably, has been a big hit with pupils and faculty alike.
Whether you’re troubleshooting app crashes, beta testing an app, or you just want to help an iOS developer out after you’ve discovered a particular bug, you can retrieve crash reports from any app on an iPhone, iPad, or iPod touch device once it has been synced to a computer.
Finding crash report data for iOS can be done outside of Xcode, assuming you backup the device to a computer anyway. The article will show you how to find the iOS crash logs in Mac OS X and a Windows PC.
Notification Center is a great addition to Mac OS X but not everyone likes it, sometimes just muting the alert sounds and turning banners and alert pop-ups off per-app is just not enough, and you may want to disable the entire notification system completely. Furthermore, if you don’t use Notifications on the Mac then you probably don’t want the menu bar icon sitting in the corner of your screen either. We’ll show you how to disable Notification Center, all alerts, and also remove the icon from the corner of the menu bar in Mac OS X.
This will also completely disable all pop-up alerts and Notification banners in Mac OS X. If you still want to receive alerts and banners, do not completely disable the notification center.
iOS 6 beta 4 has been released for developers, the update comes as build 10A5376e and is available for all iOS 6 compatible hardware.
Registered developers can download the beta update through Over The Air, or login to the Apple Dev Center and get the IPSW directly from there. Alongside the fourth beta of iOS 6 is a new developer version of Xcode and a new dev release of Apple TV software.
Any Mac fan watching the Mars Curiosity landing last night probably noticed the abundance of glowing Apple logos on the desks of NASA engineers and scientists. Exactly how all the Macs participated in managing Curiosity from millions of miles away is unknown, but the overwhelming presence of MacBook Pro’s should tell you they played an important enough role to make any Apple fan proud.
Want to open Notification Center with a keystroke on the Mac? It can be done by setting up a custom keyboard shortcut.
Typically Notification Center of Mac OS X can be summoned either with a click of the menu bar item in the upper right corner, or a two-fingered swipe left on a trackpad, but you can also set a custom keyboard shortcut to see your notifications or alerts on the Mac.
This article will show you how to setup a custom keyboard shortcut for accessing Notification Center in Mac OS: Read more »
Safari 6 changed the longstanding behavior of the Delete key, which used to navigate back a page when pressed but now does nothing. Instead, navigating web pages forward and backward is done through Command [ and Command ].
If you’d like to return the back-a-page navigation behavior to the Delete key within Safari, you can do so with a defaults write command.
AirDrop is probably the quickest and easiest way to transfer files between Macs these days, thanks to it’s instant ad-hoc network it lets Macs send files back and forth – without even being connected to the same network. As is, using AirDrop is easy through the Finder, but now with Mac OS X you can send files through AirDrop right out of a Quick Look window.
This offers a super fast way to AirDrop a file you are already glancing at through the Quick Look feature, here’s how it works: Read more »
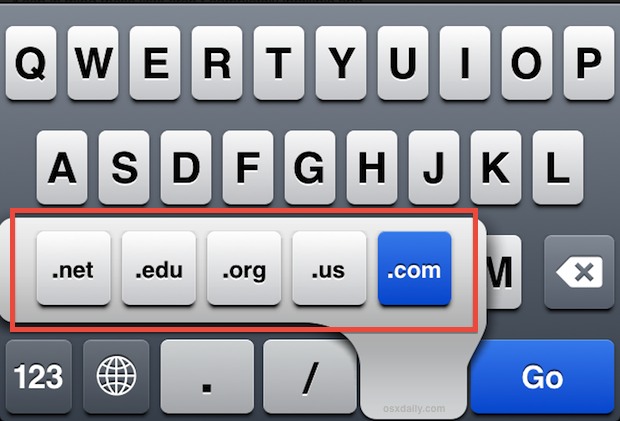
One of the most frustrating things to type on the iPhone, iPad, and iPod touch keyboards is an email address. Typing out a name, then tapping the “.?123” button to access special characters for the @ sign and numbers, then tapping it again to type more letters, than tapping it yet again to type a period, and again to finish off an email address, by the time you’re done you’ve shifted between the touch keyboards half a billion times. Instead of repeating that process over and over again, do yourself a favor and create a keyboard shortcut for your email address in iOS.
Having tons of screen real estate tends to aid everyones productivity, but some tasks simply demand it. Case in point; the equities trading desk of Thomas W. with dual Cinema Displays. More screen space means more charts and more information, leading to smarter trades. Here’s the Apple hardware that’s making it all happen:
Mac Pro (2008)
Dual 30″ Apple Cinema Displays
MacBook Air 11.6″ (2011)
Apple wireless keyboard, Magic Trackpad, and Magic Mouse
iSight camera
Not shown is an iPad and iPhone 4S, but you can see a large Samsung HDTV to the upper left tuned into CNBC or something similar. Also, if you look carefully you’ll find the screen on the left is running Parallels with Windows 7. Is this a great Mac setup or what?
We’ve had some really great Mac setups lately from a wide variety of sources with various use cases, keep ’em coming! If you want yours featured, send in a good picture or two, a list of hardware, and a brief description of what you use the Apple gear for to osxdailycom@gmail.com