Deleting cookies on the Mac depends on the specific web browser in use, thus if you want to delete all cookies, you’ll want to accomplish this for every browser app. Considering the web browsers most commonly used in Mac OS X are Safari, Chrome, and Firefox, we will show how to delete cookies in each of these browsers.
Mac OS X 10.6.2 has been released, for most Mac users this is great news because it fixes over 40 problems and bugs, including the rare but very problematic user account deletion bug. If you have an official Apple Mac then go right ahead and update to Mac OS X 10.6.2, but if you have a Hackintosh Mac Netbook… well you will want to hold off. It has been confirmed that the final release of 10.6.2 kills Intel Atom support officially. Hackintosh Guru StellaRolla reports:
The netbook forums are now blowing up with problems of 10.6.2 instant rebooting their Atom based netbooks.
A quick glance at the Hackintosh forums on MyDellMini.com confirms this:
So, I can tell you 10.6.2 DOES NOT WORK with the Mini10v.
OSX tries to start, but it hangs before you can see the apple and system ist trying to boot again … you are in a loop…
StellaRola goes on to note that the OSx86 community is pretty crafty and a modded kernel will likely surface in the near future. In any event, if you have a Hackintosh, hold off on the official 10.6.2 until more information is available.
You can read more about the Mac OS X 10.6.2 Update from Apple.com
You can securely delete files from Mac OS X right from the Finder. This is by far the simplest method to securely delete something on the Mac, and the process is pretty straight forward, very similar to the normal procedure of deleting a file except that you will access a separate option to enable the ‘secure’ layer:
Place files, folders, or whatever contents you want securely deleted into the Trash as usual
Next, pull down the “Finder” menu and select “Secure Empty Trash” from the options (also accessible by command+right-clicking the Trash icon)
The process begins instantly, but unlike the normal approach to emptying Trash, you will find the process takes a bit longer. Read more »
¥ – You can enter the Japanese Yen symbol in Mac OS X by hitting Option+Y
Rendering the ¥ Yen symbol is fine in most simpler Mac system fonts, but some of the more fancy and crazy fonts will not be able to display Japanese Yen symbol properly. You’ll know this because it will display a small square glyph in it’s place. Now you know how to type the Yen symbol on your Mac!
When you’re viewing an image on the iPhone (or iPod Touch) you can tap and hold the image to prevent it from rotating, regardless of the devices orientation. Handy for showing off photos to friends!
£ – Typing the symbol for the British Pound is done by hitting Option+3 in Mac OS X.
The keystrokes for typing the pound symbol (or quid symbol) are standard on all Mac keyboards from the USA, though in another nation with another keyboard layout the keyboard shortcut may differ slightly, or the pound symbol may even appear on the keyboard like the dollar sign does in the USA with a US keyboard layout for OS X.
Not to sound like a flip-flopping broken record or anything, but it is now confirmed that the latest 10.6.2 build 10C540 does not support the Intel Atom chip, the processor that is so common in Hackintosh Netbooks. Popular Hackintosher StellaRola has confirmed this with his sources, and he even includes a video of a MSI Wind U100 trying to boot 10.6.2 but it is stuck in a continuous reboot (shown below). With how fast things are changing (supported, unsupported), it’s a mystery as to whether the final release will include support for the Atom chip, but as we said before, if you’re a Hackintosh user you should probably avoid the update until it has been confirmed one way or another.
€ – If you want to reference the Euro symbol on your Mac, you’ve probably noticed that many keyboards don’t really make it obvious with the euro sign. But typing the Euro symbol in Mac OS X is actually really easy if you know the proper keystrokes.
Let’s review how to type the Euro sign on Mac OS X (€) with nearly any Apple keyboard.
Ever wanted to watch a movie in ASCII art? What’s that? You haven’t even thought about it before? In what might be the single most useless feature to ever grace a video player, VLC allows you to output any video playback as… ASCII art. Yes, the kind of ASCII art that was quite fancy on BBS’s in 1988.
Other than the humor and prank value, or perhaps to create your own variation of the Star Wars ASCII art thing, I don’t see much point to this, but it is very entertaining and pretty funny. So, let’s cover how you can watch movies rendered entirely in ASCII art with VLC player.
¢ is the symbol for the Cent, and typing it on your Mac may not be as obvious as it should be. But like most of the other special characters, it is actually really easy to type out:
Free is the best price. MacHeist knows this and has managed to give away six very fine Mac OS X apps completely for free in their latest bundle. It’s a limited offer, as of today November 6, there are only 6 days left, so get in and download while you can.
Apps included are worth $154 combined, but are free for the next 6 days:
ShoveBox – shove information, URLs, notes, whatever, into a drawer to access later
WriteRoom – awesome writing app we have covered before, the best distraction free writing app I’ve ever seen
Twitterific – probably the best Mac Twitter client, sits in your menubar and makes tweeting and following tweets beyond easy.
TinyGrab – uploads screenshots to the web immediately for sharing with the anyone, very handy
Hordes of Orcs – desktop tower defense featuring Orc’s in beautiful 3d, a great game and fun way to waste time.
Mariner Write – (not free as of writing but will be soon) – a very powerful professional Mac word processor, with all the features you’d expect from Microsoft Office but a fraction of the price, or in this case, FREE!
Do yourself a favor and go on over to MacHeist to pickup this totally sweet Mac app bundle. All that’s required is a simple registration, if you never want to hear a peep out of them just set the email preferences to receive no email after signup.
Want to type the Apple Logo with your Mac keyboard? The Apple logo is actually a special character available to type rather easily from a keyboard in OS X.
This is a fun little typing trick that looks pretty cool too, here’s what it looks like typed out:
Shown larger, it’s the exact Apple logo as seen here:
The next time you need to quickly reboot, shut down, log out, or sleep a Mac, all you need to do is hit the right keyboard shortcut. When we say quick we mean it here too, because these keyboard shortcuts will not prompt you to confirm, they are quite literally instantaneous in their results, and that means if you’ve got unsaved documents open you may lose them if you don’t have auto-save in the newest versions of OS X.
Here are the six keyboard shortcuts for all the power functions of a Mac, like quickly rebooting, shutting down, logging out, or sleeping. Again, these are pretty much instant, for example if you hit the reboot keystrokes below your Mac will instantly reboot without warning, so you probably won’t want to test these out unless you know you want to perform that action. Read more »
Fortune Magazine has named Steve Jobs the CEO of the decade, and it’s a pretty fitting title really, the guy is a powerhouse. Nearly 10 years ago Apple was struggling to find their place in the technology world, there were rumors of collapse and impending bankruptcy or buyouts, the first release of Mac OS X (10.0) was a slow cumbersome dud, and they had just entered an extremely crowded MP3 player market with a seemingly overpriced product with a weird name, the iPod. Apple stock at the time was right around $7. Now fast forward to today, where the iPod is the only MP3 player people talk about, the iPhone is taking over the cellular world, and Apple’s market capitalization is greater than Google’s, with their stock sitting comfortably at $193. CEO of the decade? After pulling all that off, that might be an understatement.
Here’s the readers digest version as to why they think Steve Jobs is so remarkable, summarized in the articles first paragraph:
Youthful founder gets booted from his company in the 1980s, returns in the 1990s, and in the following decade survives two brushes with death, one securities-law scandal, an also-ran product lineup, and his own often unpleasant demeanor to become the dominant personality in four distinct industries, a billionaire many times over, and CEO of the most valuable company in Silicon Valley.
As a longtime Apple fan I think the article leaves out some of the other obvious and important contributions, but I can’t argue with much of what they do cite. If you’re a part of the Cult of Jobs, or just a fan of Apple, the Fortune article is worth a read:
It’s baaaaaack! Like a relentless zombie in a bad horror flick that just can’t be killed, the Intel Atom chip is now supported again in the latest developer build of 10.6.2, 10C53. This doesn’t mean much since it’s just a developer build, but for now Hackintosh Netbook users can feel a bit better about their uncertain future. StellaRolla reports:
…the latest development build Atom appears to have resurrected itself zombie style in 10C535. The Atom lives another day, but nothing is concrete until the final version of 10.6.2 is out.
So that’s all fine and dandy, but will the Atom truly survive? Time will tell.
Thank you to OS X Daily reader Tony for notifying us of this change!
Even if you have the Mac Dock icon magnification turned off in your system preferences of Mac OS X, you can still force Dock icons to magnify on the fly by using a simple keystroke.
This can be a helpful trick if a Mac Dock is set to be small and you want a better look at something, or perhaps you just want a better view of an icon before you select it.
Anyone fascinated by the mystique of Apple should check out the CultOfMac.com interview with a man you’ve probably never heard of, Ken Segall. His claim to fame? He named the iMac, and was in charge of that whole ‘Think Different’ campaign. With how ubiquitous the iBranding has become, I find it really interesting that Steve Jobs didn’t like the iMac name at all and rejected it on several occasions, but started using it anyway:
“He rejected it twice but then it just appeared on the machine,” Segall says, laughing. “He never formally accepted it.”
Ken Segall then worked for Dell of all places, and he doesn’t exactly go out of his way to praise his more recent employer when comparing them to Apple:
“Dell and Apple: It’s night and day,” Segall says. “It’s a transactional world Dell lives in. It’s all about numbers. Everything they say about Apple making products for themselves is true. Apple — it’s about changing the world. For everyone else, it’s about the money.”
Does anyone else get the feeling that this guy just wants to work for Apple again? Anyway, read the interview, it’s a fascinating look into Apple company culture.
Note: Ken Segall was kind enough to correct our post here via the comments, he never actually worked for Dell, only their ad agency. The interview is still a great read, carry on.
You can use Spotlight as a calculator on the Mac, and it actually works impressively well. Yes, the Spotlight search feature can do calculations!
While many longtime OS X users probably know this, there are tons who are new to the Mac who aren’t aware that Spotlight is so robust, so the next time you need to quickly solve an equation, perform a calculation, or add up a handful of numbers for taxes, try using Spotlight Search on the Mac as a calculator to solve the equation. Here’s exactly how it works.
 Deleting cookies on the Mac depends on the specific web browser in use, thus if you want to delete all cookies, you’ll want to accomplish this for every browser app. Considering the web browsers most commonly used in Mac OS X are Safari, Chrome, and Firefox, we will show how to delete cookies in each of these browsers.
 You can securely delete files from Mac OS X right from the Finder. This is by far the simplest method to securely delete something on the Mac, and the process is pretty straight forward, very similar to the normal procedure of deleting a file except that you will access a separate option to enable the ‘secure’ layer:
 When you’re viewing an image on the iPhone (or iPod Touch) you can tap and hold the image to prevent it from rotating, regardless of the devices orientation. Handy for showing off photos to friends!
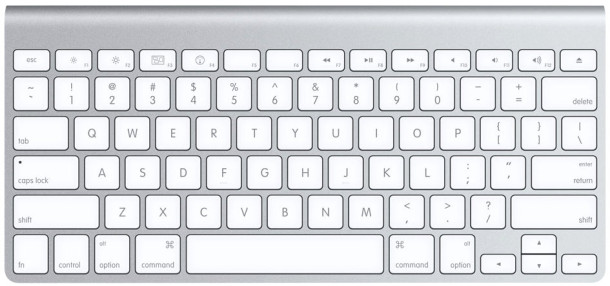


 Fortune Magazine has named Steve Jobs the CEO of the decade, and it’s a pretty fitting title really, the guy is a powerhouse. Nearly 10 years ago Apple was struggling to find their place in the technology world, there were rumors of collapse and impending bankruptcy or buyouts, the first release of Mac OS X (10.0) was a slow cumbersome dud, and they had just entered an extremely crowded MP3 player market with a seemingly overpriced product with a weird name, the iPod. Apple stock at the time was right around $7. Now fast forward to today, where the iPod is the only MP3 player people talk about, the iPhone is taking over the cellular world, and
  It’s baaaaaack! Like a relentless zombie in a bad horror flick that just can’t be killed, the Intel Atom chip is now supported again in the latest developer build of 10.6.2, 10C53. This doesn’t mean much since it’s just a developer build, but for now Hackintosh Netbook users can feel a bit better about their uncertain future.
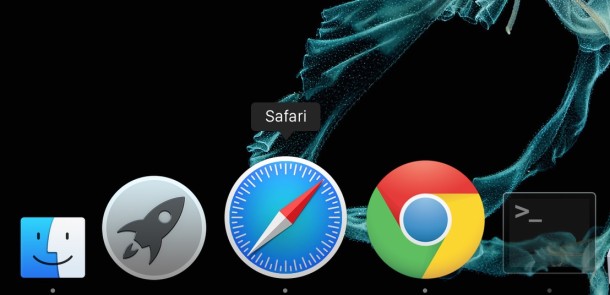
 Anyone fascinated by the mystique of Apple should check out the CultOfMac.com interview with a man you’ve probably never heard of, Ken Segall. His claim to fame? He named the iMac, and was in charge of that whole ‘Think Different’ campaign. With how ubiquitous the iBranding has become, I find it really interesting that Steve Jobs didn’t like the iMac name at all and rejected it on several occasions, but started using it anyway: