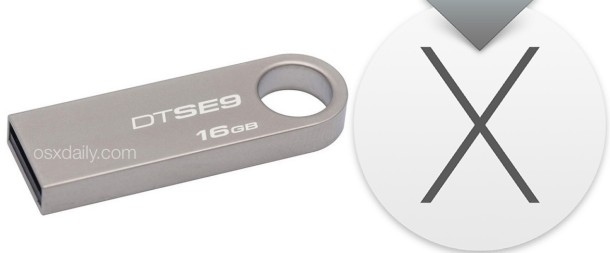
How to Make a Bootable OS X El Capitan GM / Beta USB Installer Drive

Many Mac users interested in running OS X El Capitan may wish to have a bootable install drive of the new operating system. We’re going to demonstrate how to do this with a USB flash drive, but technically you can create a boot installer out of just about any USB device which has sufficient space. The process of creating the boot installer for OS X 10.11 is easy enough, though users should have some experience and comfort with the command line before attempting to do so.
The basic requirements to make a bootable OS X El Capitan install drive are as follows:
- An 8GB or larger USB Flash Drive
 , this will be formatted and turn into the OS X El Capitan bootable installer
 - The OS X El Capitan installer application, this can be downloaded from Apple (either as Public Beta or Developer Beta, or preferably the GM Candidate)
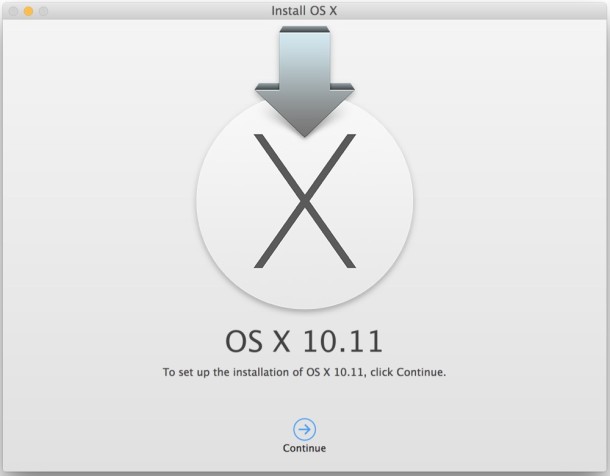
Naturally, you’ll also need a OS X 10.11 compatible Mac for the destination. Beyond that, we’re going to assume you have an appropriately sized USB drive ready, and the “Install OS X 10.11” application file residing in the /Applications/ folder of OS X, which is where it downloads to by default.
Make an OS X El Capitan GM / Beta Bootable Installer Drive
- Connect the USB drive to the Mac and launch Disk Utility, then select the USB drive from the left side menu and go to the “Erase” tab
- Format the USB flash drive as “Mac OS Extended (Journaled)” and choose Erase to confirm the process – this formats the USB drive which will become the installer, be absolutely certain you have selected the right volume or you will lose data
- Now go to the “Partition” tab and change the partition layout to “1 Partition”, then change the name of the partition to “ElCapInstaller” or another name of your choosing
- Click on “Options” and select “GUID Partition Table”, and click “OK”, followed by “Apply”, then quit out of Disk Utility
- Launch the Terminal application and paste the following string into the command line, if you changed the installer name “ElCapInstaller” to something else, be sure to adjust that in the syntax:
- Hit the Return key and enter the admin password when requested (this is necessary to use sudo), you’ll then see numerous progress indicators as the process completes, it will be finished when the last messages is “Done.”
- When completed, the USB bootable installer will be created and you have an OS X El Capitan installer drive, exit out of Terminal and you’re ready to go
For OS X El Capitan final release: (full tutorial for final version are here)
sudo /Applications/Install\ OS\ X\ El\ Capitan.app/Contents/Resources/createinstallmedia --volume /Volumes/ElCapInstaller --applicationpath /Applications/Install\ OS\ X\ El\ Capitan.app --nointeraction
For OS X El Capitan GM Candidate:
sudo /Applications/Install\ OS\ X\ El\ Capitan\ GM\ Candidate.app/Contents/Resources/createinstallmedia --volume /Volumes/ElCapInstaller --applicationpath /Applications/Install\ OS\ X\ El\ Capitan\ GM\ Candidate.app --nointeraction
For OS X El Capitan Public Beta:
sudo /Applications/Install\ OS\ X\ El\ Capitan\ Public\ Beta.app/Contents/Resources/createinstallmedia --volume /Volumes/ElCapInstaller --applicationpath /Applications/Install\ OS\ X\ El\ Capitan\ Public\ Beta.app --nointeraction
For OS X 10.11 Developer Beta:
sudo /Applications/Install\ OS\ X\ 10.11\ Developer\ Beta.app/Contents/Resources/createinstallmedia --volume /Volumes/ElCapInstaller --applicationpath /Applications/Install\ OS\ X\ 10.11\ Developer\ Beta.app --nointeraction
“Erasing Disk: 0%… 10%… 20%… 30%…100%…
Copying installer files to disk…
Copy complete.
Making disk bootable…
Copying boot files…
Copy complete.
Done.”
You can boot from the drive by holding down the Option key and selecting “Install OS X El Capitan” from the boot volume menu.
If you’re going to install OS X El Capitan beta, you should do so safely on a secondary partition, if not a secondary Mac. Beta system software is often unstable and is not intended for primary use outside of development environments.
By the way, you may notice that drive creation command looks familiar, and that’s because it’s basically the same ‘createinstallmedia’ function that allowed for the creation of an OS X Yosemite boot install drive too,with the primary difference being the application path to the installer file, and of course, the version of OS X itself.
Unless something changes, this command will almost certainly work to make a boot installer with future versions of the OS X El Capitan installer app as well, just keep in mind the file name of the installer will change for beta versions and final version, so users would need to adjust that portion of the command syntax as necessary.

Or diskmaker :)
and for last HIGH SIERRA GM !
sudo /Applications/Install\ macOS\ High\ Sierra\ Beta.app/Contents/Resources/createinstallmedia –volume /Volumes/HighSierra –applicationpath /Applications/Install\ macOS\ High\ Sierra\ Beta.app –nointeraction
sudo /Applications/Install\ OS\ X\ El\ Capitan.app/Contents/Resources/createinstallmedia –volume /Volumes/ElCapInstaller –applicationpath /Applications/Install\ OS\ X\ El\ Capitan.app –nointeraction
Password:
Erasing Disk: 0%… 10%… 20%… 30%…100%…
Copying installer files to disk…
The copy of the installer app failed.
Can’t figure out what the problem is … any ideas?
I have a problem.
I download El Capitan GM from App Store. When finish it, use terminal command and all ok.
When I use in my MacMini Late 2014 or Macbook Air Mid 2012 has the same problem:
I create partition “OSX” with all space and “install OS X” but when status bar complete say “just one second” and installation freeze in 6-10 minutes reboot system but don´t any SO…
I download in iMac and MacMini but problem It´s the same… What can I do?
I’m getting a curious error using a 16GB Transcend USB Key drive that worked perfectly for previous El Capitan public betas, so not sure why I’m having problems with the El Capitan GM release – this is what I get:
[d1m1:~] user% sudo /Applications/Install\ OS\ X\ El\ Capitan\ GM\ Candidate.app/Contents/Resources/createinstallmedia –volume /Volumes/ElCapGM –applicationpath /Applications/Install\ OS\ X\ El\ Capitan\ GM\ Candidate.app –nointeraction
Password:
Erasing Disk: 0%… 10%… 20%… 30%…100%…
Copying installer files to disk…
The copy of the installer app failed.
Anyone hit this problem? I checked permissions on “createinstallmedia” and It’s 755 as expected..
Ok this seems to have worked with a 32GB SanDisk USB Key drive, so I wonder if 16GB is big enough for the latest OS?
How long does it take to complete install? Mine seems to be stuck here and not progressing.
Erasing Disk: 0%… 10%… 20%… 30%…100%…
Copying installer files to disk…
|
it takes a long time, it’s OS X
oops – my mistake – didn’t partition it correctly sorry
Doesn’t work. When I try I get this in Terminal:
createinstallmedia: invalid option — o
Usage: createinstallmedia –volume –applicationpath [–force]
Arguments–volume, A path to a volume that can be unmounted and erased to create the install media.
–applicationpath, A path to copy of the OS installer application to create the bootable media from.
–nointeraction, Erase the disk pointed to by volume without prompting for confirmation.
Example: createinstallmedia –volume /Volumes/Untitled –applicationpath “/Applications/Install OS X El Capitan GM Candidate.app”
Ooops! The GM Candidate is wrong. It should be:
sudo /Applications/Install\ OS\ X\ El\ Capitan\ GM\ Candidate.app/Contents/Resources/createinstallmedia –volume /Volumes/ElCapInstaller –applicationpath /Applications/Install\ OS\ X\ El\ Capitan\ GM\ Candidate.app –nointeraction
Oops thanks for catching the typo, the command has been updated for the GM Candidate!
GM Candidate
sudo /Applications/Install\ OS\ X\ El\ Capitan\ GM\ Candidate.app/Contents/Resources/createinstallmedia –volume /Volumes/ElCapInstaller –applicationpath /Applications/Install\ OS\ X\ El\ Capitan\ GM\ Candidate.app –nointeraction
Worked great for me, thank you very much.
Thank you so much :)
in my case the result for installing “For OS X El Capitan Public Beta” is an error: “Mount of outer dmg failed”. How can i fix it?
••••••••••••••••••••••••••••••••••••••••••••••••••
Erasing Disk: 0%… 10%… 20%… 30%…100%…
Copying installer files to disk…
Copy complete.
Making disk bootable…
Mount of outer dmg failed. <<<<—————————
Done.
••••••••••••••••••••••••••••••••••••••••••••••••••
i got the same error….
Same here!
I also had the same problem, ended up working just fine once I used a different USB thumb drive.
I was using PNY brand 8GB drive which was causing the same outer dmg failed error. Using a Sandisk drive this time around worked just fine.
Dunno….may be worth a try?
Well I could never get past this problem… but it’s worth realising that you actually don’t need to make a bootable USB if you have already made the separate partition – you can install straight from Yosemite but remember to select the partitioned drive as the one to install it on. Works perfectly.
Its a permission issue….
Firstly type in terminal… “sudo su” Press Enter
Then run the command without sudo, Example…
“/Applications/Install\ OS\ X\ El\ Capitan\ Public\ Beta.app/Contents/Resources/createinstallmedia –volume /Volumes/ElCapInstaller –applicationpath /Applications/Install\ OS\ X\ El\ Capitan\ Public\ Beta.app –nointeraction”
Thanks bud, that fixed it!
Its a permission issue of file: createinstallmedia.
First: input command in terminal:
sudo chmod 755 /Applications/Install\ OS\ X\ El\ Capitan\ Public\ Beta.app/Contents/Resources/createinstallmedia
Second:
sudo /Applications/Install\ OS\ X\ El\ Capitan\ Public\ Beta.app/Contents/Resources/createinstallmedia –volume /Volumes/YourUSBVolumes –applicationpath /Applications/Install\ OS\ X\ El\ Capitan\ Public\ Beta.app –nointeraction
Okay, not using USB, I want to create a small partition that acts as the installer from my hard drive. Someone above asked for this already and got anything but the correct answer. I don’t want 2 operating systems so I can dual boot. Don’t want that. Can anyone help? Or at least use a dvd as the installer?
Yeah, thanks a bundle.
Tried to do this with public beta today, seemed to work everything is fine in console, but when I boot up it doesn’t detect the usb drive, tried reseting via cmd, option, r, p and still nothing. Any ideas to why it is not showing the usb when I restart by holding option key down?
sudo /Applications/Install\ OS\ X\ El\ Capitan\ Public\ Beta.app/Contents/Resources/createinstallmedia –volume /Volumes/ElCapInstaller –applicationpath /Applications/Install\ OS\ X\ El\ Capitan\ Public\ Beta.app –nointeraction
Password:
/Volumes/ElCapInstaller is not a valid volume mount point.
HELP – I get the error as above
If you did not follow the instructions the command will not work.
Most users should not install beta software, it is very buggy. Wait for final release in the fall.
Ijt’s reply is correct, but not very helpful. You probably did not rename the newly made partition from Untitled 1 to ElCapInstaller, its an important step
How about doing the same thing but with a hard drive instead of a USB?
It can be done with an external hard drive but it would be formatted, not an efficient usage of large disk space thus a USB flash key is better, but yes a hard drive would work.
So how can it be done without Diskmaker?
I don’t have a USB and in the past websites have shown how to make a partition (a small one that I designate) as the installer. How can I do this?
Thanks.
You don’t need to make a partition for the installer, you need a partition for the destination. This is for advanced users, the beta is very buggy right now so it would be best to hold off and wait until the public version in the fall.
In the past, as with Yosemite, sites have offered a partition for the installer on hard drives. Everyone I’ve seen thus far is only giving out help for USB installers. I don’t have a USB, hence a separate drive for the installer. I also have a separate drive for the destination as well. I know the command is similar to the one listed above but I can’t quite get it. Can anyone help with this command? Perhaps my request isn’t understood. I appreciate the advice that I should wait until the fall but would prefer to dabble myself.
If all you want to do is install El Capitan onto a separate partition or hard drive, you can do so with these instructions:
https://osxdaily.com/2015/06/15/dual-boot-os-x-el-capitan-partition-mac/
Sweet info! Thanks! Works a treat!
Saw this on Apple forums and found it useful you may too if you run into this:
“If the installation creates a core storage logical volume you can revert it to get partitions back to normal by running these 2 commands in terminal.
diskutil cs list
and then
diskutil coreStorage revert lvUUID
where lvUUID is the last lvUUID reported by the previous Terminal command.
Then restart for everything to get back to normal after you have run these commands in Terminal.”
The disk creation goes smooth but Startup Disk preference pane does not see it as a boot disk. Made it again and again, even with DiskMaker, it just wont see it as a valid boot drive.
Booting with Option doesn’t work for me, just results in a gray screen so I have no other way to boot from this drive other than system preferences > startup disk. Any suggestions?
Be sure you format the drive and set the partition as GUID, GUID is what makes it bootable. Also be sure the process completes, it can take a while to make the drive. And of course, it will only boot a Mac compatible with OS X El Capitan.
I did format it as GUID and the Mac meets the requirements (Mac Pro 2012). Even cloned my Mac HD and applied the update to the cloned drive, that just results in a login window that shows an unknown user account [Update Needed].
I’m having the same issues here… Tried my USB installer (created with both createinstallmedia and DiskMaker X), and on 4 different types and generations of Mac’s, all listed as compatible with El Capitan, none of them recognize it as a Startup Disk in System Preferences, or when booted holding down the Option key.
Has Apple added some sort of safeguard to El Capitan that prevents the machines booting off external devices unless some safety setting is disabled first?
There’s another better way: Just use DiskMaker (former Lion DiskMaker) The only thing you have to do is rename the El Capitan beta file you downloaded to ”Yosemite” just to cheat Diskmaker. It will creat a bootable pendrive that easy.
I tried – but I only got this:
sudo: /Applications/Install OS X 10.11 Developer Beta.app/Contents/Resources/createinstallmedia: command not found
Any ideas?
The error your getting is that your dmg resides in a different directory. Make sure you put the “Install OS X 10.11 Developer Beta” dmg into the Applications folder. Run the command as a root user and it should work.
Agreed. But this is a problem.
The only reason the “Install OS X 10.11” file is in a directory other than /Applications is if you downloaded it outside of the App Store or copied it from someone else or another Mac. I’m betting on the former, making it an unofficial method of transfer, like downloaded El Cap from a website, not a good idea.
Frankly, if you can’t figure out how to change a directory path, you should 100% NOT be running beta system software, you are going to break something and regret it.
No, it’s not in a different directory.
Downloaded just normal in the Applications folder.
And yes – I know what I’m doing – and NO it was not a dl from a website!
Cheers for the suspicion.
I tried as well as stated here:
https://forums.developer.apple.com/thread/5335
I Help: ( command not found )
sudo /Applications/Install\ OS\ X\ 10.11\ Developer\ Beta.app/Contents/Resources/createinstallmedia –volume /Volumes/ElCapInstaller –applicationpath /Applications/Install\ OS\ X\ 10.11\ Developer\ Beta.app –nointeraction
Password:
sudo: /Applications/Install OS X 10.11 Developer Beta.app/Contents/Resources/createinstallmedia: command not found
$ /Applications/Install\ OS\ X\ 10.11\ Developer\ Beta.app/Contents/Resources/createinstallmedia –applicationpath [–force]
Usage: createinstallmedia –volume
Arguments–volume, A path to a volume that can be unmounted and erased to create the install media.
–applicationpath, A path to copy of the OS installer application to create the bootable media from.
–nointeraction, Erase the disk pointed to by volume without prompting for confirmation.
Example: createinstallmedia –volume /Volumes/Untitled –applicationpath “/Applications/Install OS X 10.11 Developer Beta.app”
This tool must be run as root.
J’ai fait l’essai sur une clé usb3, pas de problème pour l’installation, Il faut compter une petite heure pour arriver à la fin et pouvoir l’utiliser.
J’ai trouvé El Capitan très lent et j’ai refait l’installation sur un disque dur thunderbolt V2 et la c’est plus du tout pareil, une bombe.
Maintenant je découvre les nouveautés qui me plaisent beaucoup, comme le nouveau safari, j’attends maintenant avec impatience la version finale.
Here’s the English translation for those wondering, I thought it was a troubleshooting question but it’s just some details in French:
I did the test on a usb3 key , no problem for installation, it takes an hour to get to the end and can use it.
I found El Capitan very slow and I redid the installation on a hard disk thunderbolt V2 and it is not at all like a bomba .
Now I discover the innovations that I like very much , as the new safari , I now look forward to the final version.
Merci Pablo
Thank you for the guide!
Looking forward how much it will change for the first commercial version.
I’m waiting for public beta personally
Good. Thank you for not being one of those people who runs beta software for no valid reason, then b*tches on websites when some obscure app keeps crashing.
Perhaps my flash disk was already setup as GUID but the following worked for me without any fiddling with Disk Utility, boots immediately too:
sudo /Applications/Install\ OS\ X\ 10.11\ Developer\ Beta.app/Contents/Resources/createinstallmedia –volume /Volumes/Untitled –applicationpath /Applications/Install\ OS\ X\ 10.11\ Developer\ Beta.app –nointeraction
It looks like the only difference was single dashes versus double dashes, and your flash drive volume name was different.
Good stuff thanks