How to Apply Filters to Any Picture from Photos App on iPhone & iPad
The iOS Photos app includes native image editing features that allow you to add the same filters from the live camera to pictures you have already taken. Additionally, you can apply those photo filters to any image stored on the iPhone, iPad, or iPod touch, so long as it’s accessible from the Photos app, whether it’s a photo or a screen shot.
Just as with the live camera filtering, you’ll have eight+1 total filter choices to pick from: Noir, Mono, Tonal, Fade, Chrome, Process, Transfer, Instant, and None (the default setting). The first three are variations of black and white, with the latter 6 being various color adjustments that either boost or reduce saturation, brightness, and contrast. They’re all pretty nice looking and reasonably subtle, particularly compared with some of the more garish filtering apps that exist out there, try each of them out to see which you like the best.
How to Add Filters to Photos on iPhone or iPad
This process can be completed with any image or photo that is accessible through the Photos app or Camera Roll, whether it was taken with the device camera or not.
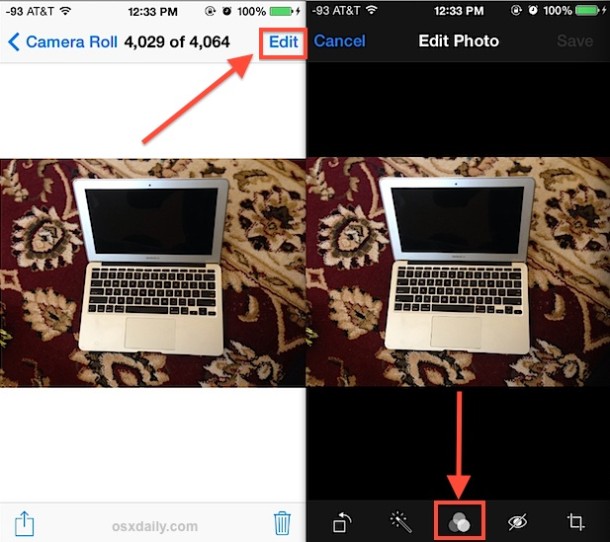
- Open the Photos app and tap on the picture you want to edit and add a filter to
- Tap the “Edit” button, then tap the three overlapping circles button
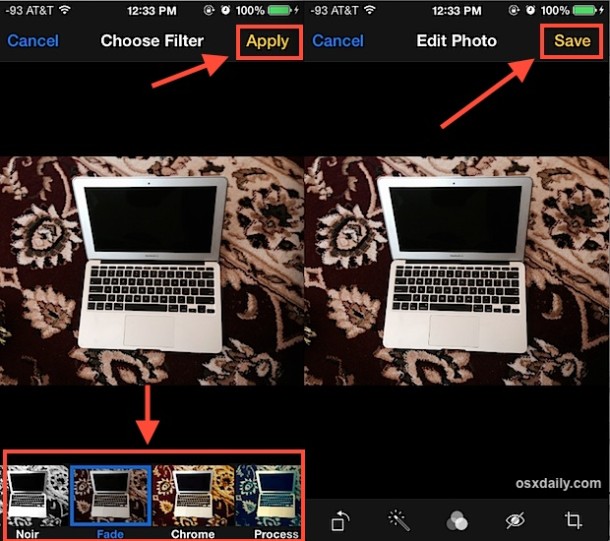
- Choose the desired filter by tapping on them, when satisfied with the look tap on “Apply” then on “Save” to apply that filter to the image
The image will now be stored in the Photos app Camera Roll as the filtered version.
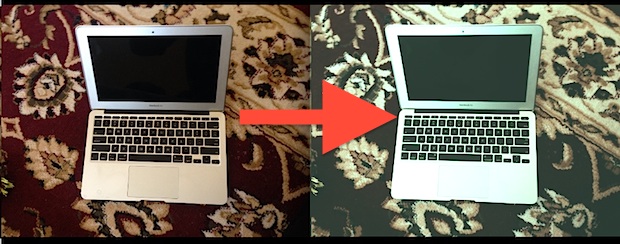
The screenshot here uses the “Fade” and the “Process” filter, which is quite subtle and reduces both saturation and contrast on the image. In order to apply two filters atop on another, you’ll need to save the first filter, then edit the newly saved/modified image. By default, the filters will negate one another, meaning applying a second filter will simply override the first.
Applying noir, mono, and tonal also happens to be the easiest way to convert any existing picture on an iPhone into black and white without having to download other apps or using any additional software, a major bonus for those who like shooting in black and white imagery.
![]() The native Photos app editing features have grown considerably since iOS 7 and offer a variety of improvements for on-device picture editing without the need for downloading or using third party apps, with filters being the most obvious adjustment which can be made.
The native Photos app editing features have grown considerably since iOS 7 and offer a variety of improvements for on-device picture editing without the need for downloading or using third party apps, with filters being the most obvious adjustment which can be made.
If you’re looking for some more advanced image editing options, including finely-tuned color adjustments, custom filters, vignetting, resizing and rotating, and much more, Snapseed for iOS is free and an excellent choice for an additional app.
Don’t miss our other iPhone photography articles too. And feel free to share any tips or tricks regarding iphone photography in the comments below!
