How to Create a Bootable macOS Sierra Installer

Some Mac users like creating a bootable USB install drive for macOS Sierra, which offers for a way to easily update multiple machines, perform clean installs, and to have just as a backup Mac OS Sierra installer should the need arise.
This walkthrough will demonstrate the exact steps necessary to create a boot installer drive for the final version of macOS Sierra using a USB flash key or a similar thumb drive.
The basic requirements necessary to make a boot macOS Sierra installer are as follows:
- USB flash drive (8GB or larger), this will be formatted and become the MacOS Sierra installer volume
- Download macOS Sierra from the App Store onto the Mac and have the Installer app located in the /Applications/ folder – you can re-download it from the Purchases tab if need be
You’ll want to be sure you have the final version of the “Install macOS Sierra” app in the /Applications folder, this is important because the process using the final versions of macOS Sierra installer is slightly different than performing the same bootable installer using the beta versions. Additionally, it needs to be in the /Applications/ folder because the command syntax assumes that is the application path.
As far requirements go, having a USB flash drive and the release version of macOS Sierra are all the tis necessary, though having some degree of patience will be helpful because it can take a while to successfully create the boot installer.
Creating a macOS Sierra Boot Install Drive
Remember, this is going to erase the USB flash drive and turn it into a bootable installer for Mac OS 10.12. Do not use a USB flash drive that you don’t want erased.
- Connect the USB flash drive to the Mac, then rename the USB drive to “SierraBootInstall” – yes you can pick a different name just be sure to edit the command syntax to reflect that
- Open “Terminal”, found within /Applications/Utilities/
- Place the following command syntax into the Terminal:
- Double-check to confirm the syntax is accurate, and remember the USB drive is going to be erased in this process, then hit the Return key to start creating the macOS Sierra USB installer media
- Enter the admin password into the terminal if requested
- Let the process run it’s course, this will take a while depending on the speed of the target flash volume but you can expect to wait nearly 30 minutes
- When you see “Done” on screen, the task is complete and you can quit out of Terminal
sudo /Applications/Install\ macOS\ Sierra.app/Contents/Resources/createinstallmedia --volume /Volumes/SierraBootInstall --applicationpath /Applications/Install\ macOS\ Sierra.app --nointeraction &&say Done

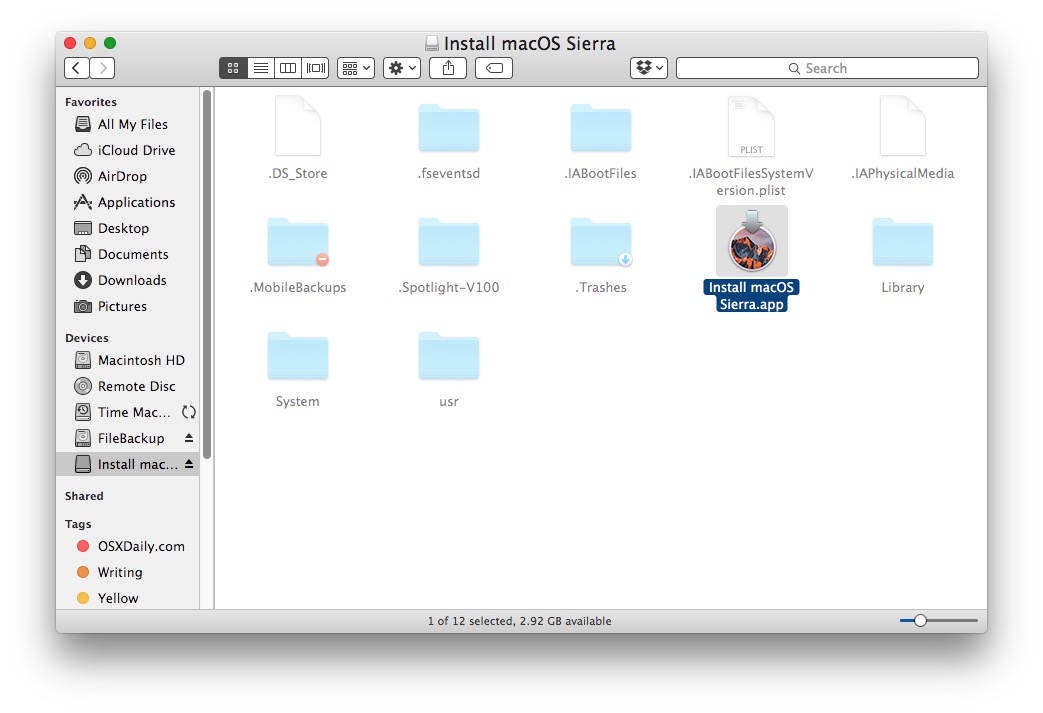
Once the macOS Sierra installer has been completed, the USB flash drive will be named as “Install macOS Sierra” and it’s ready to be used. If you open the volume you’ll see the typical Sierra installer app:
The video below demonstrates the entire process of erasing a USB flash drive and then turning it into a macOS Sierra installer drive. If you’re having any difficulties, watch the video tutorial to see each step.
Booting with the MacOS Sierra Installer Drive
Now that you have created the boot installer for Mac OS 10.12, you can boot from any compatible Mac with it by doing the following:
- Connect the macOS Sierra boot drive to the Mac
- Reboot the Mac and immediately hold down the OPTION key
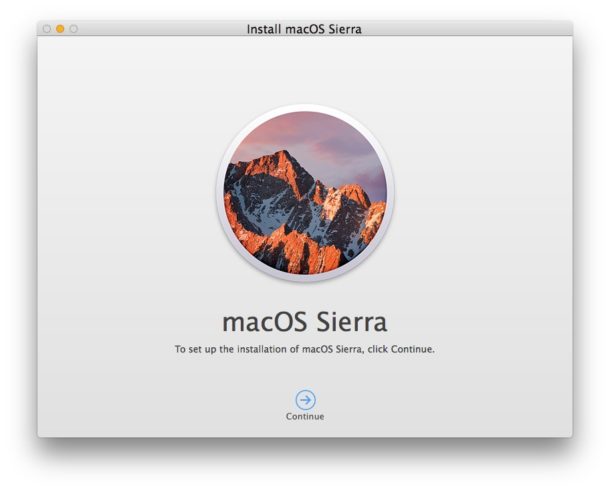
- Choose “Install macOS Sierra” from the boot menu options
Once booted up from the installer drive, you can either install macOS Sierra directly as an update, or have access to the traditional utilities menu options including Disk Utility. We’ll cover performing a clean install in a separate article.
Have any questions, thoughts, tips, or info about creating a macOS Sierra boot install drive? Let us know in the comments!

realise this is an old post but hope someone is still manning.
I have followed this process and successfully created a bootable drive for Sierra.
My question is how do I dual boot a Mac with this USB on a Mac using Catalina. I need to be able to run Sierra on this Mac so I can run old 32 bit software.
At the moment when I try I get a No Entry sign. Obviously Catalina or some system file recognises what I am doing and refuses. I need to be able to bypass this and dual boot.
Any help with this would be much appreciated, as the Apple help line didn’t (help I mean.
Thanks in anticipation.
DaveC
If you are still getting the “createinstallmedia: command not found” Your permissions on the file might have changed to rw-rw-rw it needs to be at least r-xr-xr-x to change it to rwxrwxrwx do a sudo chmod 777 /Applications/Install\ macOS\ High\ Sierra.app/Contents/Resources/createinstallmedia
That will change the permissions back to executable.
Hey I have a flash drive that I installed the with Sierra boot install. Went through the full setup. Start with option, selected my boot flash drive. It installed for 15-20 min. Then when it finished it said this model
Isn’t able to run this os or OS X application..
This is the command I used and it works (for yosemite with app renamed to yosemite.app, which can be any as long as ext is .app):
sudo /Applications/yosemite2.app/Contents/Resources/createinstallmedia –volume /Volumes/benstaller –applicationpath /Applications/yosemite2.app –nointeraction
>> instead of this: /Applications/Install\ macOS\ Sierra.app/, changed to: /Applications/yosemite2.app/
This article states that you need a USB flash drive that is 8 GB or larger. I have noticed that, for the first time that I remember, the official Apple support article on creating a bootable installer states that you need a drive that is at least 12 GB. Does anyone know if this is true, and why that may be?
In answering JohnS on his question you will be assisting me as well for I have a like (circa 2009) iMac with like operating system with the intent of creating a bootable USB thumb drive to format a new drive that I intend to install.
Anyone know if this will work on an older (circa 2009) iMac? I have one with an intel Core 2 Duo, currently running macOS Sierra and I can’t get it to boot off this flash drive, although the drive creation process appears to have worked fine. Thanks
Very helpful.. Thanks!!
Have any other ways to make Bootable OS Sierra another explain in this page i mind without Terminal.
Because when I’m try this tutorial the result is Failed.
Anyone can Help Me, Please ….
OK, so I got 1 step further by simply shutting down instead of choosing restart. This time upon booting I could choose the external drive to do the install. It all looked like it was going well. I received a msg saying the OS would be installed. I got passed the licence agreement screen then this message came up: “MacOS could not be installed on your computer. Volume contains a MacOS or OSX installation which may be damaged”
I’ve tried trouble shooting this by redownloading the OS from the app store and re formatting and doing every step from the beginning but have stalled at this point again.
Anyone have any ideas? I’ve spent hours trying to get this to work now.
I should also add that the drive is a USB3 750 GB external that is completely empty.
Hi, everything works up until the point when I boot my Mac holding the option key. The external drive “Install macOS Sierra” is not provided as an option. I’ve retried every step with the same result. ANy suggestions about how to get this to work?
Be careful with this app. If you stop it for some reason and then restart, it defaults to the drive on which the Install Sierra app resides and writes the bootable files there.
Actually Bernard should not cast a grammar stone when he does not even know this article guide was written by a singular journalist, and Bernard’s comment of “their” (plural pronoun) use of its or it’s. Next time, Bernard, stick to boot drive comments and leave the writing (and writing commentary) to the professional journalist and real grammarians.
Hei! Is it possible to create several bootable sticks with this command or will the installer file get deleted from the applications folder after copying it to the flash drive?
Best!
Nico :)
This went sideways for me. Downloading the installer automatically installed it on my machine and prompted to reboot to complete installation. Very, very bad…
i did everything that it says but when i put drive into the computer I’m trying to install it on and let it run i get the “signature check failed” What did i do wrong?
This worked great on an SD card as well. It executed the commands in less than 10mins. Loved the little added audio `say Done` too!
Pointed VMware Fusion 8.5 at the card was running Sierra as a guest in no time.
Thanks!
Had a hell of a time getting this to work, although I have used a similar process in the past with no trouble.
All my macs were running Yosemite, and I decided to upgrade all of them to Sierra (so skipping El Capitan).
Tried several USB sticks, seems to create it OK (using Yosemite), but would NOT boot the machine (any of them) from USB.
I finally did an ‘upgrade install’ to Sierra on one machine (instead of the ‘clean install’) I wanted to do), then created the USB again, but using Sierra instead of Yosemite.
Now, finally, it is working as expected.
Could have saved myself a LOT of time and trouble if I had known the USB needs to be created on a machine already running Sierra)…
terminal gives me a “command not found” error every time.
All of these posts- yet not one of them gives you the complete information.
Where is the Sierra installer after downloading from the App store? How can you put it into the Applications folder if you don’t know where it is????????????
Once the installer is downloaded, it is automatically put in the Applications folder. Once the installer is run, it will ask if you want to delete it. (Hint, open the Applications folder and Sort by Size. It should be at the top of the list.)
The file will be in the applications folder – it is called “Install macOS Sierra”
More on the ‘where is it?’ scenario – So, while running Sierra, I download again from app store. It automatically launches. I quit. It appears in launchpad but definitely not in Applications. Searching in Finder also negative. Where is the blighter?
I am following the instructions, but one detail eludes me. Can I do this AFTER installing Sierra?
I have an iMac but located where I have a poor internet connection. I also have a MBA which I can take somewhere that has a good internet connection and download Sierra. Am I supposed to follow the directions above BEFORE I install Sierra in the MBA.
My goal is to download to a USB drive and install as described onto the iMac.
1) Download Sierra on to your MBA but DO NOT install it yet [the install file will disappear if you install]
2) Complete the process detailed above; leaving you with a bootable USB
3) When finished you can complete the installation on your MBA with the downloaded file and take the USB to your iMac and install it from that
Hey all,
Trying to make a bootable USB drive to refurbish machines into Sierra. I would also like to include some App Packages and Terminal subprocesses (used to create accessible admin accounts on the refurbished computers, along with setting other user preferences for initial on-boarding). Anybody know the workflow for this? I have tried many different variations, from creating a netboot image, to trying to use a machine as a source image, to creating several bootable images and attempting to copy over the subprocess scripts… At a loss here.
Any guidance would be appreciated!!
Hey Dylan, it sounds like you’re looking for a Mac modular deployment installer or thin imaging solution, one which may work for you is the free app called AutoDMG which lets you create a Mac OS installer that also includes additional packages. Check it out here. https://github.com/MagerValp/AutoDMG
Hi, ran the script to create bootable USB a s follows and received noted errors. Can anyone fill us in as to what is wrong.
Jims-iMac:~ jimteames1$ sudo /Applications/Install\ macOS\ Sierra.app/Contents/Resources/createinstallmedia –volume /Volumes/SierraBootInstall –applicationpath /Applications/Install\ macOS\ Sierra.app –nointeraction &&say Done
These errors ocurred:
sudo: unable to stat /etc/sudoers: Permission denied
sudo: no valid sudoers sources found, quitting
Found the problem.
“&&say Done” didn’t work at end of command line. After removal of this phrase, bootable USB stick made easily.
Posting this to help others: I tried this today, unsuccessful while on an iMac running 10.7.5, and using Install Disk Creator.app didn’t help either (even though it says it works with older versions). Once you enter the commands above and your password in Terminal, it just shows a prompt, with nothing about erasing the disk.
It does work with a Mac running 10.9.5 Mavericks, though. Sharing to possibly save someone some time/aggravation. On my way up the Sierras now.
Thanks… this was also not working for 10.7.5 … saved me a lot of hassle. Surprising no one else in articles have pointed this out.
Hi,
I typed
sudo /Applications/Install\ macOS\ Sierra.app/Contents/Resources/createinstallmedia –volume /Volumes/SierraBootInstall –applicationpath /Applications/Install\ macOS\ Sierra.app –nointeraction &&say Done
into the terminal and it comes back
sudo: /Applications/Install macOS Sierra.app/Contents/Resources/createinstallmedia: command not found
Not sure what I’m doing wrong?
You probably don’t have the “Install macOS Sierra” application in the /Applications folder would be my guess, that’s typically the problem. Download the installer or put it into the Applications folder and then try again
sudo /Applications/Install\ macOS\ Sierra.app/Contents/Resources/createinstallmedia --volume /Volumes/SierraBootInstall --applicationpath /Applications/Install\ macOS\ Sierra.app --nointeraction &&say DoneWorks thanks!
Hi,
This method doesn’t work. the DVD is not bootable.
I did a search and I didn’t find a method to create a bootable DVD.
I searched a method to convert a bootable USB key to .iso file and I found nothing too.
Does the installer that’s created by this process work on ALL eligible Macs or just the specific machine on which it was created? I troubleshoot other people’s computers, and it’d be great to have a “universal” installer when needed.
installing was finish and mac restart and stop on white boot page with apple flag for more than 3 hours!!!!
Last login: Thu Sep 22 19:53:17 on console
imac-7:~ Robert$ sudo /Applications/Install\ macOS\ Sierra.app/Contents/Resources/createinstallmedia –volume /Volumes/SierraBootInstall –applicationpath /Applications/Install\ macOS\ Sierra.app –nointeraction &&say Done
Password:
sudo: /Applications/Install macOS Sierra.app/Contents/Resources/createinstallmedia: command not found
imac-7:~ Robert$ sudo /Applications/Install\ macOS\ Sierra.app/Contents/Resources/createinstallmedia –volume /Volumes/SierraBootInstall –applicationpath /Applications/Install\ macOS\ Sierra.app –nointeraction &&say Done
sudo: /Applications/Install macOS Sierra.app/Contents/Resources/createinstallmedia: command not found
imac-7:~ Robert$
where did i go wrong first time in terminal very nervous about this
You need to copy the commands *exactly* – you’ve only put one hyphen in front of “volume” “applicationpath” and “nointeraction” but two are shown in the instructions.
Thanks for the DVD info.
If you already have El Capitain installed in your computer then you will notice that Apple removed the “burn” feature (of course everybody have no more DVD, thank you Apple !), so use any burning software like Roxio toast and burn the image.
I install it by flash drive and it takes along time and stop on about 0 seconds remaining.
What should i do????
Wait, the estimated time remaining is never accurate. I waited 45 minutes when it told me 5 minutes was remaining.
There is a method to build an iso file in order to create a bootable DVD ?
Thanks
GG
Download macOS Sierra’s Installler.app. Hghtlight it, then right-click and consecutively select the following options:
Get Package Contents->Contents->Shared->InstallESD.dmg. Open Disk Utility and drag InstallESD.dmg to the Disk Utility’s sidebar. Insert a blank DVD ( 8.5 GB, the max option, available for the media, single layer or double layer, + type preferably). When Disk Utility initializes it and makes it viewable in the input sources list of the sidebar, select InstallESD.dmg and click “Burn”. Let it “Verify” both beforehand and afterwards burning procedure to ensure there’re no errors. Choose 4x burning speed, not maximum one.
This does not produce an ISO file, just a bootable DVD. Are you sure it actually works? If it does, I guess you could use DiskUtility to produce an ISO from the burned disk. I have had trouble with InstallESD.dmg burned disks not being able to boot.
I’ve always used Diskmaker X to do this automatically. It’s free, on the web (not the app store) – google Diskmaker X.
I followed the instructions here and the process stalled while creating the install drive. I finally had to do a force quit on the terminal. My USB drive seemed to be complete so I tried it out by restarting my Mac. Everything worked and I installed Sierra on one of my drives without issues.
I have used this method to create other USB startup disks but I haven’t had any stall like this.
When the Mac Sierra installer is created properly it should not stall, but it does take a while. In my experience it’s about 45 minutes from start to finish, a bit slow, but then it finished and the terminal says “done”
But I guess if yours worked and installed Sierra, that is a unique case. Good thing it worked though! Maybe it is the USB disk itself?
This is very useful. I’m going to update soon. I apologize to Tim Cook and Apple for all the nasty things I say about them. I will turn over a new leaf!
I tried twice. Same error:
Erasing Disk: 0%… 10%… 20%… 30%…100%…
Copying installer files to disk…
Copy complete.
Making disk bootable…
Couldn’t mount dmg /Volumes/Install macOS Sierra/Install macOS Sierra.app/Contents/SharedSupport/InstallESD.dmg (error code -4960)Mount of outer dmg failed.
Done.
What am I doing wrong?
You could try another USB drive. They’re not all created equal and maybe it’s damaged. I’ve done this install before a couple of times with El Capitan and everything went smoothly. I’m just saying a bad USB drive is a possibility. There’s really not much else can go wrong if you’ve copied the commands into the terminal.
Also check out some other sites that use this method. Maybe some commands are wrong here.
Ahhh, good point. I reside in Singapore (from LA). The market here is flooded with fake Sandisk product (1 in 4 are fake). While the drive says it is 16GB, I think it might only by 4GB.
It stopped with the error after only about 10 min both times.
Finder says the resulting 4.7GB file is corrupt.
It looks like I have a fake Sandisk 16GB. It is only 4GB. One in four is fake here in Singapore! 😡
I bought a shiny new thumb drive. It appears to have worked. I will try to boot with it later.
I used Install Disk Creator to basically make this a one-step process. Check it out if you don’t like the Terminal, or even if you just want some automation in your life. http://macdaddy.io/install-disk-creator/
I know that it is nit-picking, but I would have thought that professional journalist could tell their “it’s” from their “its”.
Really? They’re knocking out articles at lightning speed to meet public demand for “NOW!”. Typically, online journals don’t have “print publishing” -sized copy desks to mull over every little error. God, you grammar freaks are Nazis. Get over yourself. You were able to clean install OS right? Oh, and by the way, you missed the “this” spelled “tis”. And by the way, I spelled this worong.
Hey Bernard (aka liberal grammar and spelling Nazi): you omitted the ‘s’ on journalist, and yet referenced a plural…
You’re such a typical A$$hat.
Did you notice that Apple has removed the commenting option for the new OS in the app store!? I think they are afraid of all the negative reviews. They had over 50% one star rating for El Crapitan. It seems they don’t want to advertise how bad their OS is, so now they removed the possibility to add a review! HA!
I do not like Mac OS. I plan to wipe the hard drive and run Linux native.
Can I run Sierra in VMware?
Yes you can run macOS Sierra in VMWare, it can be atop Mac OS X, Linux, or Windows.
You triec it yourself?
Technically you’re only allowed to run OS X on Apple hardware… but if you look hard enough, you’ll find an answer to running it on non-apple hardware.
I own a macbook. They have nothing to complain about. Haha
VMWare doesn’t support running OS X on anything other than bare-metal Mac or in a VM (in virtual hardware) with an OS X bare-metal host.
That’s the official line, anyway. There are “Unlockers” out there to let the Windows/Linux host applications do what Fusion does, and with a clean conscience and Apple hardware (and with IMO a corresponding decrease in your expectation for the experience) you could then run an OS X guest. Or on Linux you could use qemu/KVM, which is free and Open Source and doesn’t come with these silly restrictions (you do need to do more work to make it run).
Over to you …
looking for a detail way of downgrading to El Captain
Assuming you have a Time Machine backup from El Capitan you can downgrade from Sierra to El Cap very easily
https://osxdaily.com/2016/07/19/downgrade-macos-sierra-to-os-x-el-capitan/