How to Schedule & Adjust Do Not Disturb from Control Center on iPhone & iPad
Do you want to quickly enable Do Not Disturb on your iPhone or iPad? Thanks to the iOS Control Center, you can not only toggle Do Not Disturb mode, but also schedule it according to your preference.
Do Not Disturb feature in iOS allows you to easily silence phone calls and mute notifications, which is pretty useful while you’re in an important meeting to avoid bothering others with the alert sounds.
Interested in trying this feature out on your iOS device? Read on and you’ll be setting up Do Not Disturb mode from Control Center on both the iPhone & iPad in no time.
How to Schedule & Adjust Do Not Disturb from Control Center on iPhone & iPad
By default, the iOS Control Center houses a toggle to enable/disable Do Not Disturb mode on your iPhone or iPad. However, if you don’t see the toggle, you’ll need to customize your Control Center and manually add it, before you go ahead with this procedure. Accessing the iOS Control Center may vary depending on the device you’re using, so simply follow the steps below.
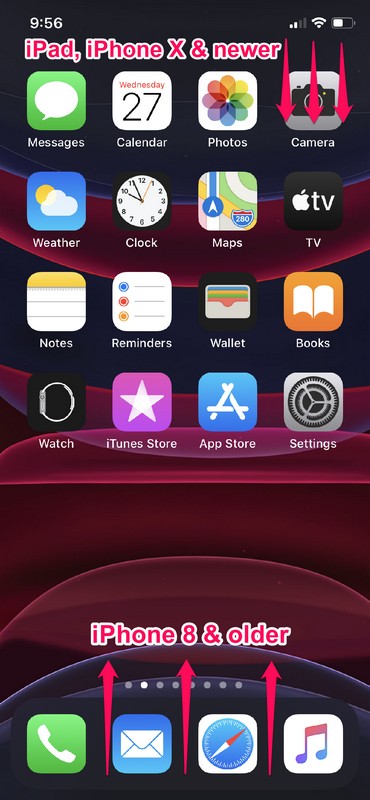
- If you’re using an iPad, iPhone X or newer device, you can access the Control Center by swiping down from the top-right edge of the screen. However, if you’re using an iPhone with a big forehead and chin, like the iPhone 8 or older, simply swipe up from the bottom of your screen as show in the screenshot below, in order to access it.

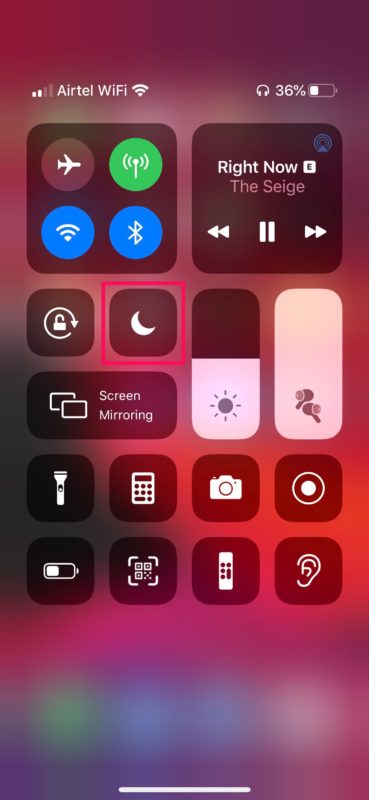
- Now, you can simply tap on the “crescent” icon to turn Do Not Disturb on or off. Additional options for scheduling and adjusting DND can be accessed by long-pressing on the toggle. This is for devices running iOS 13 or later. However, if your device is running an older version like iOS 12, use the 3D Touch gesture and force press on the slider to access the same functions.
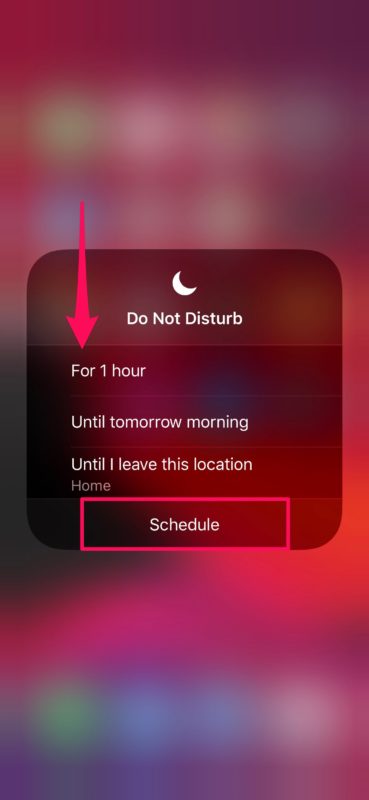
- Here, you can set how long you want to have DND enabled. There are three different options to choose from, as you can see in the screenshot below. If you want to manually schedule your Do Not Disturb feature, tap on “Schedule”.
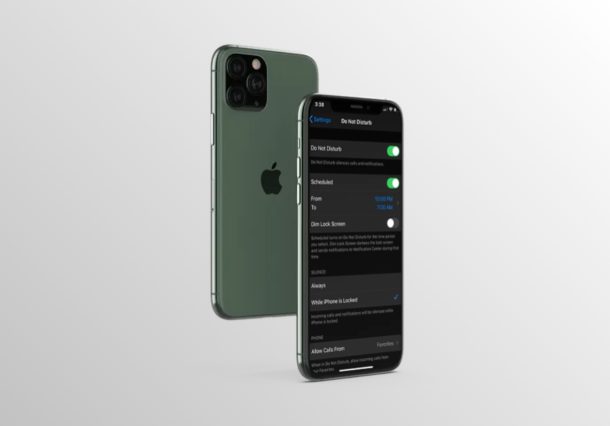
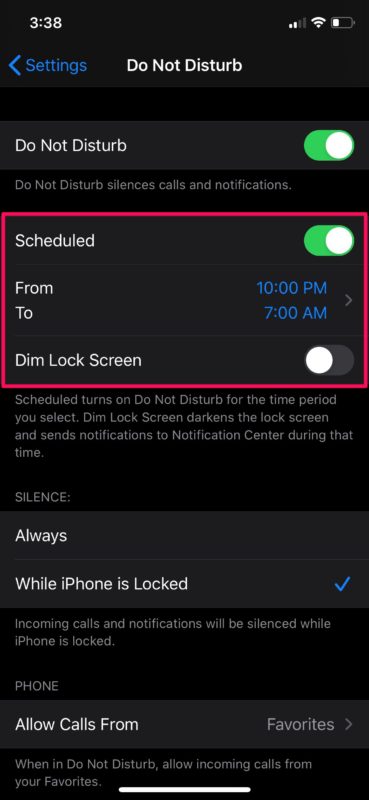
- This action takes you directly to the Do Not Disturb section within the Settings app. In this menu, you can manually set the time and schedule the duration for Do Not Disturb according to your preference.
That’s pretty much all there is to it.
Thanks to the toggle within the Control Center, users can quickly toggle Do Not Disturb on and off at their convenience, with just a couple of actions. Alternatively, you can also turn on Do Not Disturb by heading over to the device settings.
In addition to this functionality, the Control Center on iOS houses a bunch of toggles that allows you to quickly enable or disable certain features from the comfort of your home screen or without having to exit the application that you’re using.
Did you manage to find and use the Do Not Disturb toggle within the Control Center to mute phone calls and notifications? What other features do you quickly access using the iOS Control Center? Do let us know your thoughts and opinions in the comments section down below.

Do not disturb frequently does not work properly. I still get interrupted by the occasional phone call or SMS.