How to Upgrade iCloud Storage Plan on Mac
Are you running low on iCloud storage space? Or perhaps you’re running low on local disk space on your Mac and you want to offload more data to iCloud? Considering most modern Macs don’t have user-upgradeable storage, if you are pinched for space you’ll need to either get an external drive, or rely on Apple’s iCloud to store some of your data.
Having more iCloud storage is particularly useful if you perform iCloud backups of iPhone and iPad, use iCloud Photos, use iCloud Desktop & Documents, use the Optimize Mac Storage feature, and if you regularly copy files and data to iCloud Drive or with the service in general.
Although you can attempt to free up iCloud storage space, the default free plan only comes with 5GB of data which fills up quickly, so you may be interested in upgrading it to a larger paid storage plan of say 200GB or 1TB. Let’s cover how you can upgrade your iCloud Storage Plan from a Mac (and yes you can also do this from an iPhone or iPad).
How to Upgrade iCloud Storage Plan from Mac
Every Apple account comes with 5 GB of free iCloud storage space. However, upgrading to a paid higher-tier plan is a pretty simple and straightforward procedure on macOS.
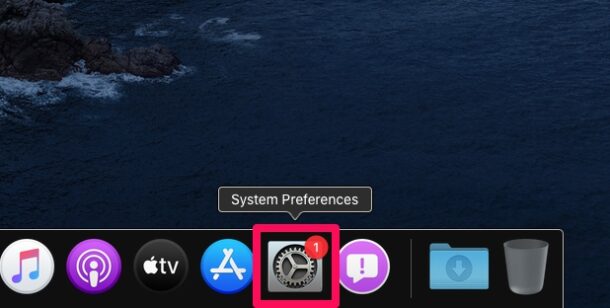
- From the Apple menu choose “System Preferences, or click on “System Preferences” located in the Dock.

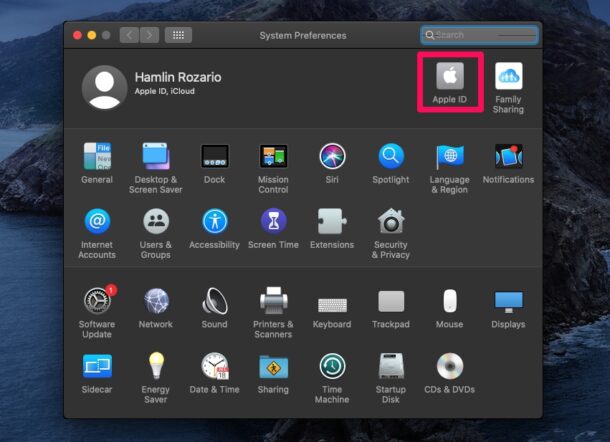
- This will open System Preferences on your Mac. Make sure you’re signed in to your Apple account. If not, you’ll have the option to sign in right here. Click on the “Apple ID” option located at the top-right corner, as shown below.
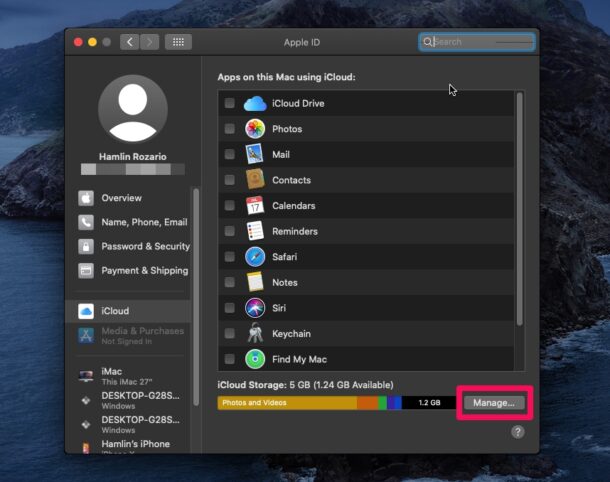
- Next, head over to the “iCloud” section on the left pane. and click on “Manage” as displayed in the screenshot below.
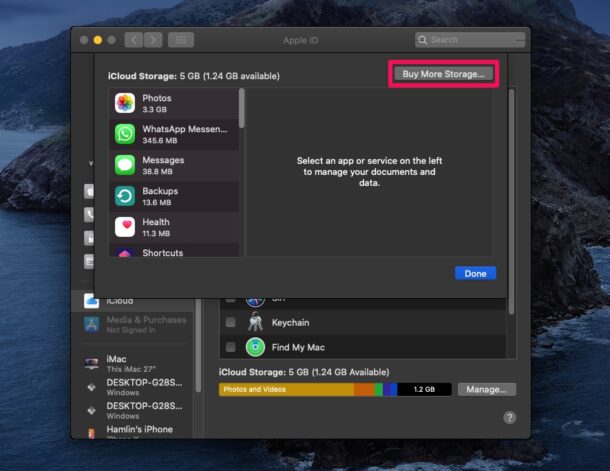
- Here, you’ll be able to see which apps are using your iCloud storage. Click on “Buy More Storage” to upgrade your plan.
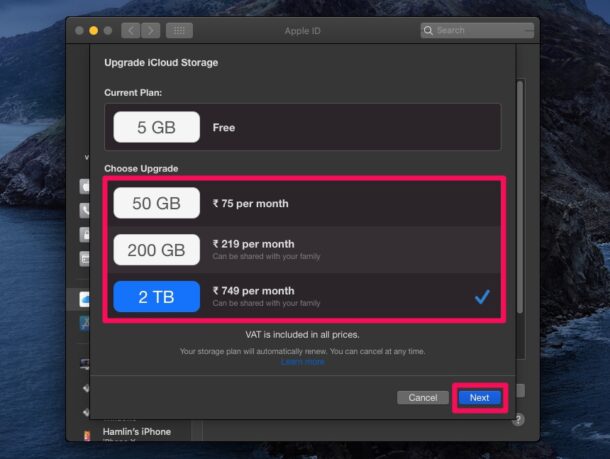
- Now, you can select any of the three paid plans according to your preference. Click “Next” to proceed to the final step.
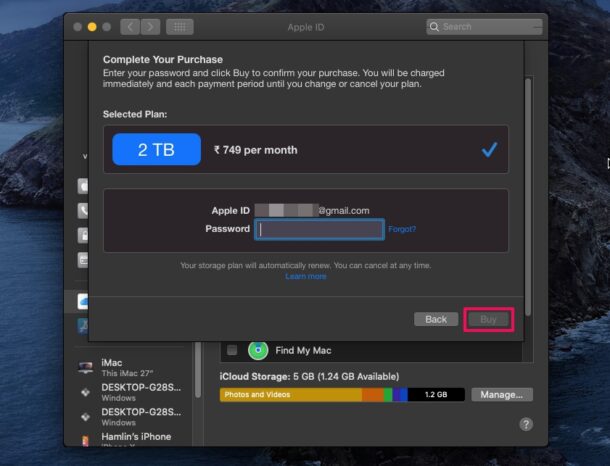
- Type in your Apple ID password and click on “Buy” to confirm and complete your purchase.
That’s all you need to do to upgrade the iCloud Storage Plan on your Mac.
It’s worth noting that this iCloud Storage is shared across all of your Apple devices. Therefore, if you own an iPhone or iPad, those devices will gain the availability of more iCloud storage capacity too, and if you use certain iCloud features then your photos and other files will be automatically synced across all the devices you’re signed in to.
If you’re currently reading this on your iOS device, you can upgrade or change your iCloud Storage Plan right from your iPhone or iPad in a similar way with ease. And when you log in to your Mac, you’ll have the iCloud Storage that you’re paying for, readily available.
Not willing to spend any money on iCloud? Or, don’t have a fast and reliable connection to use iCloud properly? There are other ways to get some extra storage. You could purchase an external solid-state drive off Amazon which are quite fast and offer a decent way to store some of your files . Looking for duplicate files on your Mac and permanently deleting them can go a long way in freeing up some space too.
Did you upgrade to a higher storage iCloud tier from your Mac?. Which plan did you choose? What are your overall thoughts on Apple’s iCloud service? Share your thoughts and experiences in the comments.
