
How to Erase an External USB-C Drive on iPad or iPad
iPhone and iPad have both grown more capable over time for power users, and one of the lesser known newer features of Files app now is that it has the ability to erase and format USB drives, including USB-C flash drives, external SSDs, thumb drives, microSD cards, and any other external USB storage. This is particularly useful on newer iPhone and iPad models where they have a USB-C port, which you can connect an external drive or storage directly to for storage access and management.
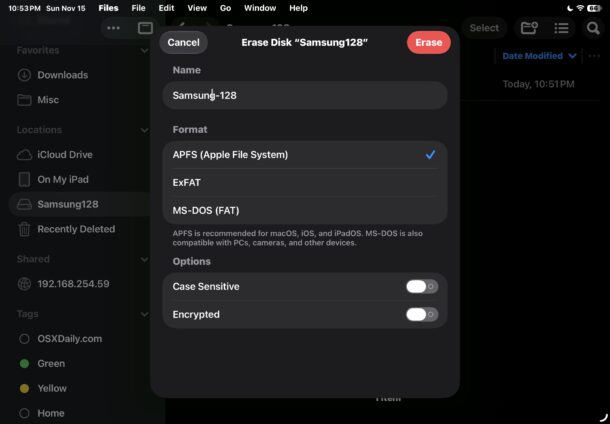
With iOS and iPadOS and the Files app, you can erase and format a connected USB drive as a variety of commonly used file system formats including ExFAT (Windows, Linux), MS-DOS (FAT32), and APFS (Apple, MacOS, iOS, iPadOS). You can also choose to encrypt the drive if you’d like, which will require a password to access and decrypt, or to make the drive case sensitive.
These are all tasks that are more commonly associated with desktop operating systems, but indeed Files app on iOS and iPadOS have these capabilities now, so let’s review how this works on iPhone, and iPad.
How to Erase & Format a USB Drive on iPhone & iPad
You’ll obviously need a USB-C external drive, flash drive, thumb drive, SSD, HDD, or similar external USB storage to use this feature, here’s how it works:
- Open the ‘Files’ app on iPhone or iPad
- Connect the USB drive to the iPhone or iPad
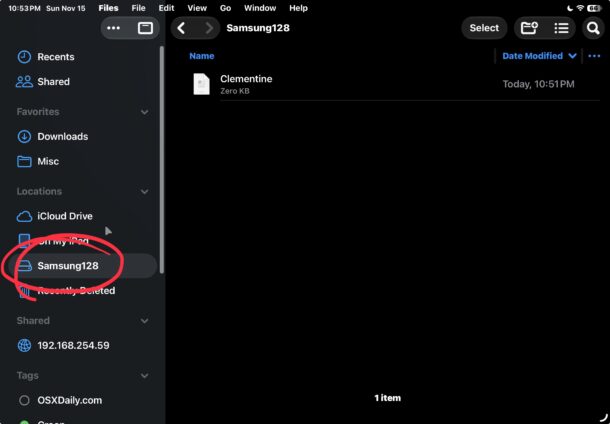
- Locate the connected USB drive or flash drive that you just connected under the ‘Locations’ section
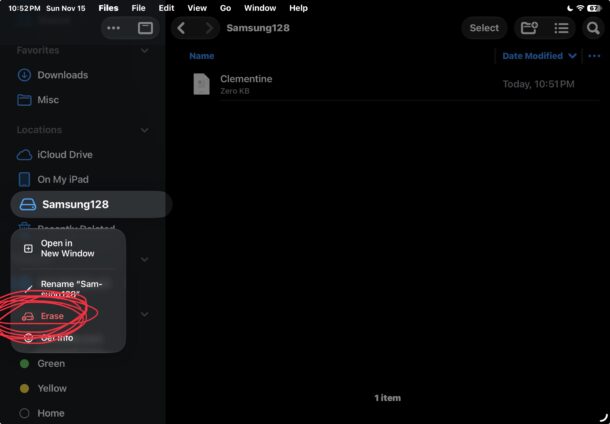
- Tap and hold on the drive name, or right-click on it, and choose “Erase”
- Give the USB drive a name, and choose the file system you’d like to format the drive to: ExFAT, MS-DOS FAT, APFS, and optionally if you want the drive name to be case sensitive or encrypted, then choose Erase
- Confirm that you want to erase and format the drive, this will erase all data on the USB drive
- Let the erase and format process complete, and in a moment your newly renamed and formatted USB drive will appear under the Locations section of Files app again
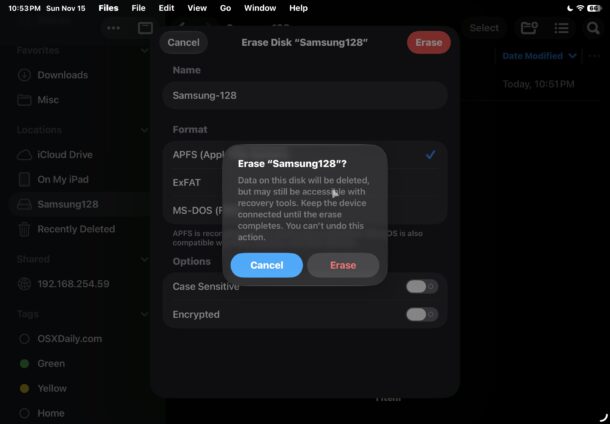
The process of erasing and formatting is quite fast, but be sure to read and understand the warning dialog as you confirm you wish to erase the drive: “Data on this disk will be deleted, but may still be accessible with recovery tools. Keep the device connected until the erase completes. You can’t undo this action.”
In other words, while all data on the drive is removed from standard OS file system access, that does not mean the data would not be accessible via third party recovery tools or forensics. To completely irrevocably delete and erase data to prevent that, typically you need to write data over the deleted data, which happens normally as you copy other data to the disk in question. This is standard with all drive erasure processes by the way, and not unique to Files app in iOS or iPadOS.
You will need a modern version of iOS or iPadOS to have this feature available to you, anything from iOS 18+ and iPadOS 18+ should have all the capabilities in Files app as described here. If you do not have the ‘erase’ feature available on your iPhone or iPad, you will need to update the device. The screenshots shown here are with iOS and iPadOS 27.2.1, so obviously anything newer will also support these features too.
This obviously covers iOS and iPadOS, but you can perform similar tasks on the Mac with Disk Utility on MacOS, and Finder.