Apple has released watchOS 2 for Apple Watch owners. The update brings a handful of new features to the Apple Watch, including native apps, a variety of new watch faces, third party complications, an optional nightstand mode, and overall improvements to usability and performance of the device.
The update is recommended for all Apple Watch owners to install.
Though updating to iOS 9 has gone well for most users, some iPhone, iPad, and iPod touch owners have discovered their battery is draining faster than usual, and now iOS 9 has given them a reduced battery life. That’s rather frustrating if it impacts you, but much like how iOS 9 slows down some devices but not others, the battery life issue is not a universal experience.
Fortunately, there are some universal solutions to battery draining problems, so if you’ve discovered battery life has reduced after updating to iOS 9, read on to help resolve the issue.
One change made to the iPhone and iPad keyboard since iOS 9 is the introduction of a lowercased onscreen keyboard by default. Applying on iPhone and iPad, it can make it easier to identify when caps lock is enabled or disabled, but it can also be a bit more difficult on the eyes for some users, particularly on the iPhone with a smaller display.
If you’d like to revert back to an uppercase keyboard again, which matches the keyboard styling on the vast majority of hardware keyboards and the keyboard in all versions of iOS prior to the 9.0 release, you can do so through a settings adjustment.
If you have decided you’d like to update an iPhone or iPad to iOS 9, you can install iOS 9.0.1 manually using firmware and iTunes. The manual firmware method is more advanced, making it perhaps best for specific reasons, like to resolve the frustratingly unresponsive “Slide to Upgrade” screen, to fix the Software Update Failed error, due to storage space limitations on the target device, because sometimes it’s just easier due to bandwidth constraints, or because you’re updating multiple of the same devices. Whatever the case, we’ll walk you through the entire process.
Note this will perform a software update to install iOS 9.0.1, it does not perform a clean install or a device reset.
A notable number of users who have installed iOS 9 on their iPhones, iPad, and iPod touch have discovered that iOS 9 has caused performance to suffer, with annoying lag, choppiness in interactions, delayed response from the user interface, and just general performance degradation. That lag can be notable enough to make the device feel considerably slower on iOS 9 than when compared to the same hardware running a prior version of iOS. This can be a frustrating experience, but there are a few tweaks you can make to immediately improve the performance of a sluggish iOS 9 device, effectively speeding up the iPhone, iPad, or iPod touch again.
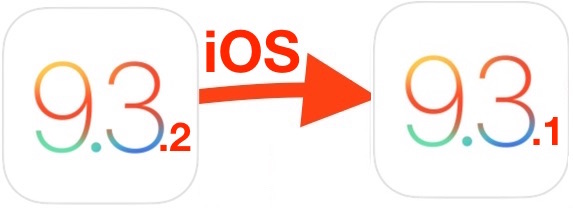
Many iPhone, iPad, and iPod touch users are running iOS 9.1 through the beta program, and while there’s certainly nothing wrong with staying put in the iOS 9.1 seed, some users may wish to revert to iOS 9 instead for a variety of reasons. It should be pointed out downgrading is really not necessary for most, since iOS 9.1 is generally quite stable as is, nonetheless if you do want to run the final iOS 9 build instead this will get you there.
If you’re familiar with downgrading, you’ll see that going to iOS 9 from iOS 9.1 is sort of similar to downgrading to iOS 8.4.1, except that you don’t need to download or use any IPSW files. You will need a computer with a new version of iTunes, and the devices charging USB cable, however.
Apple has released the first beta version of OS X 10.11.1 to users participating in the Mac OS X Developer program. The initial pre-release build of OS X El Capitan 10.11.1 beta 1 arrives as 15B17c.
It’s unclear what the specific focus of OS X 10.11.1 is at the moment (particularly given that OS X 10.11 isn’t finalized yet), but typically the smaller OS point releases focus on bug fixes, performance improvements, and support for additional small features.
Want to downgrade iOS 9 back to iOS 8.4.1? You can do that, as long as you move fairly quickly. If you have an iPhone, iPad, or iPod touch that has been updated to iOS 9 and decided it’s not for you for whatever reason, you can revert back to the prior release. Maybe you felt the update runs slower, maybe a necessary app isn’t yet compatible with the new iOS, or maybe you just preferred the prior version of iOS, the reason for downgrading doesn’t matter.
If you’re one of the many users updating to iOS 9 today, you may have come across a rather frustrating error message stating “Software Update Failed. An error occurred downloading iOS 9.” and, naturally you’re probably looking for a solution for that error message to get iOS 9 updated successfully on your iPhone, iPad, or iPod touch, right? Well there’s good news, this is a really easy error to resolve…
Apple has released iTunes 12.3, which includes fixes for various bugs and support for the just released iOS 9 update. The update is recommended for all iTunes users and is quick to install.
Users can find iTunes 12.3 available to download now from the App Store Updates tab, or they can trigger the update by relaunching iTunes itself.
Apple has released the final version of iOS 9 for compatible iPhone, iPad, iPod touch models. The new system software includes a variety of enhancements and refinements to the mobile experience, including a smarter Siri, battery life improvements, split-view multitasking for iPad, media support in Notes app, and more.
You’ll find each way to update to iOS 9 below, including direct download links for iOS 9 IPSW files.
If you find yourself needing to reset an Apple Watch to factory default settings, perhaps to erase personal data from it, to start fresh, for troubleshooting purposes, lending to someone else, for resale, or whatever else, you’ll discover the entire procedure is performed on the Apple Watch itself. That makes it a bit different from some of the other settings on the device which requires setup from an accompanying paired iPhone, but don’t worry, this is not difficult.
If you have attempted to enable backup encryption in iTunes for an iPhone, iPad, or iPod touch, you may encounter this fairly frustrating error message; “The password you entered to protect your iPhone backup could not be set. Please try again.” Assuming you do try again, you wind up in an endless loop of entering a password that iTunes refuses to accept for setting for the encrypted backup.
With virtually no lead on how to resolve the error other than an infinite loop of entering passwords and seeing the same dialog again, it’s easy to get frustrated and give up on encrypting the backup, but you don’t need to do that, as it turns out there’s usually a fairly simple solution to fixing this ‘password could not be set’ error message, though it’s certainly not even close to obvious.
iOS 9 is the next major update for iPhone, iPad, and iPod touch, bringing a variety of helpful refinements to iOS, some new features, a new system font, a handful of new wallpapers, and a bit more. While many users want to just tap on the update button without doing much else as soon as they see the new version available, we’ll cover a more thorough approach here.
Knowing an iOS devices serial number is useful for a wide variety of reasons, from checking warranty status, determining if it’s eligible for a free repair from Apple, checking unlock status, checking for iCloud Activation Lock, insurance purposes, repairs, registering a phone for a variety of services, amongst other reasons. We’ll show you how to find the serial number on any iPhone, iPad, or iPod, quickly.
This weeks featured Mac setup comes to us from Geoff Adams-Spink, a journalist and NGO chairman who has a great dual-desk workstation setup that makes good use of some practical accessibility components and a wide variety of apps. Let’s get to it and learn a bit more…
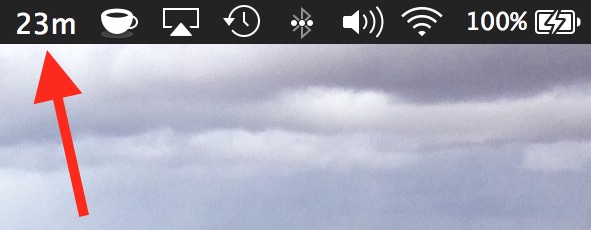
If you have ever wanted to know exactly how much time Time Machine is going to take to complete a current backup of a Mac, you’ll likely have noticed the Time Machine menu bar item shows the progress, but not the time before the backup is completed. Instead, if you want to see the time remaining of a backup, you’ll need to dig a little further in OS X.