You’ll soon be able to run Linux on a select few iOS devices via a jailbreak hack. The port is being worked on by German iOS developer Patrick Wildt, and while it’s not entirely clear when Linux for iOS will be released, he is expected to unveil it publicly at MyGreatFest, a jailbreaking convention that is being held on September 17th.
Supported hardware is said to include the original iPad, iPhone 4, and iPod touch 4th generation, but the iPad 2 with it’s A5 CPU is currently left out due to complications with the hardware.
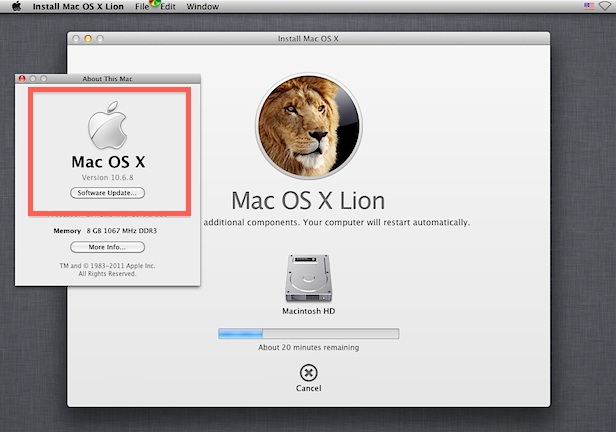
An upcoming release of Mac OS X 10.6.9 may bring iCloud support to Mac users who haven’t made the jump to Lion and remain on Snow Leopard, at least that’s what a screen shot provided to MacRumors suggests. Sent in by a developer, the screenshot of the .Mac/MobileMe preference pane includes the text:
“iCloud requires a computer running Mac OS X Snow Leopard v10.6.9 or later for Contacts, Calendars, and Bookmarks.”
The extent of iCloud support in Mac OS X 10.6 remains to be seen, but from the latter part of that text it suggests it will be limited to basic syncing relevant to iOS devices rather than the full iCloud feature set.
iCloud is expected to be released this fall alongside iOS 5, and the pricing plans range from a free 5GB package to $100 a year for 55GB of cloud storage.
Mac OS X Lion has changed how several helpful troubleshooting tools function, one being the reset password tool, and another is how Apple Hardware Test (AHT) mode works. Gone is AHT’s independent boot mode in favor of an internet based version that is dependent on Lion’s Internet Recovery instead. If you always have access to the internet, this isn’t a big deal, but if you can’t get online that’s not particularly useful.
There’s a solution, for some Macs at least, and that is to copy the old Apple Hardware Test utility over to the Mac OS X Lion boot drive, which enables you to boot up from AHT by holding down the “D” key as usual. The catch? You’ll need a pre-Lion Mac that came with the Mac OS X Installation and Application install disks, yes, the DVD, from 10.6 or otherwise. This obviously rules out some of the newest Macs like the 2011 MacBook Air and Mac Mini from restoring onboard AHT, but it will work to restore the functionality to Macs that did ship with OS X install and app restore disks. Read more »
Here’s a 15″ MacBook Pro connected to an external display, and of course an iPad and iPhone complete the setup. MacBook Pro’s with external displays always make a great desktop workstation, the best part of course is that you can disconnect from the external screen and be fully mobile.
The iPad stand looks like the elago P2 Stand, which makes an iPad look like a miniature iMac.
These are all effective methods, but what if you want to easily manage OS X Lion’s Resume feature on a per application basis from a GUI? Resuminator does just that. It’s an easy to use and free app for Mac OS X 10.7 that lets you individually select applications and whether or not they will use Resume. Want it enabled for Chrome but not Safari? No problem.
The app is extremely simple. Select an app, and uncheck the box next to “Should Resume” if you don’t want that app to Resume it’s windows and states. The “Global Resume” checkbox turns control back over to the general System Preference that disables the feature.
Resuminator was created by Mac developer and occasional TUAW contributor Erica Sadun. It likely just serves as a GUI front end to the aforementioned defaults write commands, but it’s in a much easier to use format.
Mac OS X and iTunes has been slowly going the way of minimalism with subdued grey interface elements and icons, some people like the change and others don’t. We just showed you how to get color icons back in the OS X Lion Finder sidebars, and in the comments, Prescott Perez-Fox posted a resource file that works to bring the color sidebar icons back to the latest version of iTunes in Mac OS X Lion too. Here’s how to use that file.
Bringing Back Color iTunes Icons to OS X Lion
The best thing about this tip is that it doesn’t require SIMBL or any additional installations, making it very simple. This has been verified to work with the latest version of iTunes 10.4.1 in Mac OS X Lion 10.7.1.
First things first, you need to download a new color iTunes icons resource file and rename it:
Unzip this file and rename it to iTunes.rsrc, place it somewhere easy to find like the Desktop
Now that you have that ready to go, you can proceed with the actual resource file change:
Hit Command+Shift+G and enter the following path:
/Applications/iTunes.app/Contents/Resources/
Locate the file “iTunes.rsrc” and rename it to “iTunes-backup.rsrc” – you will need to authenticate renaming the file, and this is important because you want to be able to revert the changes
Now drag the newly downloaded version of iTunes.rsrc into the open /Resources/ folder – you will again need to authenticate
Relaunch iTunes and enjoy your new color icons again
A big thanks to Prescott for pointing this out in the comments.
Motion FX is a very cool real-time video effects tool that uses your Macs built-in camera to detect movement and render a slew of special effects ranging from fire to smoke and any variation of colors or distortion in between.
Using the apps Motion Detect or Effect Paint mode, you can literally paint with fire (or a psychedelic blend of colors) by using your hands or mouse, and create some really wild looking videos. Motion FX also utilizes OS X Lion’s facial recognition tools, so you can set any of the 80 different preset special effect modes to your head and face as well. It’s a bunch of fun and well worth playing around with.
The best part about Motion FX? It’s completely free on the Mac App Store:
Safari in OS X allows you to have greater control over cookie settings as stored in the Mac web browser. There are now options to block all cookies, allow all cookies, or to selectively block third party and advertiser tracking cookies. Each of these choices are easily set or changed within Safaris’ preferences, and if you want to adjust the cookie blocking setting yourself in Safari on the Mac, here is exactly how to do that: Read more »
You may have noticed that when you log out or reboot Mac OS X, you get a dialog window with a checkbox next to “Reopen windows when logging back in” that restores all of your currently open applications and windows.
If you don’t like it and you’re tired of unchecking the box to no longer reopen the windows, you can use a third party script to render the feature useless. To clarify, what this does is disable the feature completely on a constant basis, regardless of whether that checkbox to preserve windows is checked or not, the windows will not restore.
Tim Cook reportedly sent out the following email to all Apple employees today, a day after Steve Jobs resigned from the CEO position.
Team:
I am looking forward to the amazing opportunity of serving as CEO of the most innovative company in the world. Joining Apple was the best decision I’ve ever made and it’s been the privilege of a lifetime to work for Apple and Steve for over 13 years. I share Steve’s optimism for Apple’s bright future.
Steve has been an incredible leader and mentor to me, as well as to the entire executive team and our amazing employees. We are really looking forward to Steve’s ongoing guidance and inspiration as our Chairman.
I want you to be confident that Apple is not going to change. I cherish and celebrate Apple’s unique principles and values. Steve built a company and culture that is unlike any other in the world and we are going to stay true to that—it is in our DNA. We are going to continue to make the best products in the world that delight our customers and make our employees incredibly proud of what they do.
I love Apple and I am looking forward to diving into my new role. All of the incredible support from the Board, the executive team and many of you has been inspiring. I am confident our best years lie ahead of us and that together we will continue to make Apple the magical place that it is.
Tim
Great letter that should reassure and rally the troops. The web is littered with commentary and speculation on the topic of Apple today, but out of all the garbage, this was worth posting.
OS X Lion brought greyscale icons to the Mac OS X Finder window sidebar, but if you’d rather have some color back in your desktop window sidebars, you can get this done easily through a third party plugin.
If you’ve been following some of our other Lion tips, you may already have SIMBL installed, otherwise it’s a small download.
Move the ColorfulSidebar.bundle into the following SIMBL plugin folder:
~/Library/Application Support/SIMBL/Plugins/
Either login and logout of Mac OS X, or just kill the Finder through the Terminal to relaunch it:
killall Finder
One oddity about this solution is that you may need to kill the Finder again to bring the color icons back after a full system reboot, otherwise this works trouble free.
If you ever want to get the grey icons back, you just need to remove the ColorfulSidebar.bundle file from the SIMBL plugins folder and then relaunch the Finder again.
On a somewhat related note, you can also bring back the personal folders in your OS X Lion Finder window sidebars. Those icons will gain color again too.
Steve Jobs has resigned from his role as CEO of Apple, but he will stay on as Chairman of the Board. Tim Cook, the current COO, will become CEO effective immediately.
Steve Jobs provided the following resignation letter:
To the Apple Board of Directors and the Apple Community:
I have always said if there ever came a day when I could no longer meet my duties and expectations as Apple’s CEO, I would be the first to let you know. Unfortunately, that day has come.
I hereby resign as CEO of Apple. I would like to serve, if the Board sees fit, as Chairman of the Board, director and Apple employee.
As far as my successor goes, I strongly recommend that we execute our succession plan and name Tim Cook as CEO of Apple.
I believe Apple’s brightest and most innovative days are ahead of it. And I look forward to watching and contributing to its success in a new role.
I have made some of the best friends of my life at Apple, and I thank you all for the many years of being able to work alongside you.
One of several changes to newer versions of OS X is how resetting passwords is handled, previous versions of Mac OS X would have a password reset tool easily accessible from the Utilities menu but that isn’t available anymore, and for some added security you now must access a password reset tool through the command line in Recovery Mode. Don’t let the command line sound complicated though, because it’s really quite easy to use, and we’ll walk through the entire process for OS X Mavericks (10.9), Mountain Lion (10.8), and Lion (10.7).
We’re actually going to cover two tricks, and they will work with or without internet access, and do not rely on any third party tools. Read more »
The desktop in latter versions of Mac OS X has simplified the Finder window sidebars by showing just a few choices, with the emphasis on the ‘All My Files’ directory rather than individually pointing to your Pictures and Documents folders. If you prefer to see more options from the Finder and Desktop window sidebars, you can customize what is shown in that Finder window sidebar quite easily. Read more »
The very first Macs user manual is a fun look at the past, and despite being 27 years old, there are still some undeniably Apple aspects to the manuals imagery and text. The intro paragraph from the first page is classic:
“You’re about to learn a new way to use a computer. If this is your first experience with a computer, you’re starting at a great time. If you’ve used “traditional” computers, you’ll appreciate the Macintosh difference. No more guessing what the computer wants. No more memorizing long commands with names only a programmer could love. With Macintosh, you’re in charge.”
Keep in mind that the original Macintosh was the first mainstream computer to use a mouse and a graphical user interface.
Heads up to iOS devs out there, if you installed iOS 5 beta 6, you might find it useful to know that sixth beta is set to expire on September 29. At that point you’ll either need to have installed a newer beta, which will surely have been released by then, or downgrade iOS 5 back to 4.
For the rest of us this is worth noting because each time an iOS 5 beta expires, there’s a flurry of speculation from some individuals that Apple is causing iOS 5 beta devices to not work, but that is not the case, the beta is simply expiring.
On the other hand, some have taken this date to indicate some sort of iOS 5 release day, since the date is within the “Fall 2011” timeline set by Apple, but it’s pretty unlikely that Apple would leave any meaningful dates openly available in their releases. Popular opinion at this point seems to be that iOS 5 will be released alongside iPhone 5 in October, with the possibility of pre-orders coming in late September.
The expiration date was found last week by ih8snow on Twitter
AT&T, Verizon, and Sprint will all sell the iPhone 5, according to a new report from the Wall Street Journal. Todays WSJ’s report continues to specify a “mid-October” release date for the iPhone 5 on all carriers, which is contrary to the Reuters exclusive from earlier today which said late September.
Adding Sprint to the mix means that, if the T-Mobile & AT&T merger goes through, every major cellular carrier in the USA will offer the iPhone on their networks. Sprint is a CDMA network much like Verizon, and is the 3rd largest cell provider in the United States.
AirDrop is a great local peer-to-peer file sharing feature in Mac OS X Lion that is surprisingly useful. That said, the ‘pop’ or drop sound effect that you hear when someone AirDrops you a file has always annoyed me because it’s the same sound effect you hear when you get a new iChat message. Like many other things in OS X Lion, it’s easy to customize with some minor tweaking.
Before changing the sound effect you’ll need to get a new sound to replace it, so find a sound you want to use, but:
Export the sound effect and name it “Invitation.aiff” and place it somewhere like the OS X Desktop for easy access.
The shorter the sound effect, the better
A short sound is recommended because you don’t want an entire song playing when someone AirDrops you a file, but it will if you don’t shorten a long audio file.
Once you have saved your new audio file:
Hit Command+Shift+G to bring up the “Go To Folder” window and enter the following path:
Locate the file named “Invitation.aiff” and rename it to “Invitation-backup.aiff” – you will need to authenticate the name change, this allows you to revert the change back to the default AirDrop sound
Drag and drop your own version of “Invitation.aiff” into the open /Resources/ folder, you will need to authenticate again
Now open the Terminal from /Applications/Utilities/ and type:
killall Finder
Have someone AirDrop you a new file and enjoy your new AirDrop sound effect
Anytime you want the default sound back, just delete your own Invitation.aiff and rename Invitation-backup.aiff back to Invitation.aiff, kill the Finder, and you’ll hear that familiar iChat pop sound again.


 Tim Cook reportedly sent out the following email to all Apple employees today, a day after


