How to Use Continuity Camera on Mac to Scan Documents or Take a Photo with iPhone or iPad
Continuity Camera is a great feature available in the latest versions of MacOS that allow a Mac to instantly use an iPhone or iPad for scanning documents or taking photos using that iOS devices camera. This allows you to use the high resolution camera of an iPhone or iPad directly from the Mac as a seamless part of your workflow, snapping the image right from an application or the Finder itself with an immediate import, without needing to use AirDrop or any other file transfer method to share the image from the iOS device to the Mac.
Continuity Camera system requirements: both the Mac and iOS device must be on the same wi-fi network and have Bluetooth enabled, both devices must be logged into the same Apple ID and iCloud account, and system software must be MacOS Mojave 10.14 or later on the Mac and iOS 12 or later on the iPhone or iPad. Aside from that, it’s just a matter of knowing where to access the feature and how to use Continuity Camera to get it working.
How to Use Continuity Camera on Mac with iPhone or iPad
Continuity Camera works in the Finder of the Mac, as well as new versions of Pages, Keynote, Numbers, Notes, Mail, Messages, and TextEdit. Using Continuity Camera is slightly different depending on how you access it on the Mac, but we’ll show you how it works in Mac apps as well as the Finder.
Using Continuity Camera in Mac Apps
Want to immediately snap a picture and import that photo into a Mac app? Maybe you want to scan a document quickly to insert that into the currently active file? You can do either with Continuity Camera, here’s how it works:
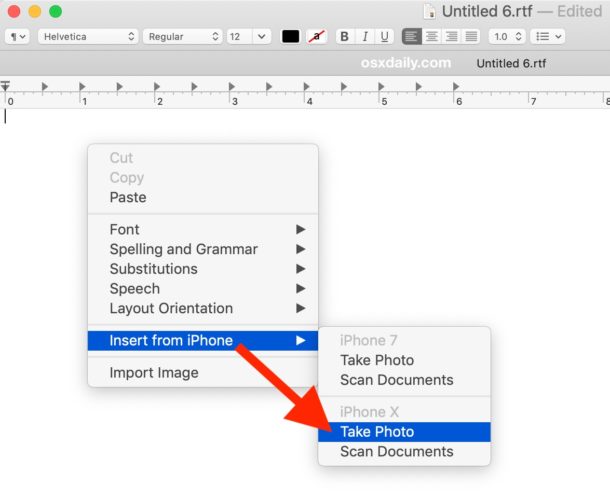
- Open a compatible app like TextEdit or Pages, then right-click (or Control+Click) within the open document
- Choose “Insert from iPhone or iPad” and then select ‘Take Photo’ or ‘Scan Documents’ from the pop-up menu, selecting the iOS device you want to use as the camera
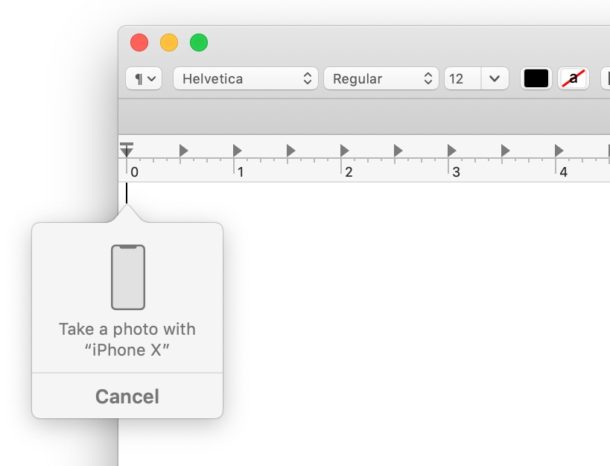
- Now picking up the iPhone or iPad, use the camera as usual and snap a photo or point it at a document
- Wait a moment and the photo or scan will appear instantly from the iPhone or iPad within the document on the Mac

Taking a photo uses the iPhone or iPad camera in regular photo mode, whereas scan document uses the iOS devices camera with software processing to serve as a quick point-and-shoot scanner.
Using Continuity Camera from Mac Finder
Want to snap a photo or scan a document quickly using an iPhone or iPad and have the file appear instantly on the Mac? Continuity Camera makes that easy:
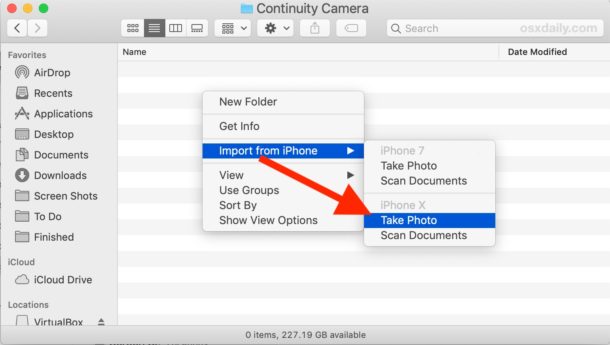
- From the Mac Desktop or within a folder, right-click (or Control+Click) anywhere and choose “Import from iPhone or iPad” and then select ‘Take Photo’ or “Scan Document” from the pop-up menu options
- Now pick up the iPhone or iPad and use the devices camera and scan the document
- The photo or document scan will appear within the Finder folder or Desktop in a moment
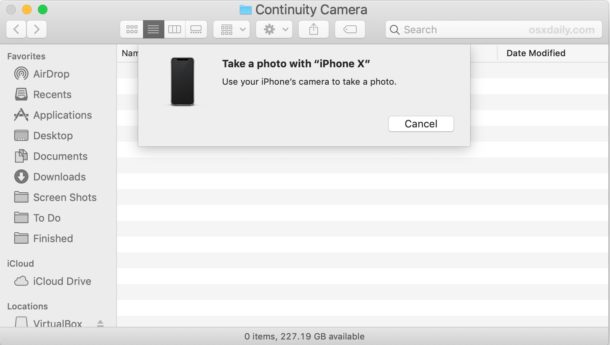
The screenshot examples here show Continuity Camera using an iPhone camera to snap a photo that appears instantly on the Mac, but the Scan Document feature works exactly the same, except it’s using the scan feature of iOS to process the image for optimal replication of a scanner. And though we’re using an iPhone here, you can use an iPad just the same way.
Continuity Camera Not Working in MacOS? Troubleshooting Tips
If you are experiencing problems with Continuity Camera not working, it’s usually fairly simple to troubleshoot. First, remember that Continuity Camera has a variety of system requirements that must be met before the feature works:
- The iPhone or iPad must be running iOS 12 or later
- The Mac must be running macOS 10.14 Mojave or later
- Both the Mac and iOS device must have Bluetooth enabled, and wi-fi turned on, while connected to the same network
- Both the Mac and iOS device must be logged into iCloud with the same Apple ID
- The devices must be in somewhat close proximity to one another
If all of those requirements are met and Continuity Camera is still not working, sometimes doing the following can resolve issues:
- Turn Bluetooth off and on again in iOS and on the Mac
- Turn wi-fi off and back on again in iOS and the Mac
- Restart the Mac
- Restart the iPhone or iPad
- Be sure the iPhone or iPad camera is not currently in use by another app
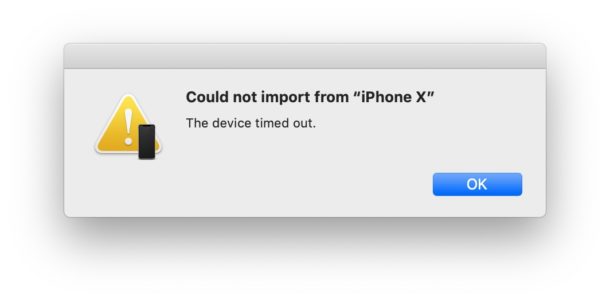
Usually those simple steps will resolve most issues with Continuity Camera when it’s not working, particularly if you get an error message on the Mac stating ‘Could not import from iPhone / iPad – The device timed out.”
Of course many people also regularly are using AirDrop to transfer photos and documents from iPhone to Mac (and vice versa), but Continuity Camera makes this a little more instant and seamless for a particular workflow when the iOS devices camera is needed for either scanning a document or snapping a picture.
Continuity Camera is just one of a variety of Continuity features available on the Mac, iPhone, and iPad, a set of features designed to make the Apple device ecosystem work in harmony with one another and allow for seamless transitioning of working from one device to another. Some of the other most helpful Continuity tricks include using Universal Clipboard to copy and paste between Mac, iPhone, and iPad , using HandOff to pass app sessions from iOS to Mac and vice versa, and making iPhone calls from the Mac.
If you have any tips, tricks, or experiences with Continuity Camera on the Mac using an iPhone or iPad, share with us in the comments below!

Great feature for scanning but I noticed that photos and drawings are rendered in much lower resolution than what my iPhone 13 Pro can capture directly. For example, an object photographed directly was 4032 x 3024 but the same object photographed with the Continuity Camera was 1920 x 1440. Respectable size but not full resolution. A sketch on the same iPhone rendered even smaller at 336 × 508. I hope Apple releases an update to allow users to adjust the size.
Feature stopped working probably after I upgraded to Big Sur 11.4. Now i only get the options in grey and can’t click on them. I erased the Bluetooth preferences file. I’ve checked all the recommendations same wifi, same account etc Please help.
iphone 6s with ios 12., macbook pro 2018 with os 10.4.3
This works for pages and finder;
but for TextEdit the 3 menu items for “Insert from iPhone” are grayed out.
TextEdit must be open in a Rich Text Format document to have access to the Continiuity Camera feature. If you are seeing the “Insert from iPhone” menu item grayed out that likely suggests the file type of that text file is Plain Text. You can either convert it to Rich Text, or create a new Rich Text Document.
Using Rich Text is necessary because you can not embed images in plain text documents. Hope that helps fix the issue with Continuity Camera for you! It’s a great Mac feature!
A really cute and useful tip.
HOWEVER all works well with my iPad Air 2, but I cannot get it to work with my iPhone XS Max!
Anyone else having a similar issue?
Many Thanks
I have the very same issue – works on my iPad Pro but absolutely refuses to on iPhone XS Max. And all the pre-requisites like same iCloud ID, Bluetooth, Wifi, 2 Factor Authentication are met (turned on, activated, same ID). Also all other continuity features like app handoff, copy paste works between iPhone and Mac, but its just Continuity cam that stubbornly refuses to. It’s now been escalated to Apple Senior support and am awaiting to hear back from them
Same here as @DM Zhu. Continuity Cam works on my 2018 MacMini using my iPadAir2, iPhone5S, and iPhone6Plus. Will not work with my iPhone XS Max.
** Just like DM Zhu – all pre-requisites are in place and all other continuity features work with the iPhone XS Max.
My daughter’s 2018 MacBook Air works fine with both her iPadAir2 and iPhone7Plus.
did you ever hear back from apple with a fix..?
All these continuity articles ignore the requirement that 2 factor authentication must be irrevocably turned on for the feature to work.
If Apple is forced to allow people to turn this feature off by a lawsuit then CC may be worth a try.
Not completely true. My mom hasn’t enabled 2-factor authentication and she does have all of the continuity features working on her iphone and ipad. She has no Mac so I don’t know if 2-factor authentication is required for continuity with a Mac, though I suspect not.
Thanks for alerting me to this handy application. Trying it with TextEdit the document has to be in RTF (Rich Text Format). Also, with TextEdit and Pages, after capturing the image I am given the option to use it or Use Photo or Retake.
You can access it from the desktop too by clicking the trackpad with two fingers to trigger the context menu.
That feature is a life saver. It also works on Safari allowing you to upload pictures.
And it also works right from the desktop, there’s actually no need to open any app as suggested in step 1 above. The pictures are saved on the desktop as jpg files and the scans as pdf.