How to Block & Unblock Email Addresses on Mail for Mac
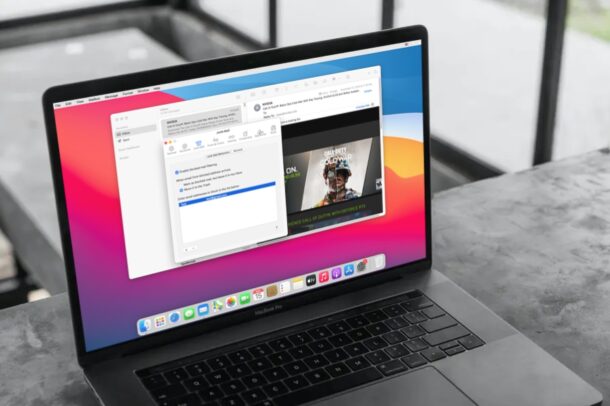
Do you use the Mac Mail app and you find yourself getting unwanted emails? Whether it’s spam, promotional emails, or just unwanted emails from a particular person, company, or group, you may want to block the sender’s email addresses to make sure you no longer see them in your mail inbox.
If you use Apple’s Mail app that comes pre-installed on macOS devices, you may already know that it’s well-integrated into the operating system. When you get emails, you also get notification badges that stick out in your Mac’s Dock. Blocking email addresses will not only prevent the blocked emails from showing up in your inbox, but it’ll ensure that you don’t get a notification badge when you receive emails from blocked senders too. Plus, you can also choose to automatically send these blocked emails to the trash if needed.
Can’t figure out how to do this on your Mac? We’re here to help. In this article, we’ll be guiding you through the necessary steps to block and unblock email addresses in the stock Mail app for macOS.
How to Block & Unblock Email Senders & Addresses in Mail for Mac
Blocking email addresses is actually pretty simple on a Mac. However, if the email address that you want to block is not in your Mac contacts, you’ll need to add it to your contacts first before you can add it to the blocked list. Now, without further ado, let’s get started.
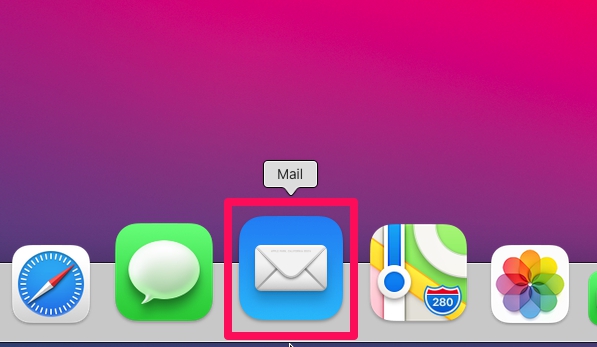
- Launch the stock Mail app on your Mac from the Dock.

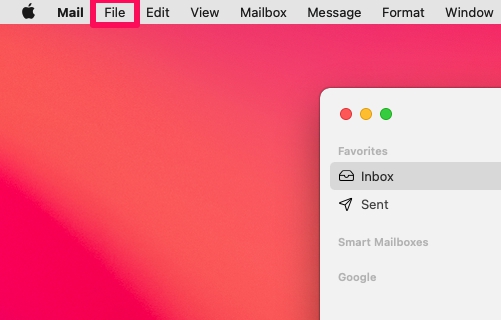
- Make sure Mail is the active window and then click on “Mail” from the menu bar. This will bring up a dropdown menu with more options.

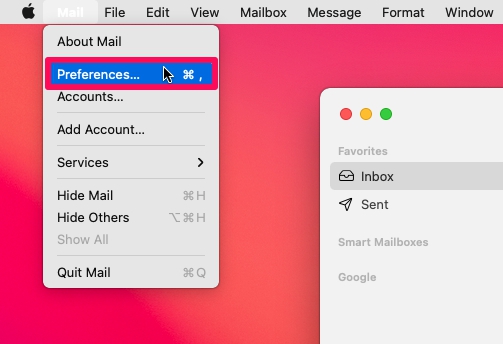
- Click on “Preferences” from the dropdown menu. This will open a new window on your screen.

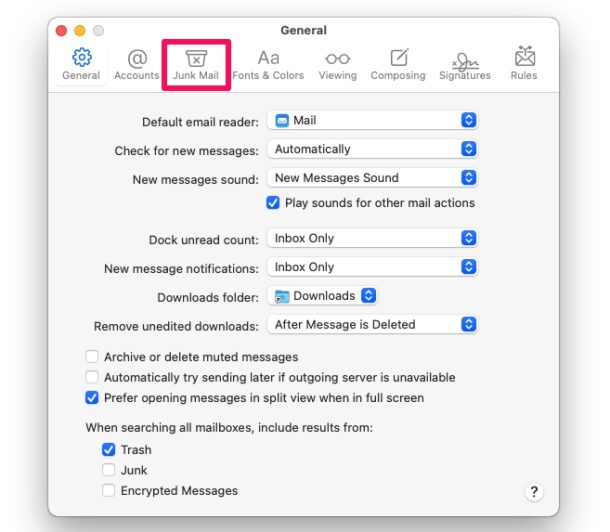
- You’ll be taken to the General settings for the Mail app. Click on “Junk Mail” from the top menu, as shown in the screenshot below.

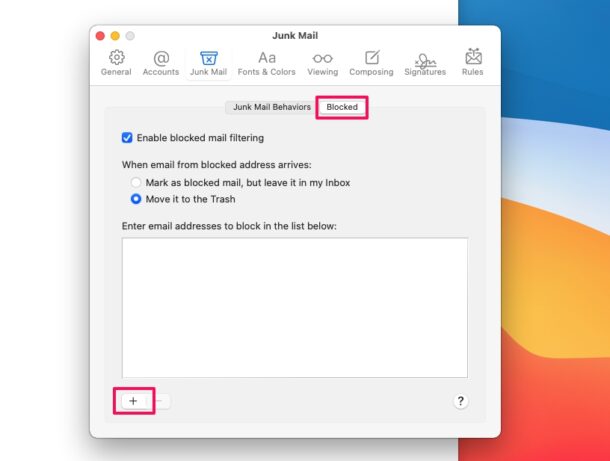
- Here, switch to the “Blocked” section and click on the “+” icon located below the blank area as shown in the screenshot below.

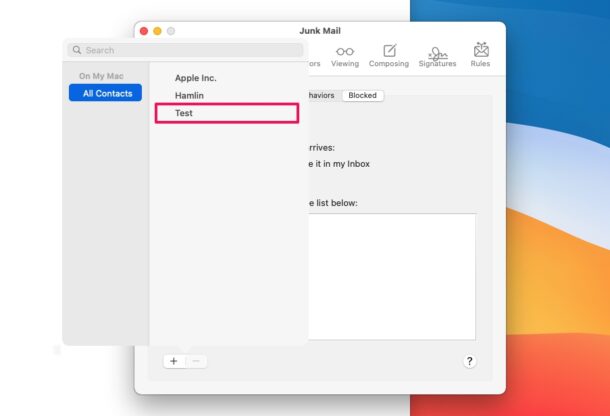
- This will bring up the contacts stored on your Mac. Click on the contact that you want to block and the email address that’s linked to the contact will be added to the blocked list.

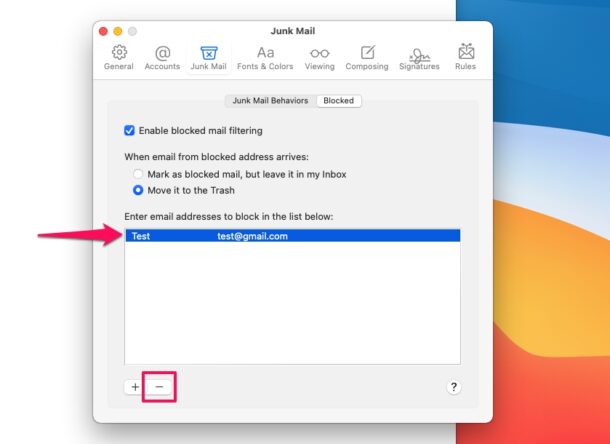
- To unblock any of the email addresses later on, select the contact from the blocked list and click on the “-” icon as indicated here.

Now you have learned how to block and unblock email addresses on your Mac. Like so much else in life, once you learn how to do something it’s not too complicated, right?
By default, the stock Mail app just marks the email as sent from a blocked user and leaves it in your inbox with the rest of the emails. However, if you don’t want to see these blocked emails, you can set your Mac to automatically trash emails from blocked senders. You can change this setting from the same menu where you manage your blocked list.
Once you do this, all the emails that you get from blocked senders will automatically be moved to the Junk mailbox rather than flooding your primary inbox. This allows you to sort and view all the blocked emails separately, if necessary.
Alternatively, you can right-click or Control-click on a sender’s email address after you’ve opened an email within the Mail app to access the Block option. This is obviously easier, but you will still need to access your blocked list if you ever want to unblock them.
Instead of blocking, you can mark an email as spam by moving it to the Junk folder on your Mac. Doing this will automatically move all future emails from the sender to the Junk folder. If you use an iPhone or iPad, you may also be interested in learning how to mark emails as spam on iOS and iPadOS devices.
We hope you were able to stop getting unwanted emails in your inbox by blocking the senders, whoever they may be. Share any of your thoughts, comments, or experiences in the comments below!


Fine if you have only a few numbers blocked: easy to find and unblock one number. But when one has, say, 300 blocked numbers, finding one to unblock is almost impossible. Why not allow a search for a number? Or a way to put the numbers by area code etc??
Could you address an issue regarding spam/mail?
We know that if we see the email headers or look at the html for emails to decide if they are legit or spam.
And we know that when we open an email, we can be notifying the sender we opened it.
Apple requires that we open the email to examine the HTML.
Ideas for how to be safer and still look at the headers/html?
Thanks for showing this. One might think it costs Apple money for each block as they made it so difficult.
I’d never seen this before. When I opened it up, it was prepopulated with the phones I have blocked. So I guess from now on if we block a phone it will block the email from that person as well.
Frankly blocking the phone requires I look up the process each time and is different on the iphone and mac. A block feature should require one click. I’d like Apple/Google/Microsoft to end reports to mail platforms showing each time an address is blocked. The mail platforms should delete these accounts.
That sequence of operations may work in MacOS versions newer than Mojave, but it’s a non-starter in Mojave and probably anything older. The term “blocked” does not appear in any dropdown menu in Mojave, wherein the word is “junk” mail. Is this ability to block incoming mail a new feature, or was it there all along, under a different name?
Mojave is a two generation old system software at this point, so it will not have all the features of modern macOS releases like Big Sur does. I still use Mojave on many of my Macs, but I don’t expect it to have the newest features. Big Sur has interesting features but a lot of quirks and incompatible with some of my apps.
If it works for you, may as well stick with it.
So it IS a new feature that is UNAVAILABLE in Mojave, correct?
Thanks for this article, as it clarified some things for me.
I think there is a minor mistake in the directions. In step 2 you said to click on the File menu, but in step 3 you used the Mail drop down menu. It’s minor because your pictures make it very clear what needs to be done.
You said to click on File menu but that is wrong. Even the screenshot where preferences is surrounded by a red rectangle shows that one has to click on the Mail menu.
I do not know what Mac OS you are using but with 10.14.6 aka Mojave, your instructions re blocking email when using the Mac Mail app makes no sense. First, “preferences” is not in the dropdown menu of file but in the dropdown of “mail”. And no windows, such as your portrayed regarding blocked messages, is an option within “junk mail”. I am using a new MacBook Air (MBA) with the above OS.
I can see as being of value if you know up front what you want to block. But I get emails from people or organizations that I wasn’t expecting. I don’t understand why Apple can’t have a simple “Block” button I can click rather than making me go through all of these hoops.
I have the same issue with Messages. I get occasional spam texts (which costs me money). To my knowledge (at least on my desktop computer), the only way to block someone I’m supposed to add them to my contacts and then block them. That’s absurd and will overpopulate my Contacts address book. Again, why can’t I just have a simple “block” button to take care of all of this? Why does Apple make me jump through convoluted hoops?
You can send feedback to Apple about this:
https://www.apple.com/feedback/