A Fantastic 1984 Macintosh Built from LEGO Blocks Doubles as iPad Stand
Jan 24, 2014 - Leave a Comment
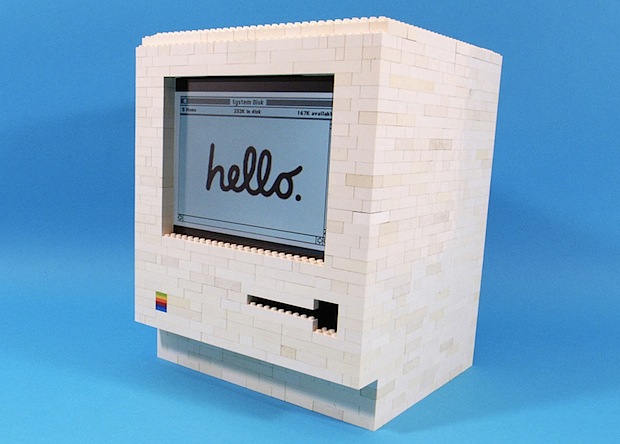
30 years ago today, Steve Jobs unveiled the very first Macintosh, and the rest, as they say, is history. If you’re looking for a unique way to celebrate the 30th anniversary of the beloved Mac, why not grab a pile of LEGO bricks and build your very own Macintosh 128k that happens to double as totally usable iPad holder and stand?
Read more »
By Paul Horowitz - Fun, Retro - Leave a Comment


 Voice turn by turn navigation and directions are incredibly convenient and easily one of the best features of Apple Maps, but rather than fumbling around with your iPhone while driving, you can rely entirely on Siri. This makes turn-by-turn almost entirely hands free; you give Siri a voice command to start the directions, and then you get the exact


 Many Mac users who come to the platform from the world of Windows have become accustomed to defragging their PC hard drives from time to time, and thus the inevitable question arrises: do you need to defragment a Macs hard drive? The answer is usually no, you don’t need to defrag a Mac as part of a