12 years of Steve Jobs… always wearing the quintessential black long sleeved shirt, jeans, and some sneakers.
I love how laid back this guy is, can you think of any other CEO of a comparably popular company dressing so casually? He’s definitely got a distinct wardrobe, even when he visits Apple Store openings.
By the way, for those wondering, the famous Steve Jobs turtleneck is apparently from Japanese designer Issey Miyake. So if you want to outfit yourself and your own wardrobe in a similar fashion, now you know where to start. Or just get a black turtleneck, it may not be as fancy but it could still do the trick.
You can now use a carrier unlock on iPhone 4, thanks to the latest ultrasn0w release from iPhone Dev Team. Installing the carrier unlock is easy, but you’ll need to jailbreak your iPhone before it works. Here are the requirements and steps to unlock the iPhone 4:
How to unlock iPhone 4
Unlocking the iPhone 4 from a carrier is pretty easy:
Navigate to “Edit” and tap on “Add” and enter the following URL repository: “repo666.ultrasn0w.com”
Now search Cydia for “ultrasn0w 1.0-1” and install the package
Once the ultrasn0w package is installed, restart iPhone 4 to complete the carrier unlock
Your iPhone 4 is now unlocked and untied to any specific carrier, the device will work on any GSM carrier around the world with the proper sim card.
Remember that the iPhone 4 uses micro sim format, you can manually trim down existing sim cards to fit into the iPhone 4’s micro sim bay but it’s a delicate process and will certainly require a fair amount of patience as well as an exacto knife or razor blade.
What baseband does the iPhone 4 unlock work with?
The ultrasn0w unlock works with iPhone 4 baseband 01.59 and also on iPhone 3G/3GS basebands 04.26.08, 05.11.07, 05.12.01 and 05.13.04.
What is iPhone baseband?
In case you are curious, iPhone baseband is basically the 3G cellular modem firmware. Hacking the baseband is what allows the unlocked iPhone to actually use the cellular portion of the phone to make and receive calls and data.
Using a carrier unlock and jailbreaking iPhone is not illegal thanks to a recent ruling by US officials, however using either hack will likely void your warranty with Apple. If you have a jailbroke and unlocked device, it’s best to unjailbreak it before you take it into Apple for any kind of warranty service or care.
The Mac firewall has long been based on IPFW, a robust and strong software firewall that comes form the unix world. But managing IPFW usually requires digging around in the command line, so as I was recently looking around for a Mac OS X GUI to IPFW, I came across WaterRoof.
If you’re looking for a nice powerful GUI frontend for Mac OS X’s built in firewall IPFW, look no further, WaterRoof is free and simple to use. Using WaterRoof you an easily add, build, and modify ipfw rules quickly and easily with OS X. The GUI is quite nice and easy to parse.
Starcraft 2 has been out for about a week now and since launch date my life has basically revolved around the game (I’m a nerd, I know). The game is an absolute blast and you should buy it if you like real time strategy games. Now all that said, it’s not without problems. Despite a lengthy beta testing period, there are still some pretty annoying bugs and crashes in SC2, particularly for Mac users who have NVidia hardware.
Here is the known problem list for the Starcraft 2 Mac client, and more importantly some potential fixes for the problems: Read more »
So you’ve decided that you want to reverse the jailbreak on your iPhone, no big deal. All jailbreaks are reversible, but what most users don’t know is that you can easily unjailbreak an iPhone by using the Restore functionality within iTunes, and then you can restore your apps, contacts, and iPhone customization to the device as well. This process is the same to undo a jailbreak on an iPhone, iPad, iPod touch, or even an Apple TV. We’re covering the iPhone here as an example, but it’s the same for all devices and all iOS versions.
If you’re troubleshooting a Mac machine with some particularly odd issues that routine measures don’t seem to be resolving, it can be helpful to list what kernel extensions are activated, particularly third party kexts loaded in OS X.
Determining what kernel extensions are loaded and running in Mac OS X is rather easy, and using grep you can then easily list all third party kexts. You can also use the same command to list native kernel extensions as well. To accomplish this, you’ll use the kextstat command and pipe the output to grep, using the command line. This works the same in all versions of Mac OS X.
If you have an older model iPhone 4 with an older iOS release, you can now use FaceTime video chat over 3G cell network, breaking you free from your WiFi shackles. There’s a catch though, it’s not free, and it requires jailbreaking.
JailbreakMe is an extremely easy method to jailbreak your iPhone or iPod running iPhone OS 3.1.2 or higher, yes this includes iOS 4 on an iPhone 3G, iPhone 3GS, iPhone 4, and iPod touch.
JailbreakMe is entirely browser based and probably the easiest method around to jailbreak any compatible iOS device, if you still aren’t convinced here are the steps:
How to easily Jailbreak an iPhone with JailbreakMe
First you should backup your iPhone with iTunes just in case something doesn’t work
At the JailbreakMe screen (like screenshot), run your finger on the ‘slide to jailbreak’ slider to start the jailbreak process
The jailbreak will now be downloaded to your iPhone and run itself, so don’t do anything and just let it run
Wait for the “Cydia has been added to your home screen.” pop up message, this tells you the jailbreak is complete
Reboot your iPhone by turning it on and off
Amazingly enough, that’s it. The JailbreakMe process requires no downloads or USB tethering to a computer, it is entirely contained within the Safari browser and works very well. This is quite impressive and without a doubt the most simple and easiest jailbreak around to date.
Remember, a jailbreak is not a carrier unlock. The iPhone 4 carrier unlock is expected to be released soon, so have patience if you’re looking to bring your iPhone over to another network. Read more »
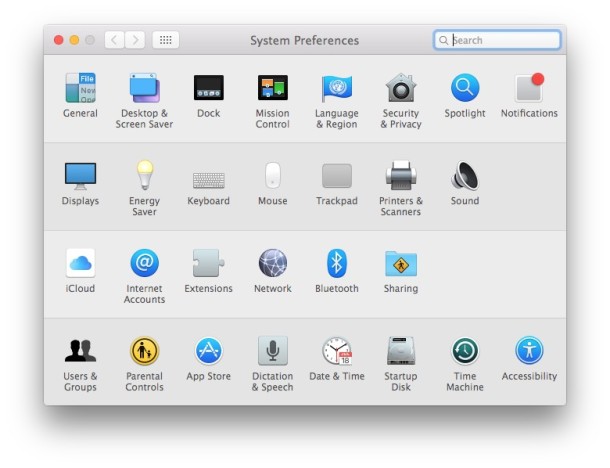
If you have added any third party system preference panels to the Mac, you can easily remove them if you no longer have a need for that system preference panel.
You can use any iPhone, iPhone 3G, or iPhone 3GS as a pay-as-you-go phone through AT&T’s GoPhone program. AT&T doesn’t officially support using GoPhone with iPhone but that doesn’t mean you can’t do it, and it’s actually much easier than you might expect. You will be able to make calls and use prepaid data, and the best part about this… it does NOT require a Jailbreak! Read more »
I use Synergy to share a single mouse and keyboard between multiple Mac’s and PC’s. Recently I added a new machine to the setup and was frustrated to discover that the Synergy client on the new machine just refused to connect to the server, without any attempts I would immediately get the following error message:
WARNING: failed to connect to server: Timed Out
Everything is configured properly in regards to settings on all clients and the server, so what’d I do to fix this error?
Change the host connect-to name from the hostname to the machines IP address, and instantly Synergy connected and everything worked as usual.
I don’t really know why the “Timed Out” message was appearing when it obviously wasn’t even attempting a connection, but nonetheless switching the client to connect to the host IP works fine. This occurred using Synergy clients and servers running 1.3.1. If you’re running into a time out error with Synergy, check your logs and try this fix out.
You can check your Synergyd error messages by opening the synergyd.log log file either manually in Console, Terminal, or through SynergyKM.
You know you’re an Apple addict when you start measuring time by the iPhone release cycles. I found this comic pretty funny, it looks like something out of a newspaper but I am unsure of it’s original source. Thanks to Daniel for sending this in!
Scrolling with momentum is a feature that is included with some MacBook Pro trackpads (and MacBooks thanks to a recent software update from Apple). The behavior is very much like the iPad or iPhone, when you are scrolling through anything you can give the trackpad a swipe and the speed of your gesture will determine the length of the scroll. I like this feature and keep it enabled on my MacBook Pro, but some people are bothered by it.
Apple is working on a “revolutionary” new Mac OS X 10.7 feature, according to a new job posting on Apple.com:
We are looking for a senior software engineer to help us create a revolutionary new feature in the very foundations of Mac OS X. We have something truly revolutionary and really exciting in progress and it is going to require your most creative and focused efforts ever.
The posting was originally discovered by AppleInsider and since then speculation has swarmed about what the feature is. Based on evidence within the posting itself and some other recent Apple news, it looks to be related to cloud computing.
Mac OS X 10.7 + Cloud Computing = Mac OS X Clouded Leopard?
The biggest hint in the job posting is the favoring of candidates who have experience developing with “internet technologies and services” and more tellingly “participated in or lead the architecture of large web scale systems” with HTTP protocol experience. This naturally leads to the assumption that Mac OS X 10.7 will indeed have Cloud features built into the foundation of the operating system. HTTP and XHTML5 are core elements in the Open Cloud Computing Interface (OCCI) spec and are integral parts in most existing cloud computing services and platforms. When you combine this knowledge with recent news that Apple is building a massive 500,000 square foot data center, there is little room left to wonder what Apple is up to.
Of course the question remains on how exactly cloud computing will be integrated with future versions of Mac OS X, iOS, and even iTunes, so let the speculation run wild! I’ll go first. Assuming this all pans out, the name Mac OS X 10.7 Clouded Leopard would certainly be fittingly appropriate and along the existing feline naming conventions as the first iteration of Mac OS X to directly integrate cloud computing features.
Here’s the entire job posting:
Are you looking to help create something totally new? Something that has never been done before and will truly amaze everyone? Are you excited by the prospect that what you helped create would be used every day by millions of Apple customers? Then come and work on with the Mac OS X software engineering team to help build a new and revolutionary feature for Mac OS X.
We are looking for a senior software engineer to help us create a revolutionary new feature in the very foundations of Mac OS X. We have something truly revolutionary and really exciting in progress and it is going to require your most creative and focused efforts ever.
An ideal candidate will have a degree in Computer Science (or equivalent), five years of professional experience developing C / C++ / Objective-C libraries or frameworks for use on end user systems, experience with developing for Internet technologies and services, and a passion for doing “really hard” things that have never been done before.
An exceptional candidate will also have up close and personal experience with the HTTP protocol as well as other protocols layered atop it, have participated in or lead the architecture of large web scale systems, have shipped multiple “platforms” for use by millions of users.
Additional Desired Skills and Experience:
– Mac OS X platform development experience
– Knowledge of Objective-C
– UNIX development experience
– BS in Computer Science or equivalent; 5+ years experience
You can see the job posting or even apply for it yourself at jobs.apple.com.
Excellent news for iPhone 3G owners who have been plagued by the iOS 4 update, an Apple spokeswoman told the Wall Street Journal that they are investigating various complaints about iOS 4 running slow on iPhone 3G.
Rumors continue to circulate that iOS 4.1 causes the iPhone 3G to run faster, but this has not shown true in our experience. If you are looking to retain the functionality of your iPhone 3G, we still recommend you do not upgrade to iOS 4 until Apple has worked out the kinks. While boasting some nice new features, the operating system update renders the 3G phone practically unusable at times, with immense slowdowns for everything from launching applications to just typing text messages and emails.
If you already installed the latest update, there’s a few tips to speed up iPhone 3G with iOS 4 but they are hardly a permanent solution and you’ll still have a slower OS than prior versions. Either an update from Apple is needed or any easy path to downgrade to 3.1.3, until then the 3G is really suffering.
Long ago in a time far far away, OK really it was just prior to Mac OS X, there used to be a Trash icon on the Desktop. Yup, earlier versions of Mac OS didn’t have a Dock at all, and the Trash was just another item on the desktop, sitting in the bottom right corner.
For the nostalgic, you can easily replicate this functionality by using the command line to create a symbolic link of the actual functioning Trash to a folder named Trash on your desktop. That may sound complex but it’s really not, you can do it with a single line entered into the Terminal application.
Starcraft 2 is out and it’s pretty much eating all my free time at the moment. I’m still in the process of tweaking my graphics settings for optimum performance, and the easiest way to benchmark Starcraft 2 performance on machines is to check the FPS (frames per second). Here’s how to do that on both a Mac and Windows SC2 install:
Check Starcraft 2 FPS on Mac
To check the frame rate on a Mac, while you are in a game hit: Control+Option+F
Show Starcraft 2 FPS on Windows
Checking FPS in Windows is basically the same key command, in SC2 hit: Control+Alt+F
On either operating system, once you hit the command to display frame rate, the FPS counter will show in the upper left corner and look like so:
If you’re wondering how well SC2 will run on your machine, check out the Starcraft 2 system requirements for Mac. Later I will post some preliminary findings on how well the game runs on a few different Mac setups.

 Unlocking the iPhone 4 from a carrier is pretty easy:

 So you’ve decided that you want to reverse the jailbreak on your iPhone, no big deal. All jailbreaks are reversible, but what most users don’t know is that you can easily unjailbreak an iPhone by using the Restore functionality within iTunes, and then you can restore your apps, contacts, and iPhone customization to the device as well. This process is the same to undo a jailbreak on an iPhone, iPad, iPod touch, or even an Apple TV. We’re covering the iPhone here as an example, but it’s the same for all devices and all iOS versions.
 If you have an older model iPhone 4 with an older iOS release, you can now use FaceTime video chat over 3G cell network, breaking you free from your WiFi shackles. There’s a catch though, it’s not free, and it requires jailbreaking.
 JailbreakMe is an extremely easy method to jailbreak your iPhone or iPod running iPhone OS 3.1.2 or higher, yes this includes iOS 4 on an iPhone 3G, iPhone 3GS, iPhone 4, and iPod touch.
 You can use any iPhone, iPhone 3G, or iPhone 3GS as a pay-as-you-go phone through AT&T’s GoPhone program. AT&T doesn’t officially support using GoPhone with iPhone but that doesn’t mean you can’t do it, and it’s actually much easier than you might expect. You will be able to make calls and use prepaid data, and the best part about this… it does NOT require a Jailbreak!
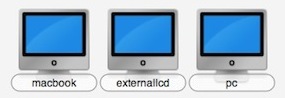


 Excellent news for iPhone 3G owners who have been plagued by the iOS 4 update, an Apple spokeswoman told the

