
How to Adjust Liquid Glass in MacOS 27 Golden Gate
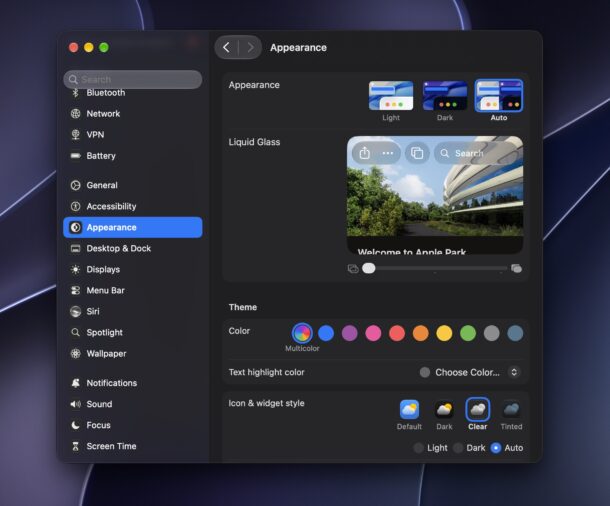
MacOS 27 Golden Gate brought with it a variety of tweaks and adjustments to the Liquid Glass interface that was first introduced in Tahoe, and overall it’s a much more refined experience with a cleaner visual aesthetic. And, new to the latest versions of MacOS from 27 onward, you can now adjust Liquid Glass to control how transparent or tinted the user interface is with granular control.
This new setting differs from Tahoe, where users just had the “Clear” or “Tinted” options to choose from, and combined with the other visual refinements to the user interface in MacOS 27 Golden Gate, Mac users should be able to find a look they’re happy with. If you’re already familiar with tweaking Liquid Glass on an iPhone or iPad, this will be familiar to you.
How to Adjust Liquid Glass in MacOS
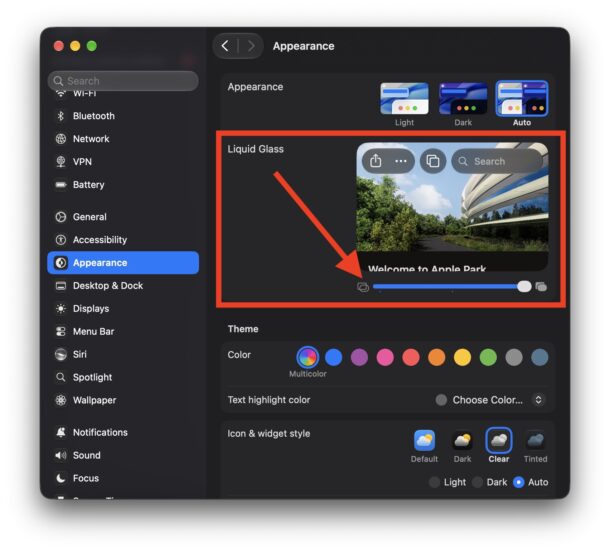
From MacOS 27 Golden Gate onward, here’s how you can change and adjust the intensity of Liquid Glass:
- From the Apple menu, choose ‘System Settings’
- Choose “Appearance”
- Locate the “Liquid Glass” section and adjust the slider as you like, all the way to the left is fully transparent Liquid Glass, whereas all the way to the right is an opaque tinted look, you can choose anywhere in between the extremes as well to completely customize the look
- The visual change is instantaneously applied throughout MacOS and you can see live feedback as you adjust, so if you aren’t happy with the look you can easily change it again
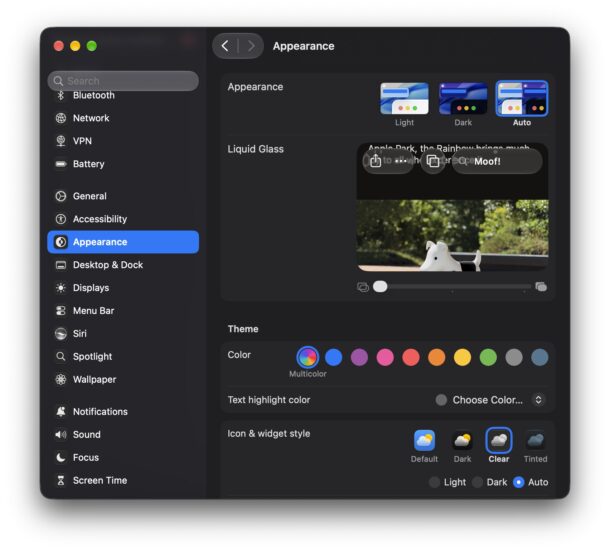
You don’t need to be all the way to the left or right, you can choose a middle ground or anywhere else on the slider as you like..
Your choice will be reflected everywhere in the MacOS interface, including windows, menus, drop-down, titlebars, Control Center, the Lock Screen clock, basically every part of the interface that
You can perform similar Liquid Glass adjustments on iPhone and iPad if you’d like to change the interface a bit on that side of things as well, where you fan also choose more transparent or opaque look.