Here’s another nice background picture, by request, it’s the blue sky star field wallpaper that was shown in a recent screenshot of Mission Control. This one isn’t part of a pack, but it does include the base PSD file so you can make your own variations of the blue night sky if you are up for it.
Another great reader submitted Mac setup here: this one is a decked out Mac Mini Server Quad i7 with 8GB RAM and dual 7200 RPM 500GB hard drives, connected to dual monitors, and to the right is an iPad 2 64GB model. Rounding out the desk is an iPod touch, iPod nano, MacBook Air superdrive, Beats Pro headphones, and an Apple wireless keyboard and trackpad.
Sweet Mac setup Jaime, thanks for sending this in! You can send in your own Apple setup shots to: osxdailycom@gmail.com
Below is a picture of all the Apple gears boxes too: Read more »
The first generation iPad got iOS 5, but it didn’t officially get multitasking gestures or display mirroring. Not a huge deal, because a user on ModMyi figured out how to enable these two features and has released a modified version of redsn0w so that it unlocks these abilities, without a jailbreak. It’s pretty easy to use, so if you want to enable these features here’s how to use the tool and make your first-gen iPad feel a bit more modern.
Warning: This is for iPad 1 only. The gestures and mirroring already exist on iPad 2 making this unnecessary. Backup your iPad beforehand just in case something goes wrong, and proceed at your own risk.
Download the modified version of redsn0w that carries the tweaked payload
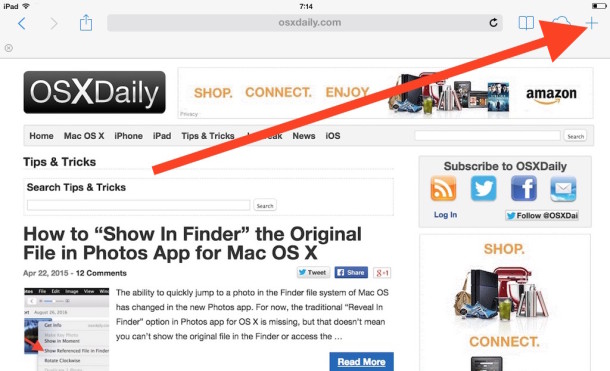
You can easily re-open closed web browser windows in Safari for iOS on the iPad. This works in all iPad models with iOS, and it’s really easy to do at any time in Safari browser on the device:
An official jailbreak for iPhone 4S and iPad 2 running iOS 5 is coming sooner than later, as evidenced by iPhone Dev Team member MuscleNerd posting several screenshots of the works in progress. In fact, they jailbreak has already been achieved, but there are unspecified “hurdles left” before the jailbreak will see a public release.
There are currently no time estimates, but typically these teaser screenshots and videos start to appear soon before a first beta jailbreak becomes available. The iPhone 4S and iPad 2 have been noticeably absent from the current iOS 5 jailbreak, both devices share much of the same internal hardware including the A5 CPU, and has posed a challenge to jail break. It’s unclear whether this will be a tethered or untethered jailbreak.
MuscleNerd also posted the following video to YouTube, showing the jailbreak off on an iPad 2 running iOS 5: Read more »
Private Eye is a free real-time network monitor app for Mac OS X that is extremely easy to use. Upon launching the app, you’ll start to see all open network connections by application and process, and you can then filter connections by app, monitor all open connections, or watch only incoming or outgoing transfer.
Connections are reported by application, the time of the connection, and arguably the most useful, the IP address that is being connected to by the app, making it easy to see socket and routing data, letting you know exactly what app is communicating with what server or IP address, for both local and broader internet networks.
If you have any interest in networking, privacy, security, or you just want to keep an eye on what apps are connecting to the internet and to where, you should download this app, but it’s also an amazingly useful tool for troubleshooting network problems and figuring out what is using the network.
We’ve covered a handful of tips to increase battery life in iOS 5 and even for the new iPhone 4S, but nonetheless the complaints about battery drain are still piling up. The culprit for the 4S is almost always Location Services, and all you need to do is disable a few things:
Tap on “Settings” and go to “Location Services”
Selectively disable Location Services for services you don’t use, like Reminders, before proceeding
Next, tap to “System Services” and switch the following to OFF:
Compass Calibration
Diagnostics & Usage
Setting Time Zone
Close out of Settings
The Reminders feature combined with Siri is great and obviously helpful, but it seems to constantly query the location of the iPhone, presumably to try and determine where the thing is and if a reminder should be triggered. Turn it off if you’re concerned about battery life.
The other part is ‘System Services’, which the items highlighted in the screenshot below seem to be the biggest offenders hat constantly ping location (with the exception of iAds, which took an unlucky spot). Many reports indicate that disabling just “Setting Time Zones” alone will save considerable battery life.
Pixelmator for Mac has long been a killer photo editing app. But I’ll cut straight to the point, Pixelmator is the single best Photoshop alternative for the Mac platform at it’s price point, and at just $29.99 (App Store link) it’s much more affordable for the average joe than Adobe Photoshops whopping $500 tag.
Apple is working on a real television set (iTV?) that utilize the artificial intelligence agent Siri as the controller, according to a new report from The New York Times. They go so far as to say prototypes are already underway, and that “it’s not a matter of if, it’s a matter of when“, suggesting that Apple may announce the product in 2012 with a release of the TV by 2013.
A Siri based remote control system is described as follows:
It’s the stuff of science fiction. You sit on your couch and rather than fumble with several remotes or use hand gestures, you simply talk: “Put on the last episode of Gossip Girl.” “Play the local news headlines.” “Play some Coldplay music videos.” Siri does the rest.
Of course this experience goes beyond just playing TV shows or the local news. As the line between television programming and Web content continues to erode, a Siri-powered television would become more necessary. You aren’t going to want to flip through file folders or baskets of content, checking off what you want. Telling Siri to “play videos of cute cats falling asleep” would return an endless YouTube stream of adorable napping fur balls.
The NY Times mentions they first heard of plans for an Apple television a year ago, and that the project has been in some stage of development since 2007 when the iPhone and first Apple TV box was released. Why the wait until 2013? Other than refining the intelligence of Siri, Apple has been waiting for large flat panel displays to become cheap enough to be reasonably priced for the consumer.
News and rumors of an Apple television set have exploded over the last week after comments made by the recent Steve Jobs to his biographer proclaimed that he had ‘cracked’ the TV, which the NYT says is a reference to using Siri AI as a replacement for the remote. This was soon followed up by reports that the creator of iTunes is leading the project.
Siri is currently only available to iPhone 4S users, but is widely expected to make appearances across the Apple lineup down the road, including in Mac OS X and the iPad.
Despite the relative ease of updating to iOS 5 through iTunes either directly or by IPSW, some users are still reporting problems.
In some cases this is user caused (error 3194 is easy to fix as is error 3200 & 3002), but if you’re continuing to have issues it could be related to a firewall or a handful of other causes.
For those cases, here’s another approach to manually update to iOS 5. Basically you just throw the downloaded IPSW file into the default IPSW location and have iTunes update without downloading, this seems to work for nearly everyone encountering problems.
Microsoft has put out this interesting concept video to demonstrate what they think the future of computing will be like. The iPad influence is clear, and in short, everything is a touch screen or tablet, complete with holograms and other things that look like they belong in a sci-fi movie. The best part? There’s none of that ugly ribbon UI either! Microsoft describes the video as follows:
Watch how future technology will help people make better use of their time, focus their attention, and strengthen relationships while getting things done at work, home, and on the go.
You have to hand it to Microsoft for thinking out of the box here. Presumably Windows 8 is the first step in this touch-everything direction of active tiles and an entirely new UI. You can get a preview of that now by installing Windows 8 in VMWare or VirtualBox right on your Mac, the developer preview is free while in beta although it’s fairly boring without a touch screen.
Looks great, but until they’re shipping real iPad competitors running an OS baked in Redmond, consider this as a purely theoretical part of the future.
Video and several screenshots are below: Read more »
Spaces are the the Virtual Desktop feature in OS X, and it’s part of the Mission Control window management system on the Mac. If you’ve opened a few desktop spaces that you no longer need access to, you can close them.
Perhaps the fastest way and most efficient means of closing a desktop space in Mission Control for Mac OS X is by using the option key. Here’s how it works: Read more »
Want to sleep in? You can quickly turn off all your alarms on the iPhone by telling Siri simply to “turn off all alarms“, Siri will then confirm the alarm change plus show you the alarm settings. Oversleeping due to Siri likely won’t be a valid excuse to get out of school or work for the day, so it’s best to save this one for the weekend.
More useful during the work week, you can also tell Siri to turn on all alarms and Siri will display the scheduled alarm times:
This little tip was sent in by Jeff S by way of FinerThingsIn, thanks for sending this in.
Fire up your DVR and get ready for some couch potato action next week, a documentary about Steve Jobs titled “One Last Thing” will air on PBS this November 2nd at 10:00 PM. The film is said to be an hour long, and will include interviews with Jobs himself, as well as his colleagues and friends. Here’s the official description:
ONE LAST THING takes an unflinching look at Jobs’s difficult, controlling disposition, and offers unique insights into what made him tick. While there has been near-universal agreement that Steve Jobs was a great innovator in business and technology, ONE LAST THING looks into why he was so great. What were the influences that shaped his character? What drove him from such humble beginnings to the heights of success?
Featuring interviews with, among others, Ronald Wayne, co-founder of Apple with Jobs and Steve Wozniak; Ross Perot, who invested in NeXT Computer when Jobs was running out of money; Walt Mossberg, principal technology columnist for The Wall Street Journal, who interviewed Jobs every year from 2003-2010; will.i.am, frontman and producer for The Black Eyed Peas, whose “I Gotta Feeling” currently ranks as the most downloaded iTunes song ever; Dean Hovey, designer of the original mouse for Apple; Robert Cringely, writer and host of the PBS series TRIUMPH OF THE NERDS: THE RISE OF ACCIDENTAL EMPIRES; Robert Palladino, calligraphy professor at Reed College, whose classes Jobs credited with inspiring his typography design for the Mac; and Bill Fernandez, who introduced Jobs and Wozniak in Sunnyvale, where the three hung out in his father’s garage and tinkered with electronics.
In a never-before-broadcast interview from 1994, Jobs expounds on his philosophy of life: “You tend to get told that the world is the way it is, but life can be much broader once you discover one simple fact; and that is that everything around you that you call life was made up by people no smarter than you … Once you learn that, you’ll never be the same again.”
In his many successful Apple product launches, Jobs developed his own catchphrase to tease his audiences. Appearing to reach the end of a presentation, he would then announce to the expectant crowd: “Oh — one more thing,” before unveiling his latest design achievement. This documentary exploration of the life of one of America’s most successful innovators and entrepreneurs pays homage to his famous presentational skills and his unique talents.
This is one of many shows to cover Steve Jobs in the wake of his passing. If you’re a fan of the subject matter, it’s hard to get enough of this stuff.
Want to tile a wallpaper on the Mac? A tiling wallpaper will repeat all over the desktop background, just like a tile is repeated in flooring or a wall. Well, you’re in luck because modern Mac OS X versions can do tile a wallpaper image, just like you could do way back in ancient Mac OS releases and all other versions too.
But how you tile a desktop image depends slightly on versions of system software, and on the size of the image itself.
Walter Isaacson was on Charlie Rose this week to discuss Steve Jobs and the writing of his biography. If you’re interested in Steve Jobs and his legacy, this is another great interview filled with interesting tidbits. It’s arguably better than the recent 60 Minutes segment and at nearly an hour long, touches on a fairly wide variety of topics related to Jobs.
The discussion between Isaacson and Rose also clarifies some of the soundbites that you’ve undoubtedly heard related to Mr Jobs cancer treatments, the reason the book was written, the naming of Apple, and what other industries that Steve would have likely disrupted had he survived another 7 years (including one I haven’t found mentioned online… yet).
This is the second recent Charlie Rose episode to cover Steve Jobs, the first being a discussion on Jobs with various Silicon Valley executives and friends just a few days after his passing.
The Mission Control “Spaces” feature in OS X is essentially a virtual desktop environment. A nice way to differentiate each individual desktop Space is to go about assigning different wallpapers to different desktop spaces.
Setting unique wallpaper backgrounds per desktop is easy in Mac OS X now, here’s the quickest way to do this:
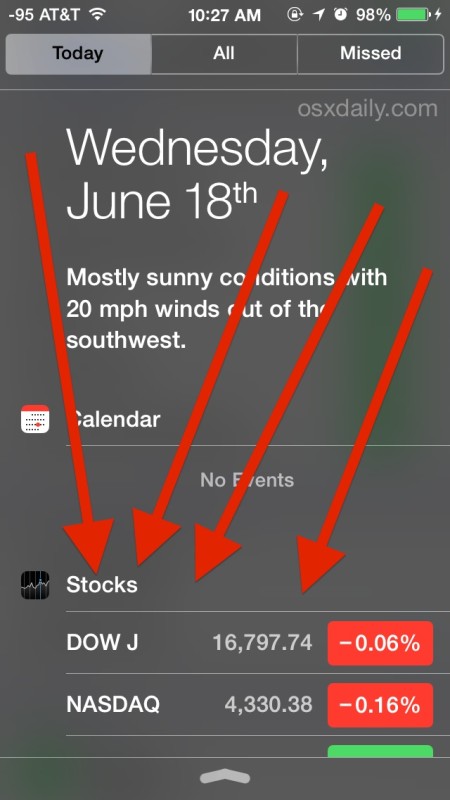
Don’t want to see the Stock Ticker and market details on the iOS Notification Center every time you swipe down to view it on your iPhone or iPad? Many users don’t, and this was one of the first questions a friend asked me after updating to iOS and discovering market details as a prominent feature of the Notifications panel. So if the stock market and movements don’t play any meaningful role in your daily life, here’s how to remove the stocks widget from all versions of iOS and clean up your notification panel a bit.


 The first generation iPad got